

Serial documents: one template with its own values
A form template can carry its own values, for example first name, salary or
start date. actaSIGN calls them Variables. Fields in the document,
subject, messages and file names are built from them, e.g.
“{{FirstName}} {{LastName}} – Salary review 2027”. When sending, the values
come from an Excel or CSV file with one row per person (see
Mass send), or you enter them for a single
request in a short form.
Create variables
Section titled “Create variables”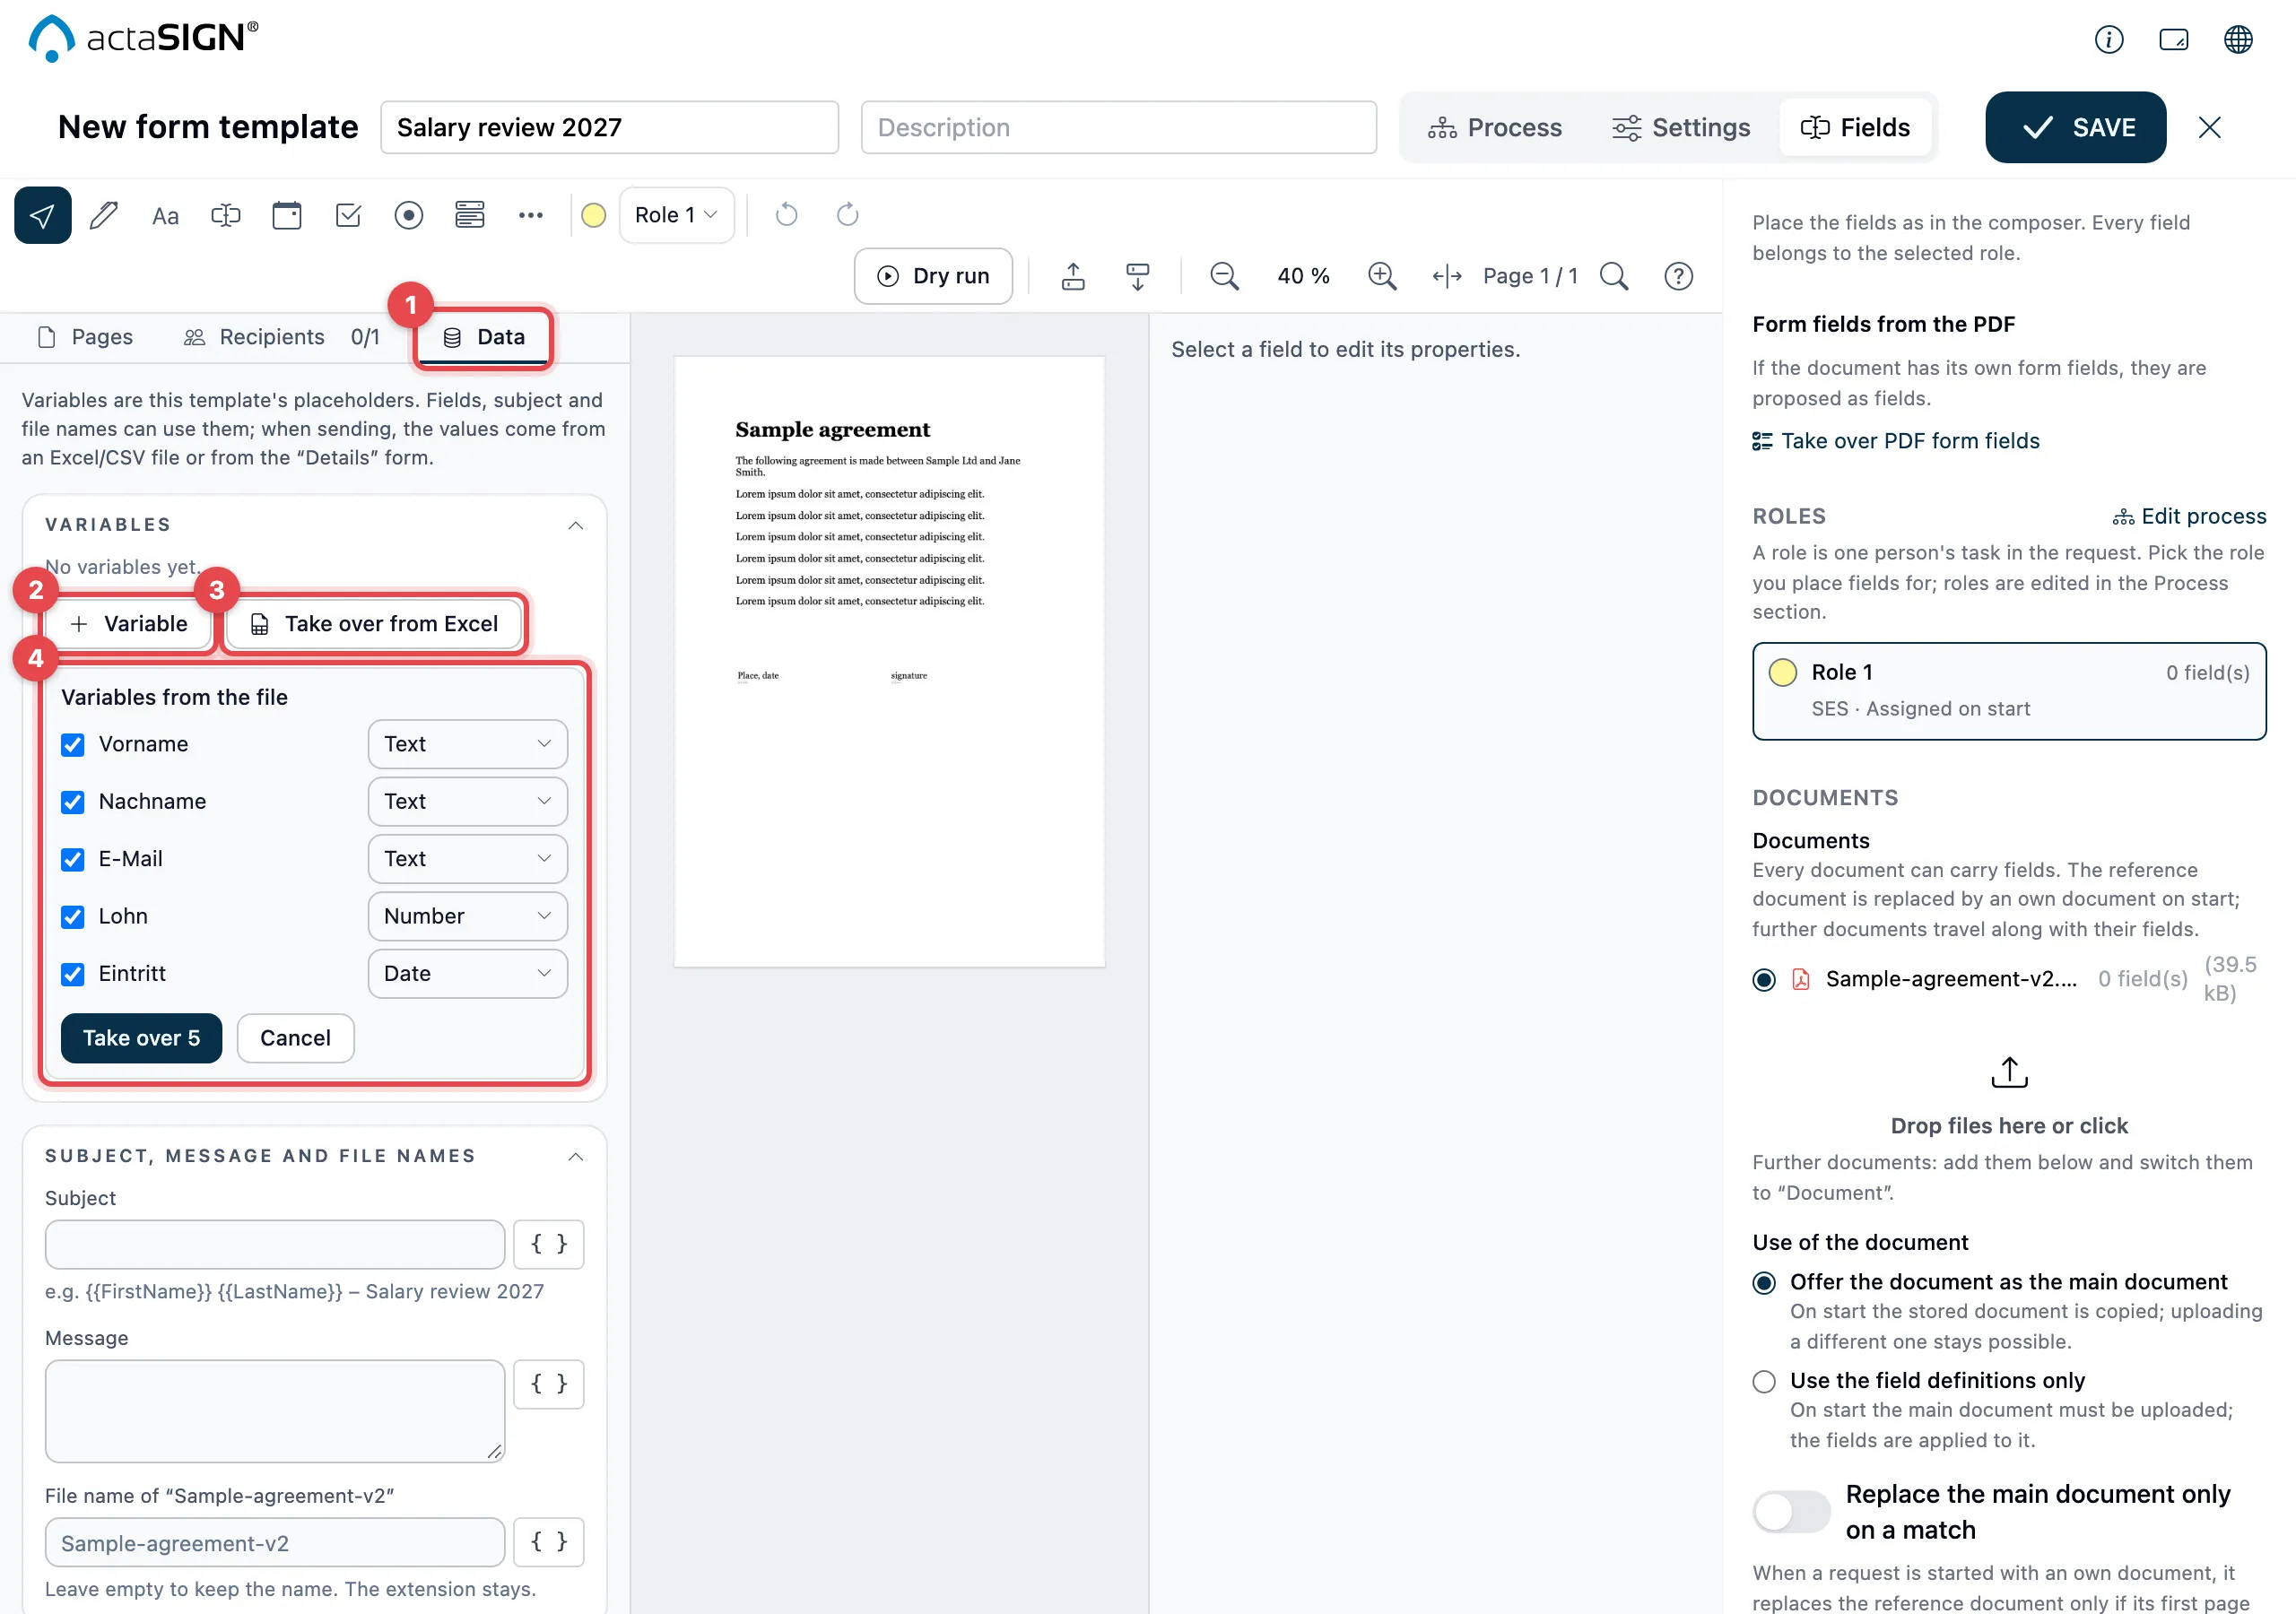
- In the sidebar on the left, open the Data tab.
- Variable: create a variable by hand. Enter Name and Type; actaSIGN proposes the Key from the name. With Sample value you see something in the preview as long as no file is loaded. Required value means: without this value, no request starts. Click Apply.
- Take over from Excel: choose an Excel or CSV file with a header row. actaSIGN proposes one variable per column and guesses the type.
- Under Variables from the file, untick what you do not need, adjust the type and take over the proposals.
| Type | Example |
|---|---|
| Text | First name, department |
| Number | Salary, invoice amount |
| Date | Start date |
| Yes/No | Part-time |
| Choice | Location from a fixed list (Choices, one value per line) |
| Address of the person who signs | |
| Mobile number | For the SMS code, with country code |
You see the same variables in the Process section under Workflow data. You can also create them there, and tasks can depend on them, see Task only when needed.
Fill fields from the values
Section titled “Fill fields from the values”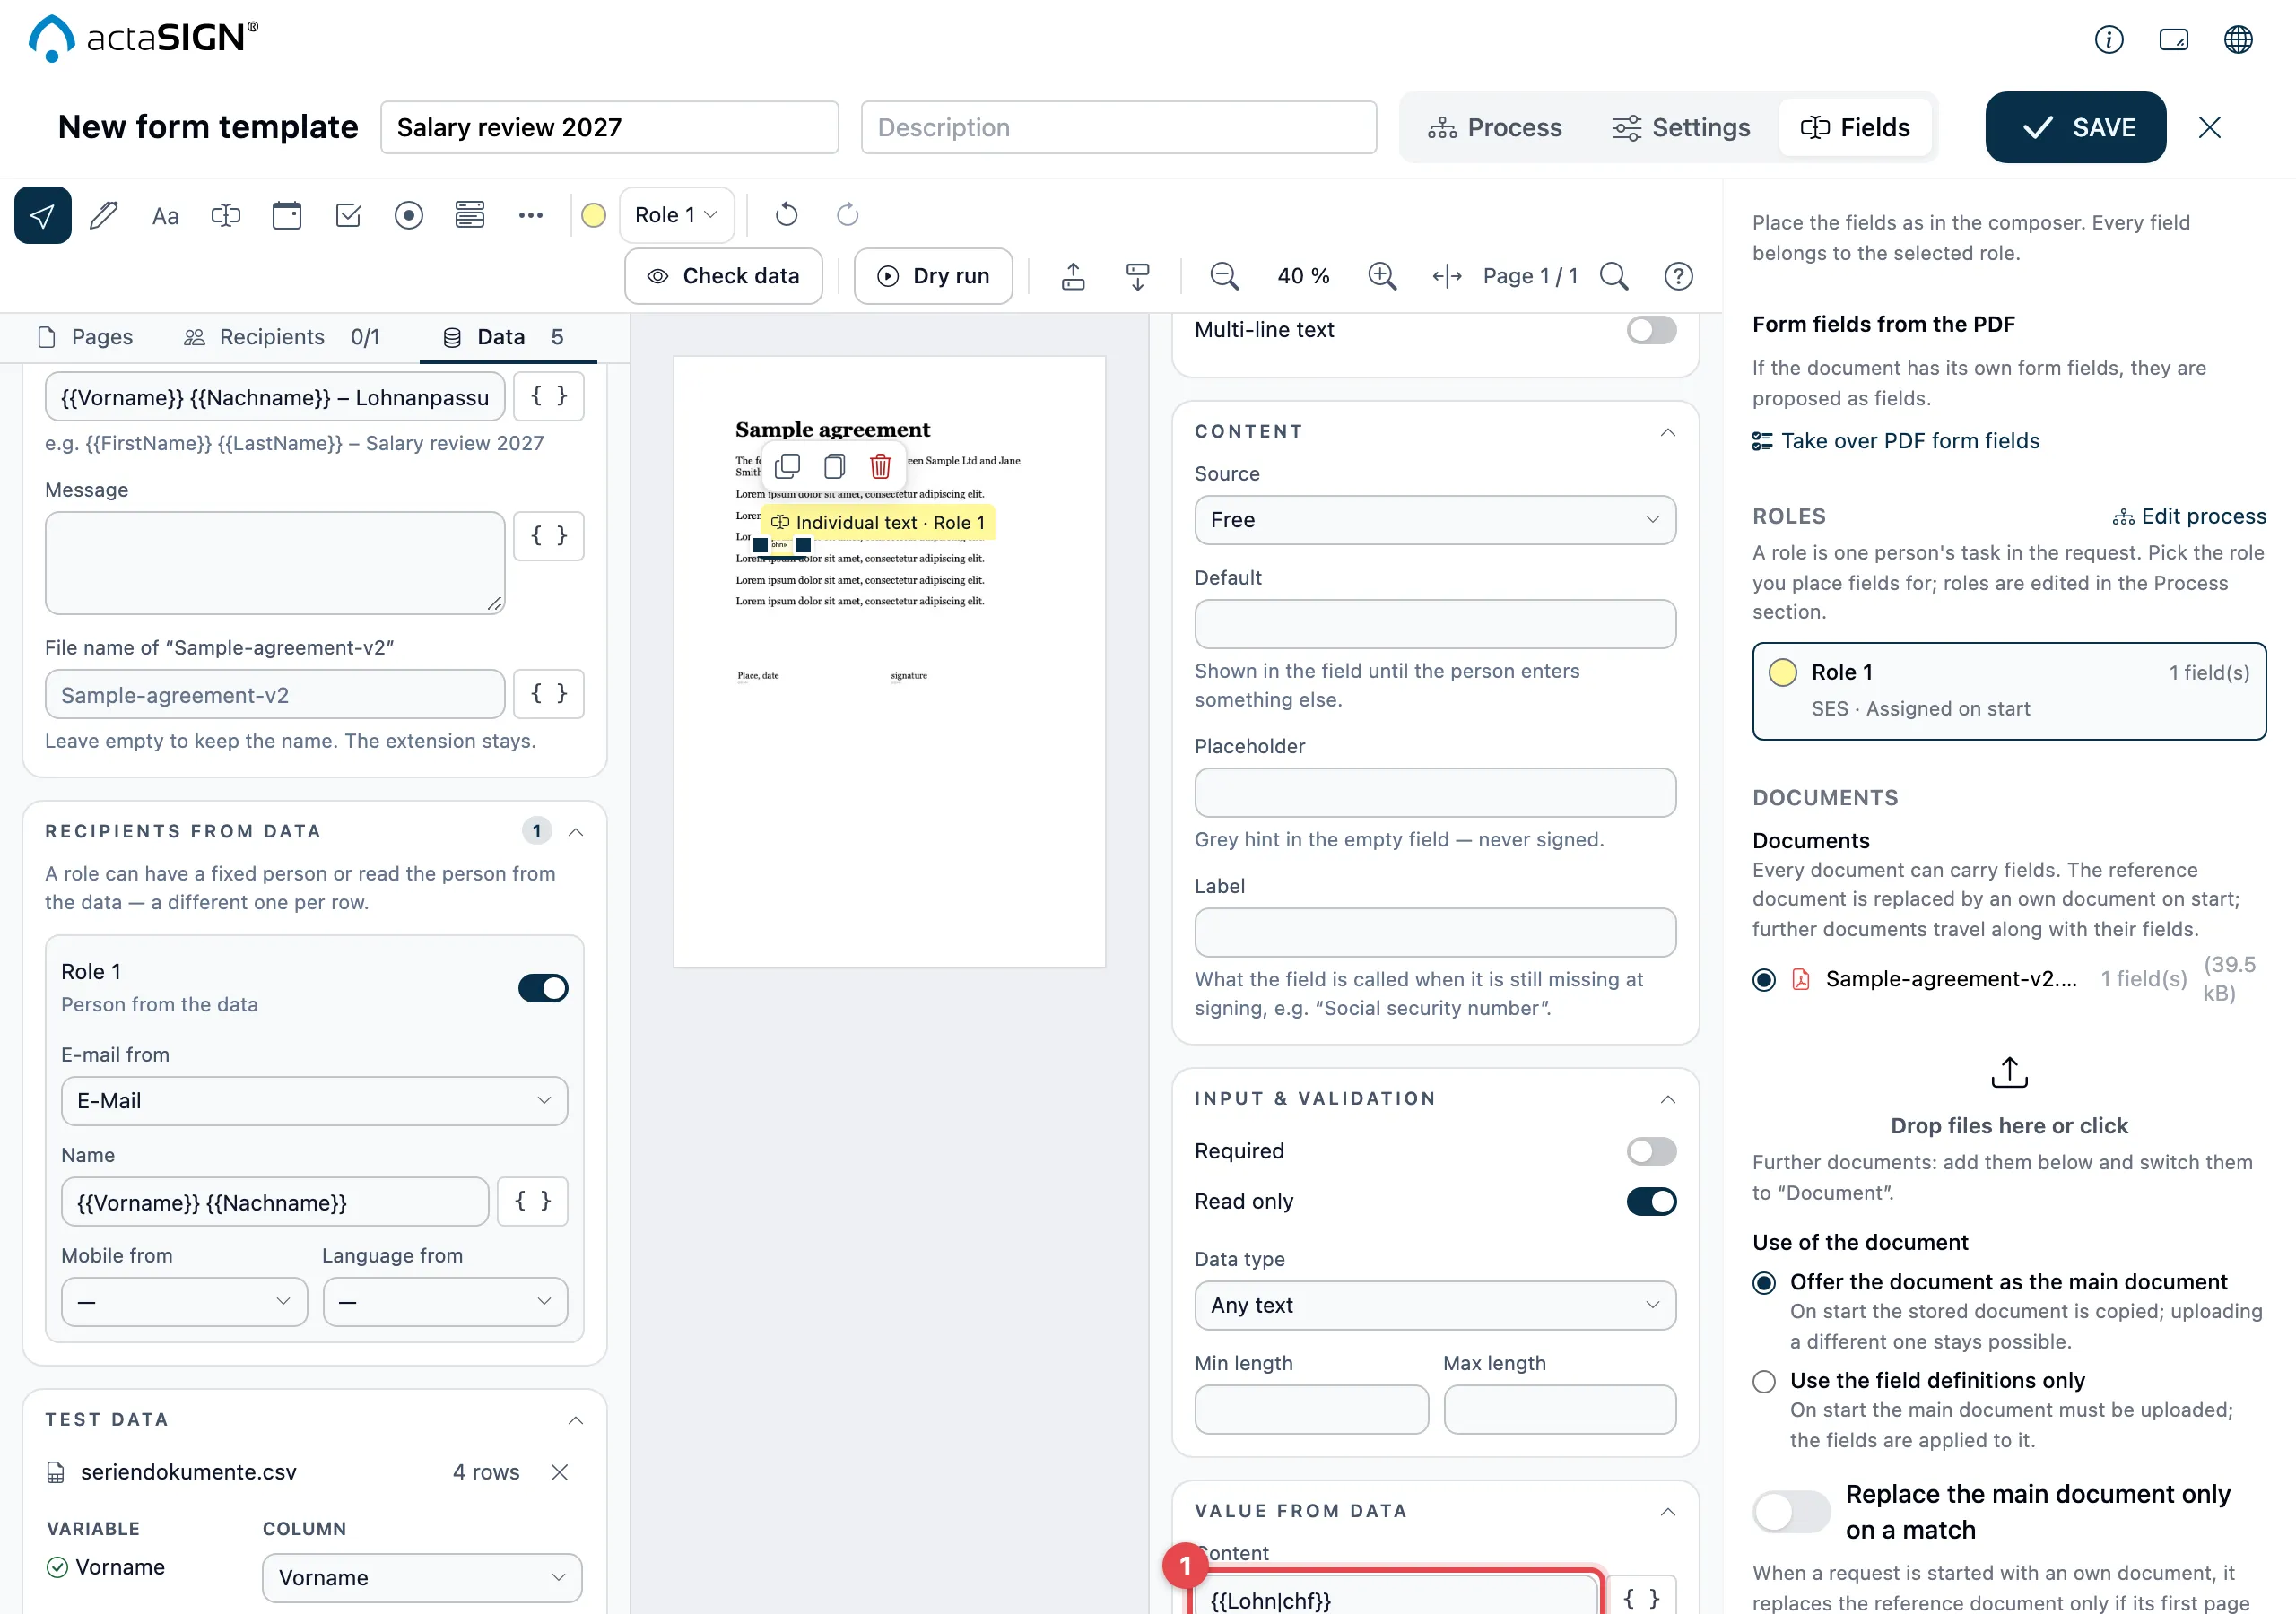
- Click a field in the document. Properties shows
Value from data. For a text or date field, write text and variables
mixed under Content, e.g.
{{City}}, {{Date}}. With the Insert variable icon you choose a variable from the list, with Insert with format e.g. Long (15 March 2027) or Amount in CHF. - Recipient may change it: if the switch is off (as every linked field starts), the value is fixed and cannot be overwritten when signing.
A checkbox takes a variable of type Yes/No under Value from variable. Options and a Selection field take a variable of type Choice or Text.
Subject, message and file names
Section titled “Subject, message and file names”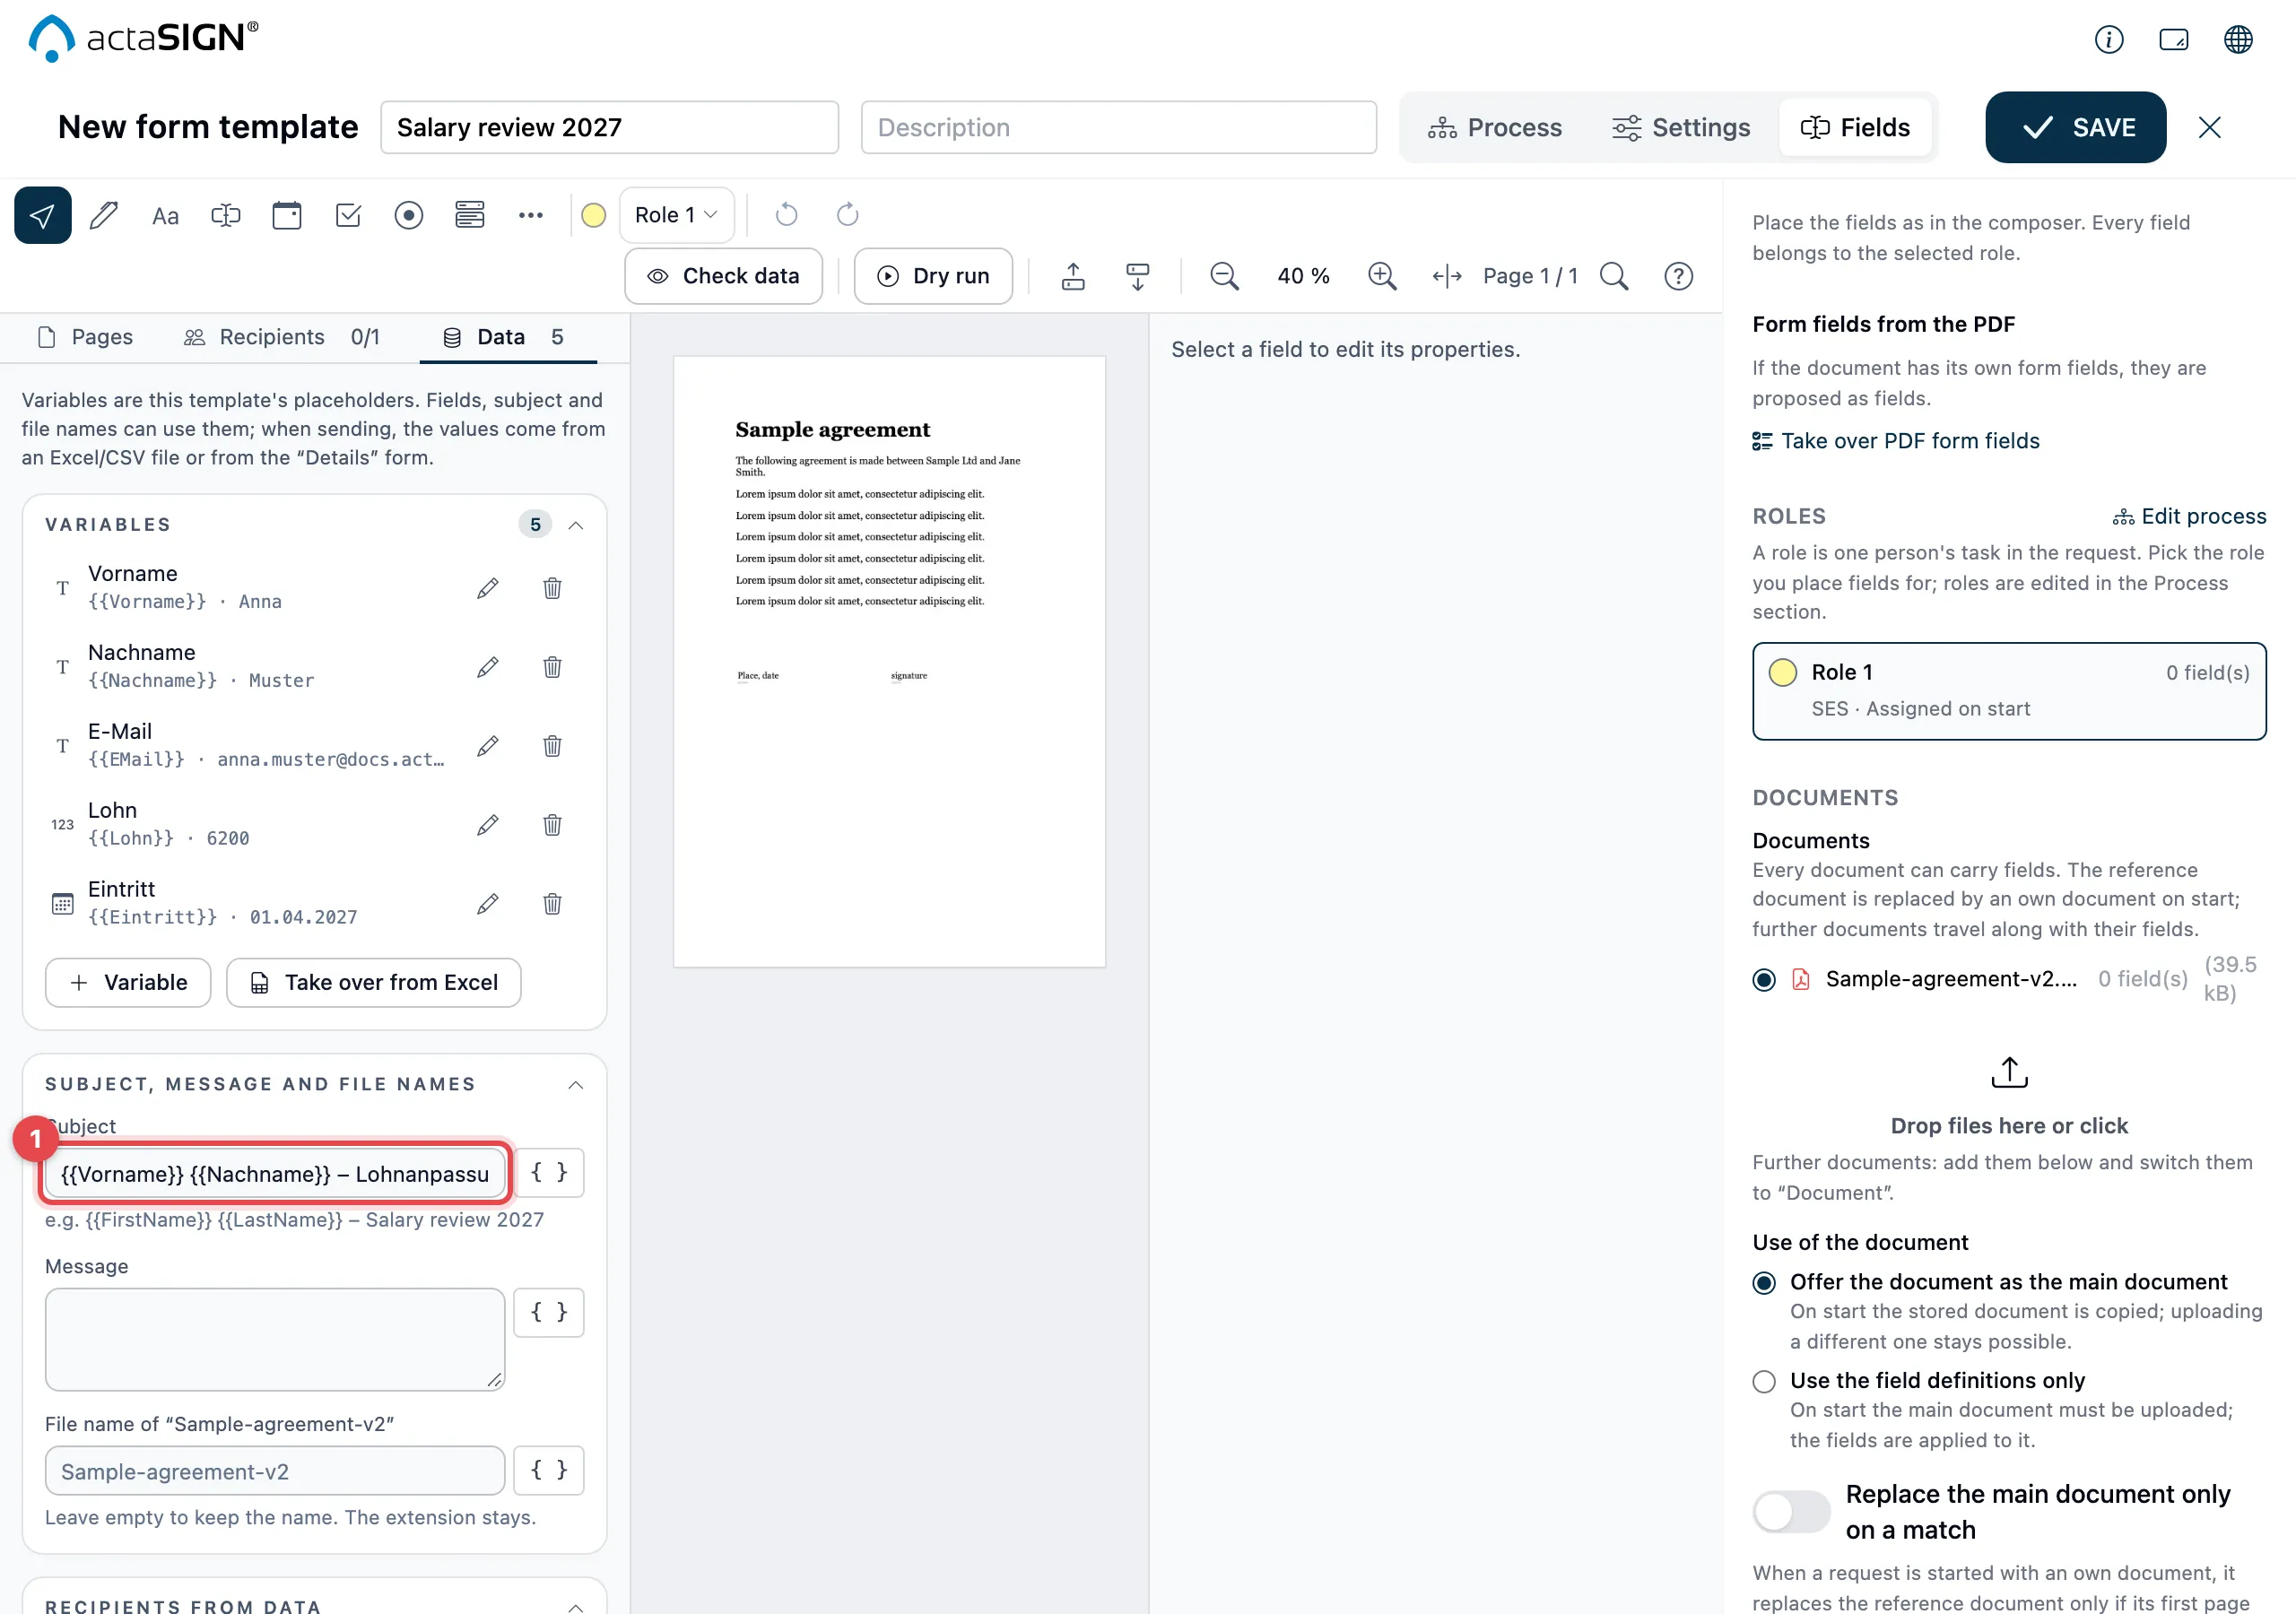
Under Subject, message and file names (1) you build the Subject, the Message and the name of each document from variables. If you leave a file name empty, the document’s name stays. The extension (e.g. .pdf) always stays.
Here and in the fields you can also use values every request knows, e.g. the sender’s name. See Insert values from the profile and request.
Recipients from the data
Section titled “Recipients from the data”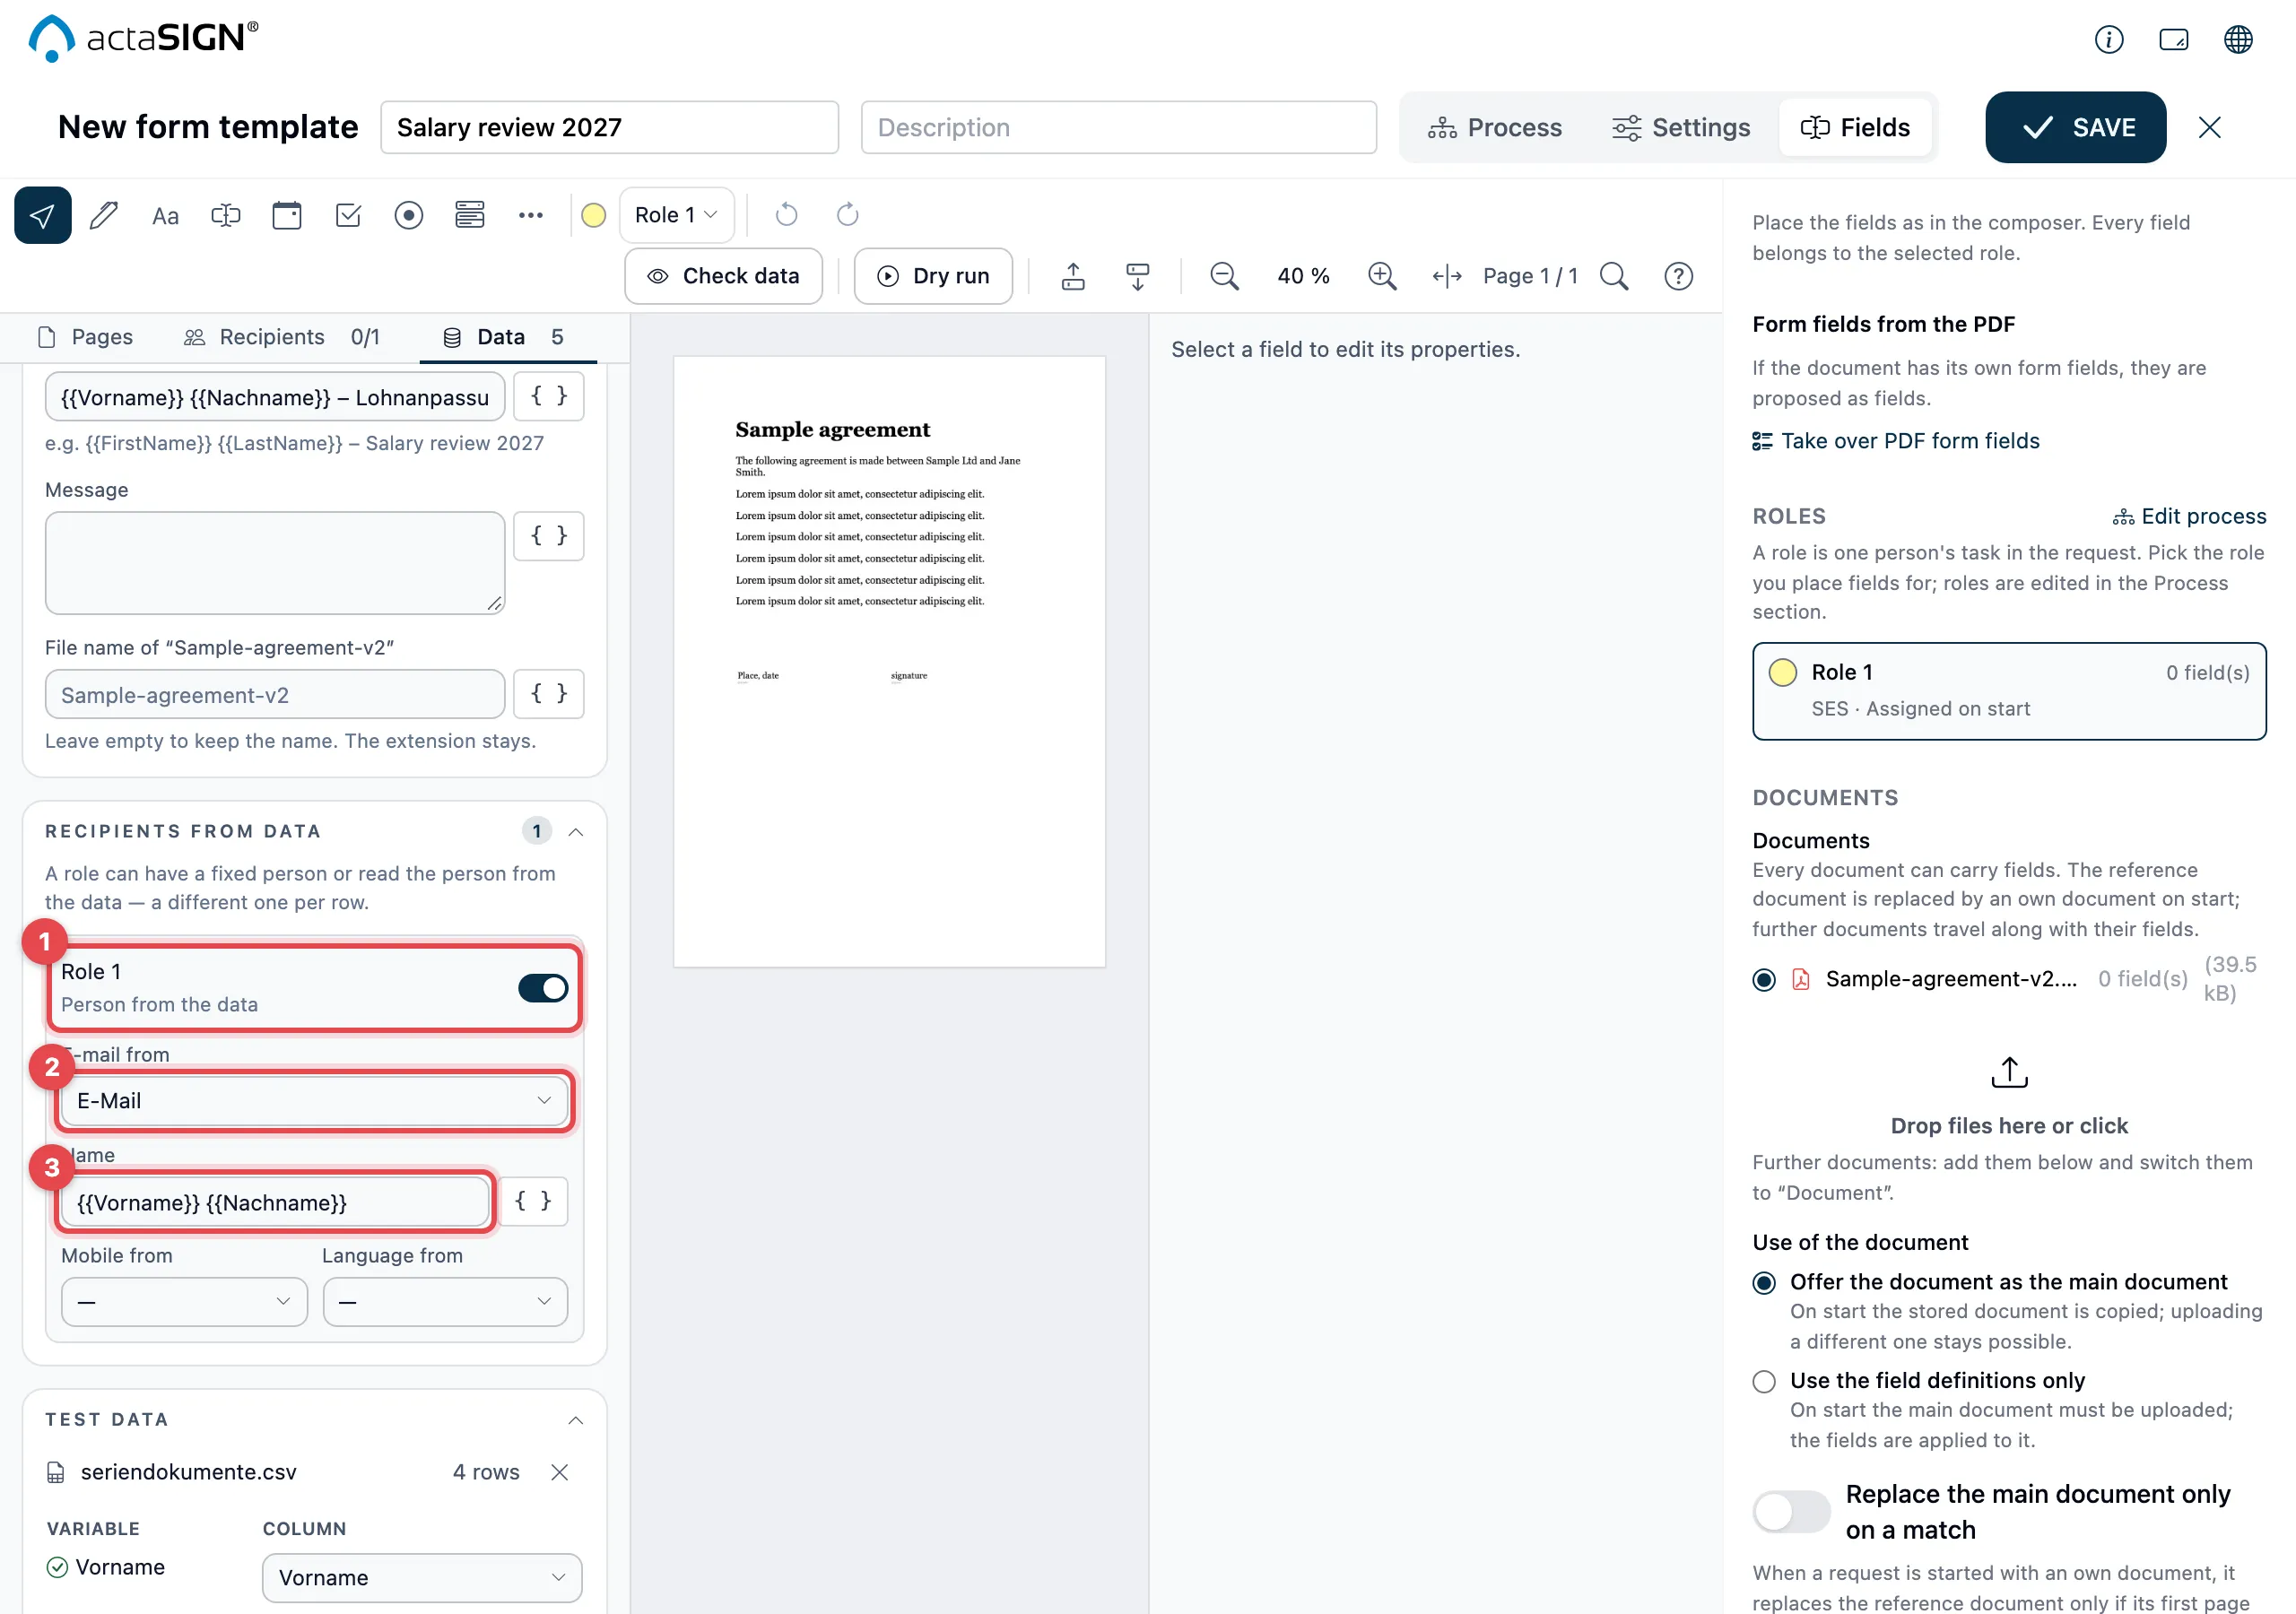
- Under Recipients from data, each role has a switch. Off means Fixed person, on means Person from the data: each row of the file brings its own person.
- E-mail from: the variable with the e-mail address.
- Name: built from variables, e.g.
{{FirstName}} {{LastName}}. Optionally, take Mobile from and Language from a variable.
When you switch it on, actaSIGN fills in these details itself if the variables have fitting names (e.g. “E-mail”, “First name”, “Last name”).
Check with test data
Section titled “Check with test data”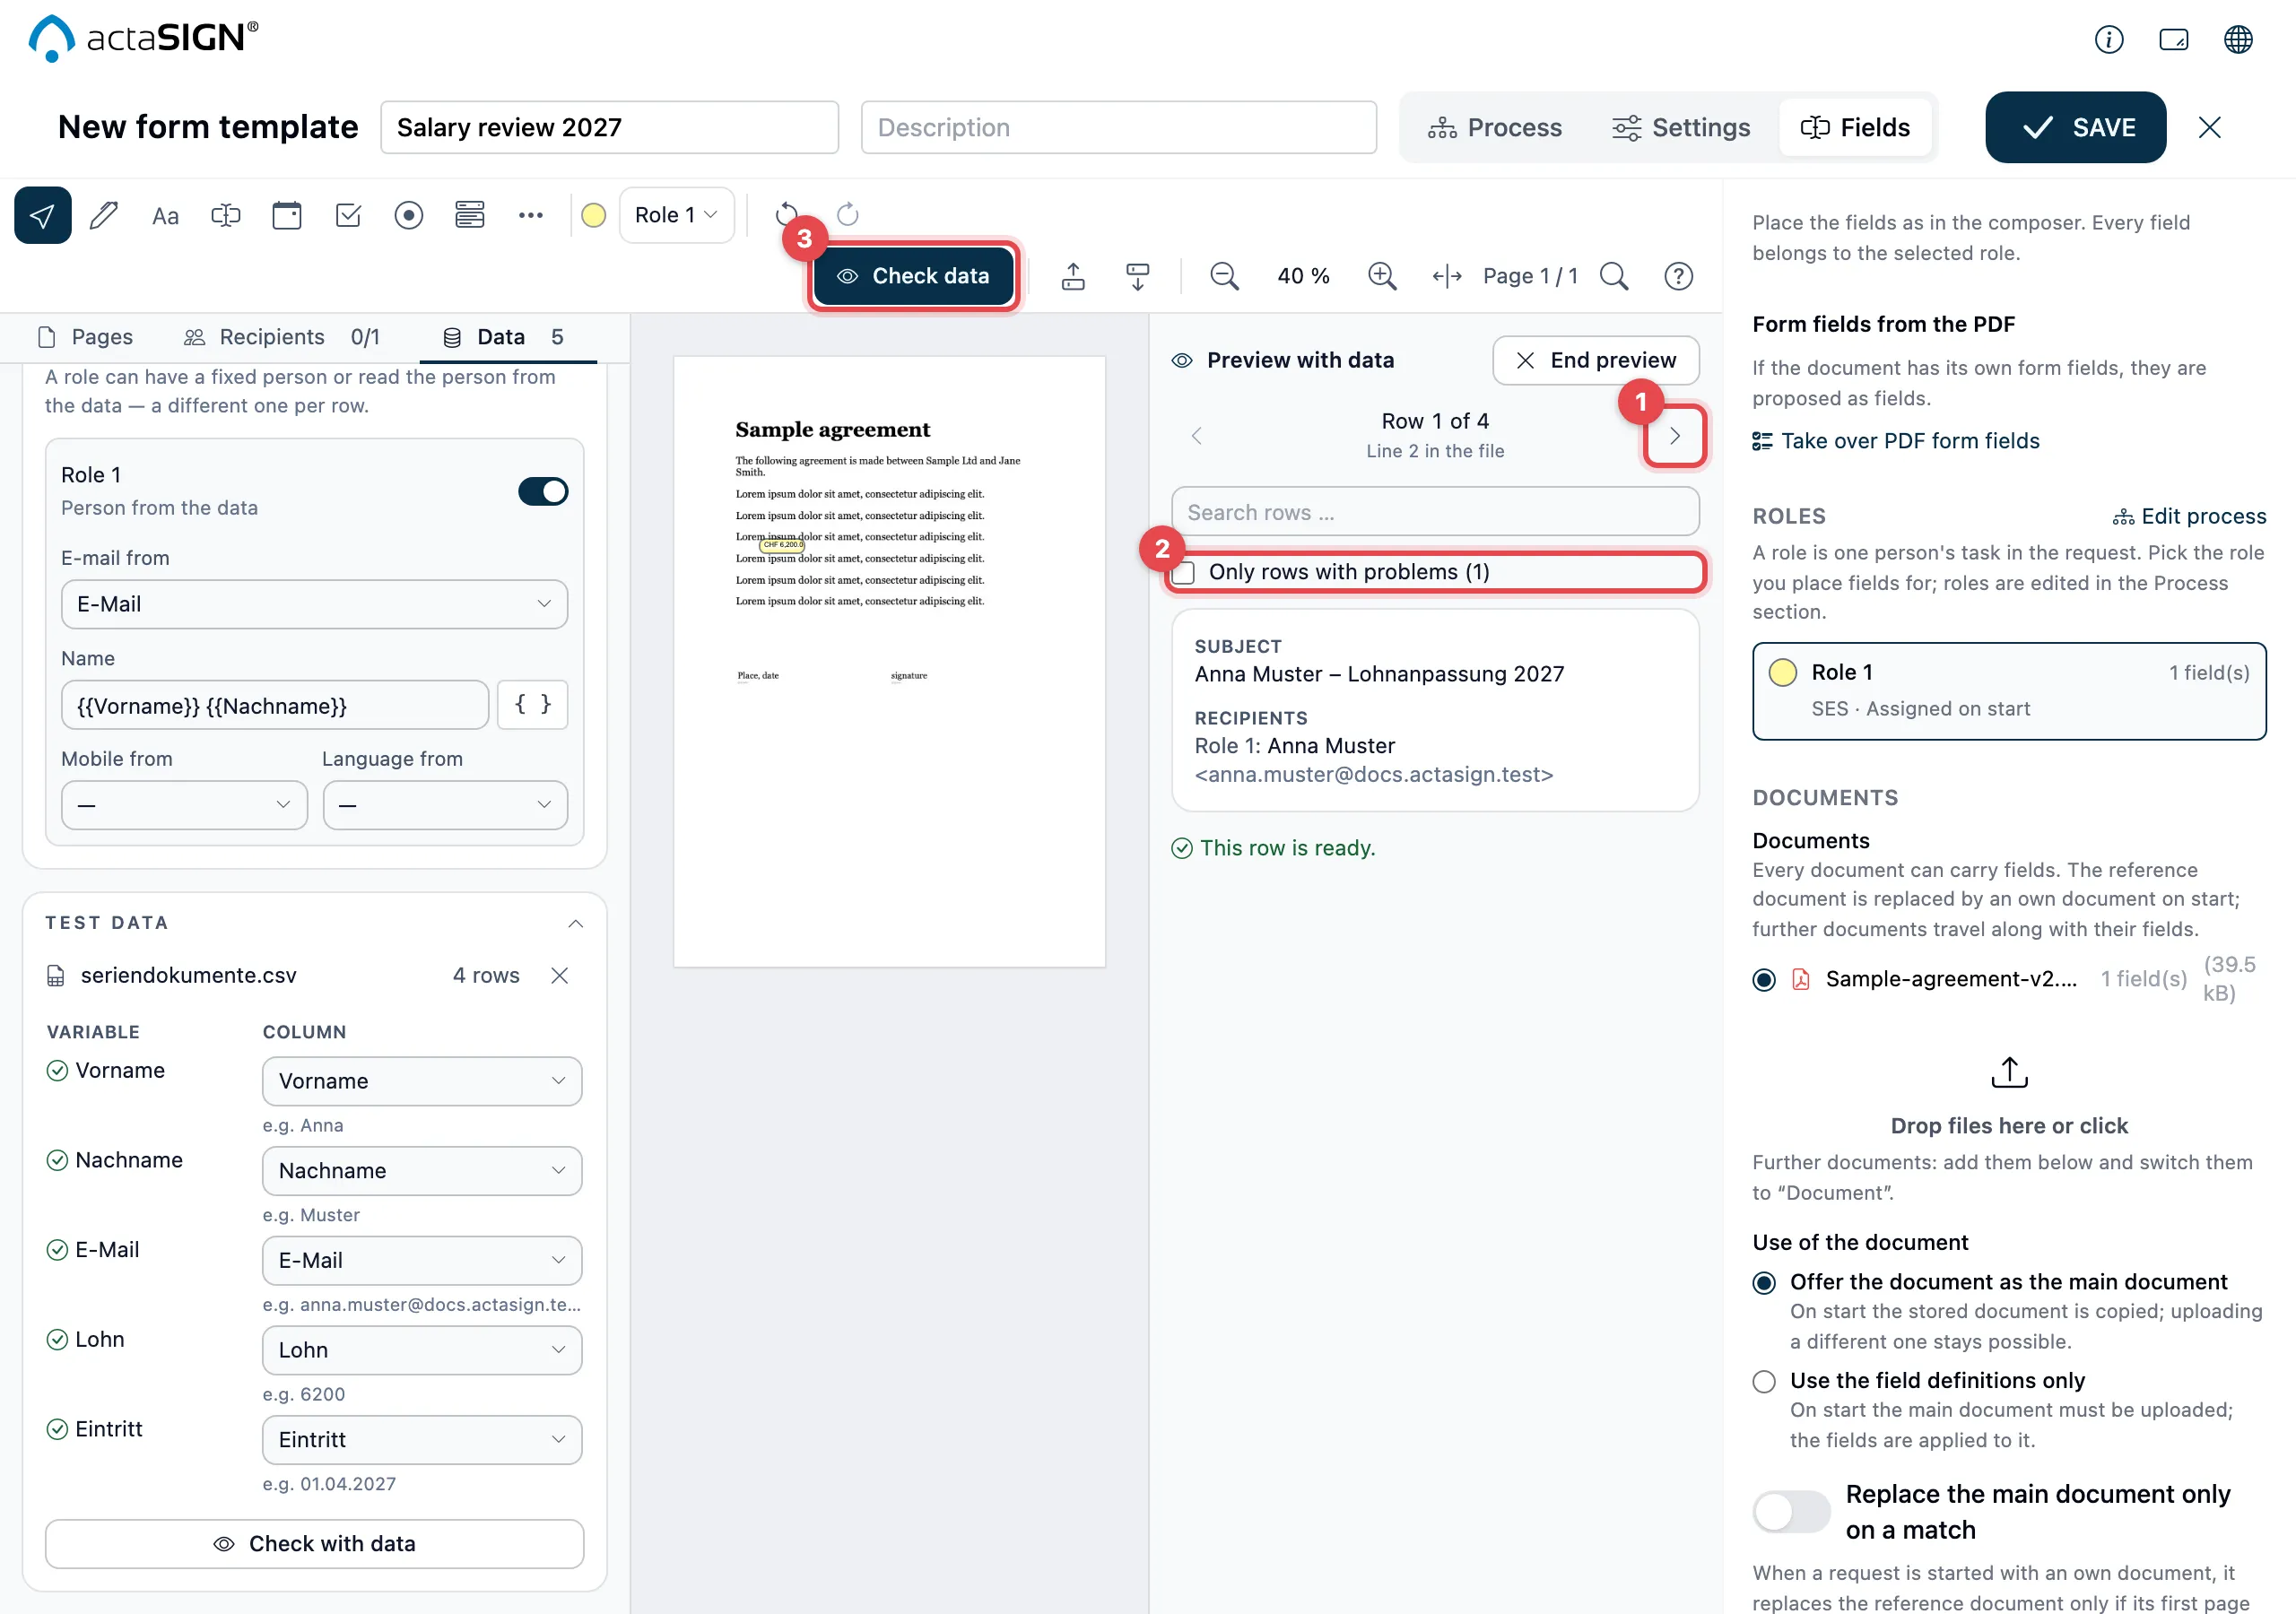
Under Test data, load a file with Load Excel or CSV file. If you took the variables from a file, that file is already loaded there. actaSIGN matches the columns to the variables by their name (Column mapping); you choose a different column in the list next to it. Then click Check with data (at the top also Check data).
- The document shows the values of one row. With Previous row and Next row you go through the rows, with Search rows … you jump to a person. On the right you see the subject, file names, recipients and which tasks become active in this row.
- Only rows with problems (…) shows only the rows where something does not fit, e.g. “… is not a valid e-mail address”. Clicking a problem that concerns a field selects that field.
- End preview takes you back to editing. The preview changes nothing in the template.
Without a file, the preview shows the sample values. Save the template at the top with Save. The test file is not saved with the template.
Use the template
Section titled “Use the template”- A single request: start the template as usual, see Use a form template. The Subject & Settings step shows the Workflow data form; enter the values there. In Studio you also find the same fields in the Data tab under Values.
- Many people: one request per row of a file, see Mass send.
Good to know
Section titled “Good to know”- A Key starts with a letter and contains only letters, digits and
_ . -. In the text you write it in double curly brackets:{{FirstName}}. - If you write a name in the subject or message that does not exist, the text stays exactly as you wrote it.
- If a Required value is missing at the start, actaSIGN does not start the request.
- The file needs a header row. Allowed are .xlsx, .xlsm, .csv, .txt and .tsv up to 2 MB; save old .xls files as .xlsx first.
- In CSV files, actaSIGN reads numbers and dates such as “1’200” or “15.03.2027” according to the variable’s type.
- Form templates without variables work as before.