

Choose a request type
With a request type you put a request into a category, for example “Supplier invoice” or “Service contract”. This lets you find the request again later with a filter. If the type brings data fields, such as supplier and amount, you fill them in right here.
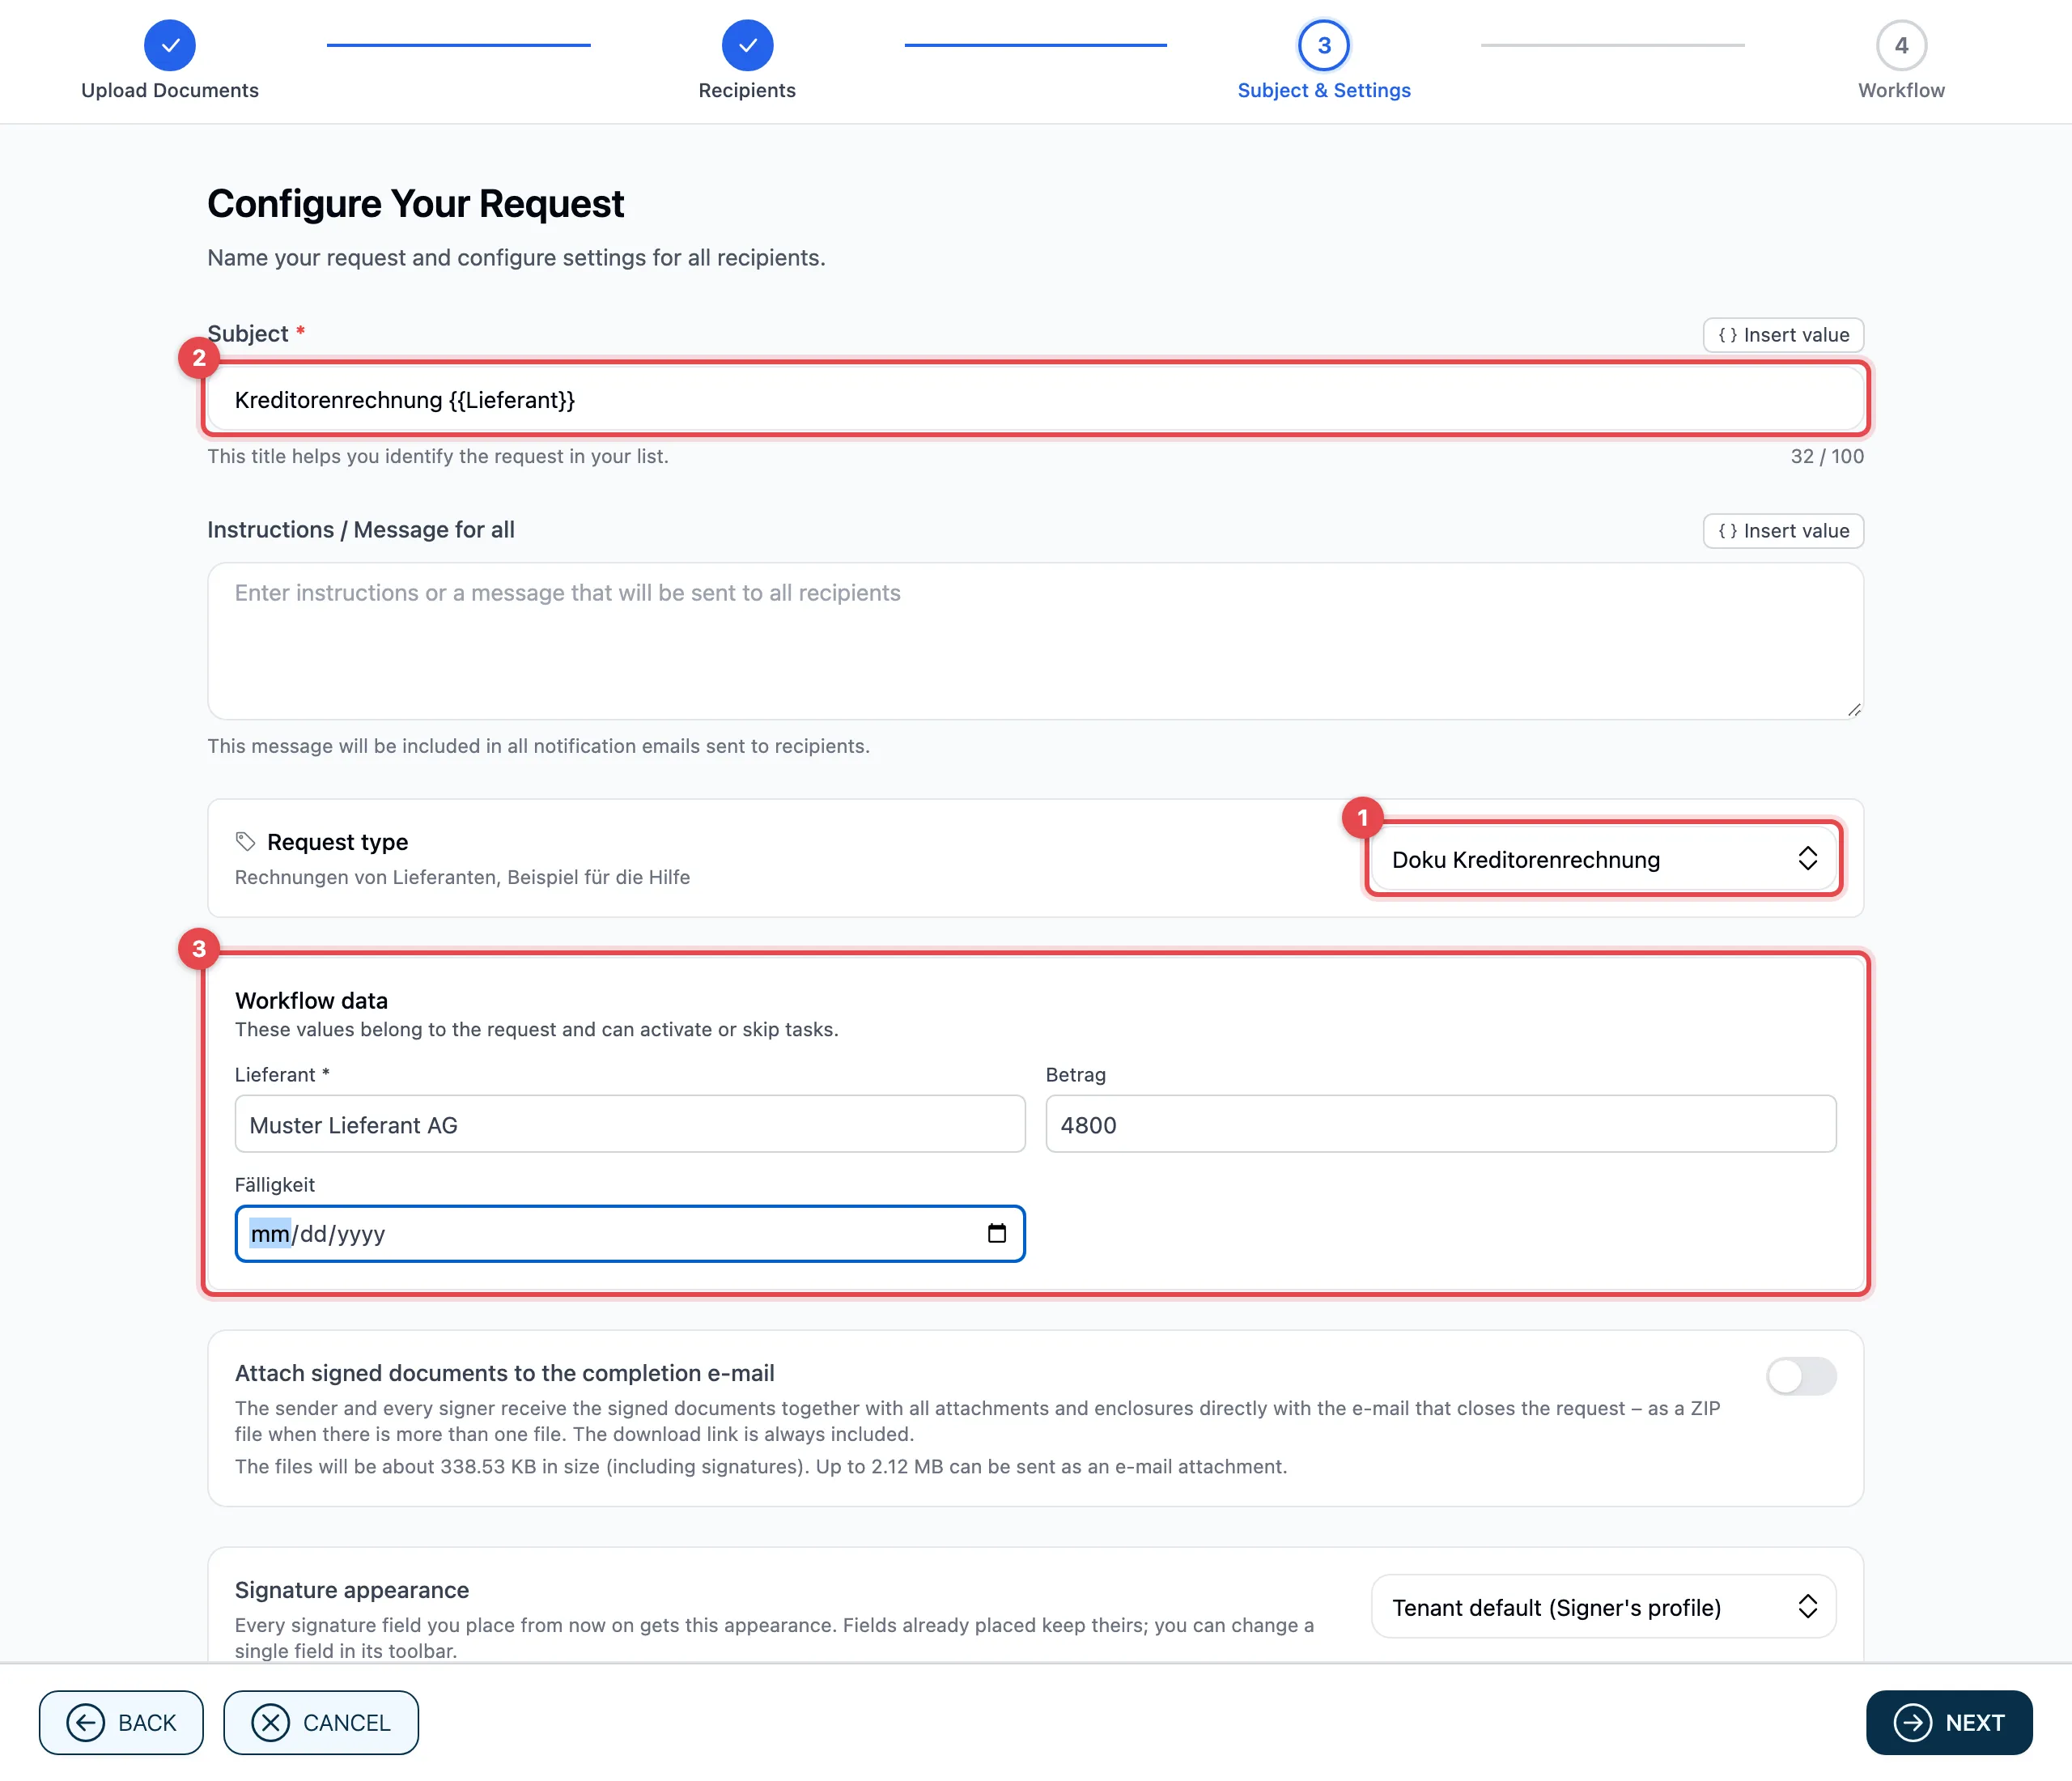
- Choose a type under Request type. Its description appears below it. With No request type the request has no type; this is the usual case.
- If the type has a subject pattern, it now appears in the Subject, for
example “Supplier invoice
{{Supplier}}”. actaSIGN fills in the values in double curly brackets when sending. The type does not replace a subject you entered yourself. - Under Workflow data, fill in the type’s data fields, for example the amount of the invoice. Fields marked * are required.
Then click Next as usual.
What the data fields do
Section titled “What the data fields do”The type’s data fields become the request’s workflow data. You can use them right away:
- in a task condition, for example “only when Amount is greater than 5000”, see Task only when needed;
- in the subject and messages with Insert value, see Insert values from the profile and request;
- in fields of the document.
If you choose another type (or No request type), actaSIGN removes the previous type’s data fields again, unless you use them somewhere. Fields you already use in a condition, a text or a field stay.
Good to know
Section titled “Good to know”- A process or form template can bring a request type. If you start from such a template, the type is already chosen.
- You change the type of a sent request in the Requests list with Change request type, see Track requests. The workflow data stays as it is.
- When the request is sent, its portfolio gets the same type if it does not have one yet.
- If the administration has removed a type in the meantime, it stays visible on sent requests. It can no longer be chosen. A draft that still carries it loses it when it is sent; its workflow data stays.