

Position and set up the fields of a form template
A field in a form template is either always in the same spot, or it finds its place next to a text in the document. The second is useful if the document is sometimes longer, sometimes shorter.
Fixed or relative to a text
Section titled “Fixed or relative to a text”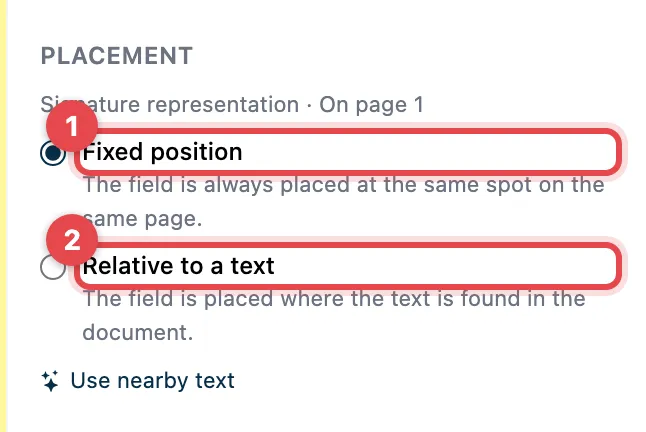
- Fixed position: the field is always in the same spot on the same page.
- Relative to a text: the field is placed where a certain text appears in the document.
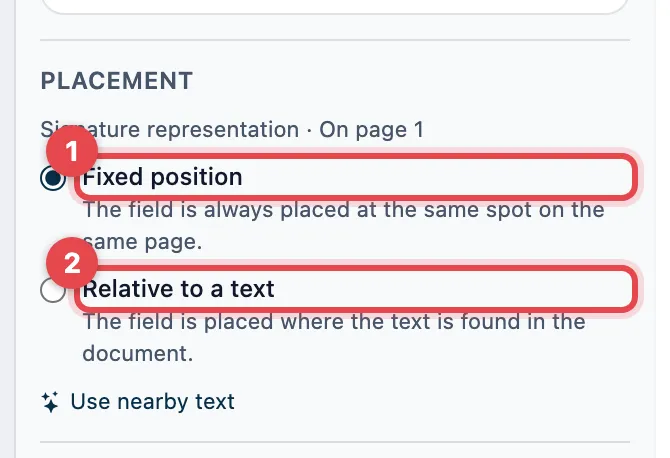
- Fixed position: the field is always in the same spot on the same page.
- Relative to a text: the field is placed where a certain text appears in the document.
Align with a text
Section titled “Align with a text”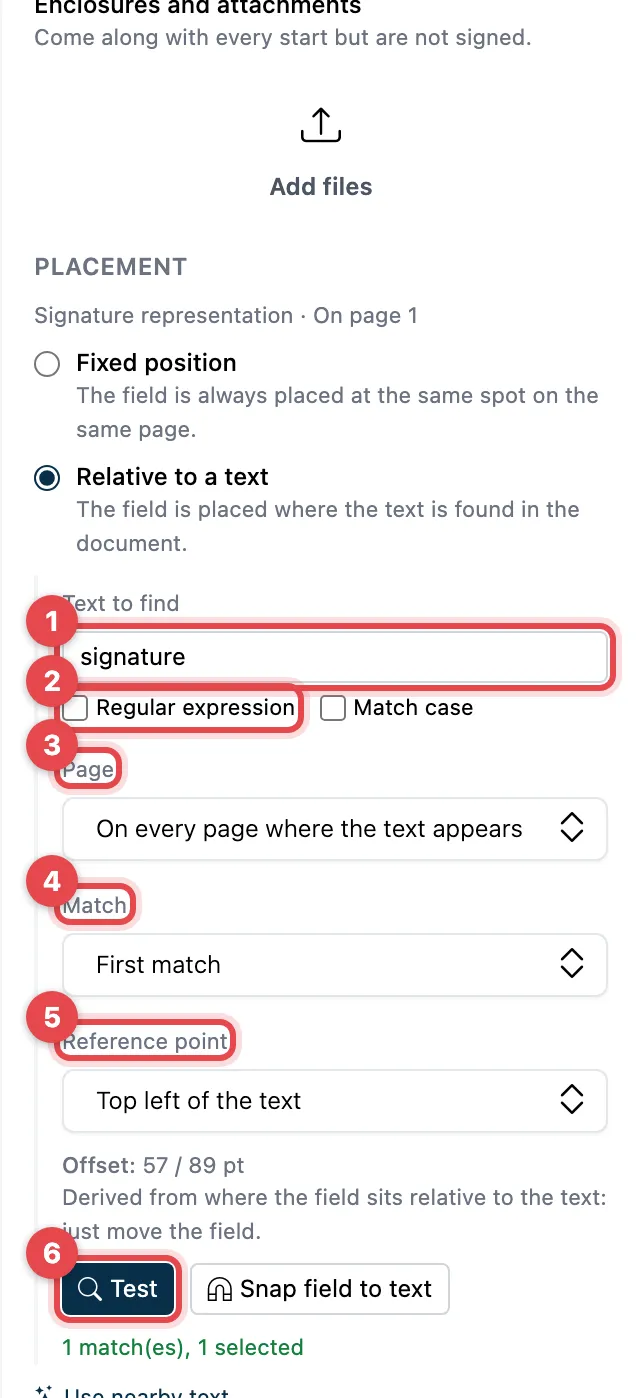
- Text to find: the text the field should be next to, for example “Tenant signature”.
- Regular expression: only tick this if you are familiar with search patterns. Match case tells “Date” and “date” apart.
- Page: where to search, for example On the last page only or On every page where the text appears.
- Match: First match, Last match or Every match (one field per match).
- Reference point: which corner of the text counts, for example Bottom left of the text. actaSIGN works out the Offset from the spot you moved the field to.
- Test: searches for the text in the document and shows how many matches there are. With Snap field to text the field moves to the spot found.
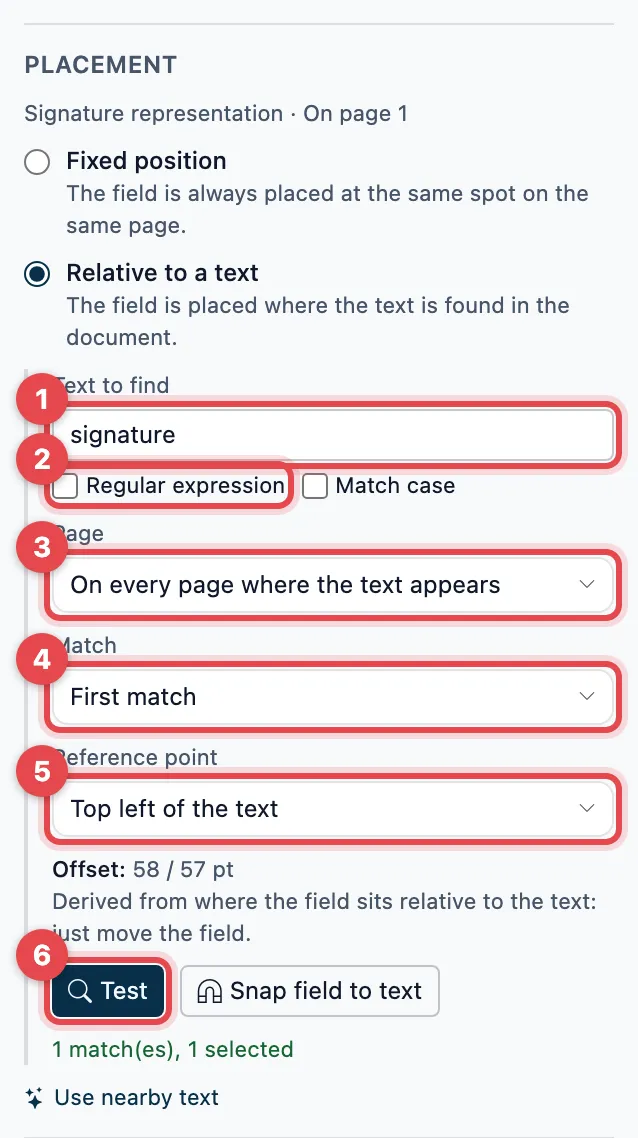
The settings are the same as in the classic view; they are in the field’s Properties:
- Text to find: the text the field should be next to.
- Regular expression and Match case.
- Page: where to search.
- Match: which match counts.
- Reference point: which corner of the text counts.
- Test, then Snap field to text if needed.
If actaSIGN does not find the text, it shows, for example, “The text was not found in the document.” For a scanned document without readable text the search does not work; use Fixed position instead.
Selection field, data name and required condition
Section titled “Selection field, data name and required condition”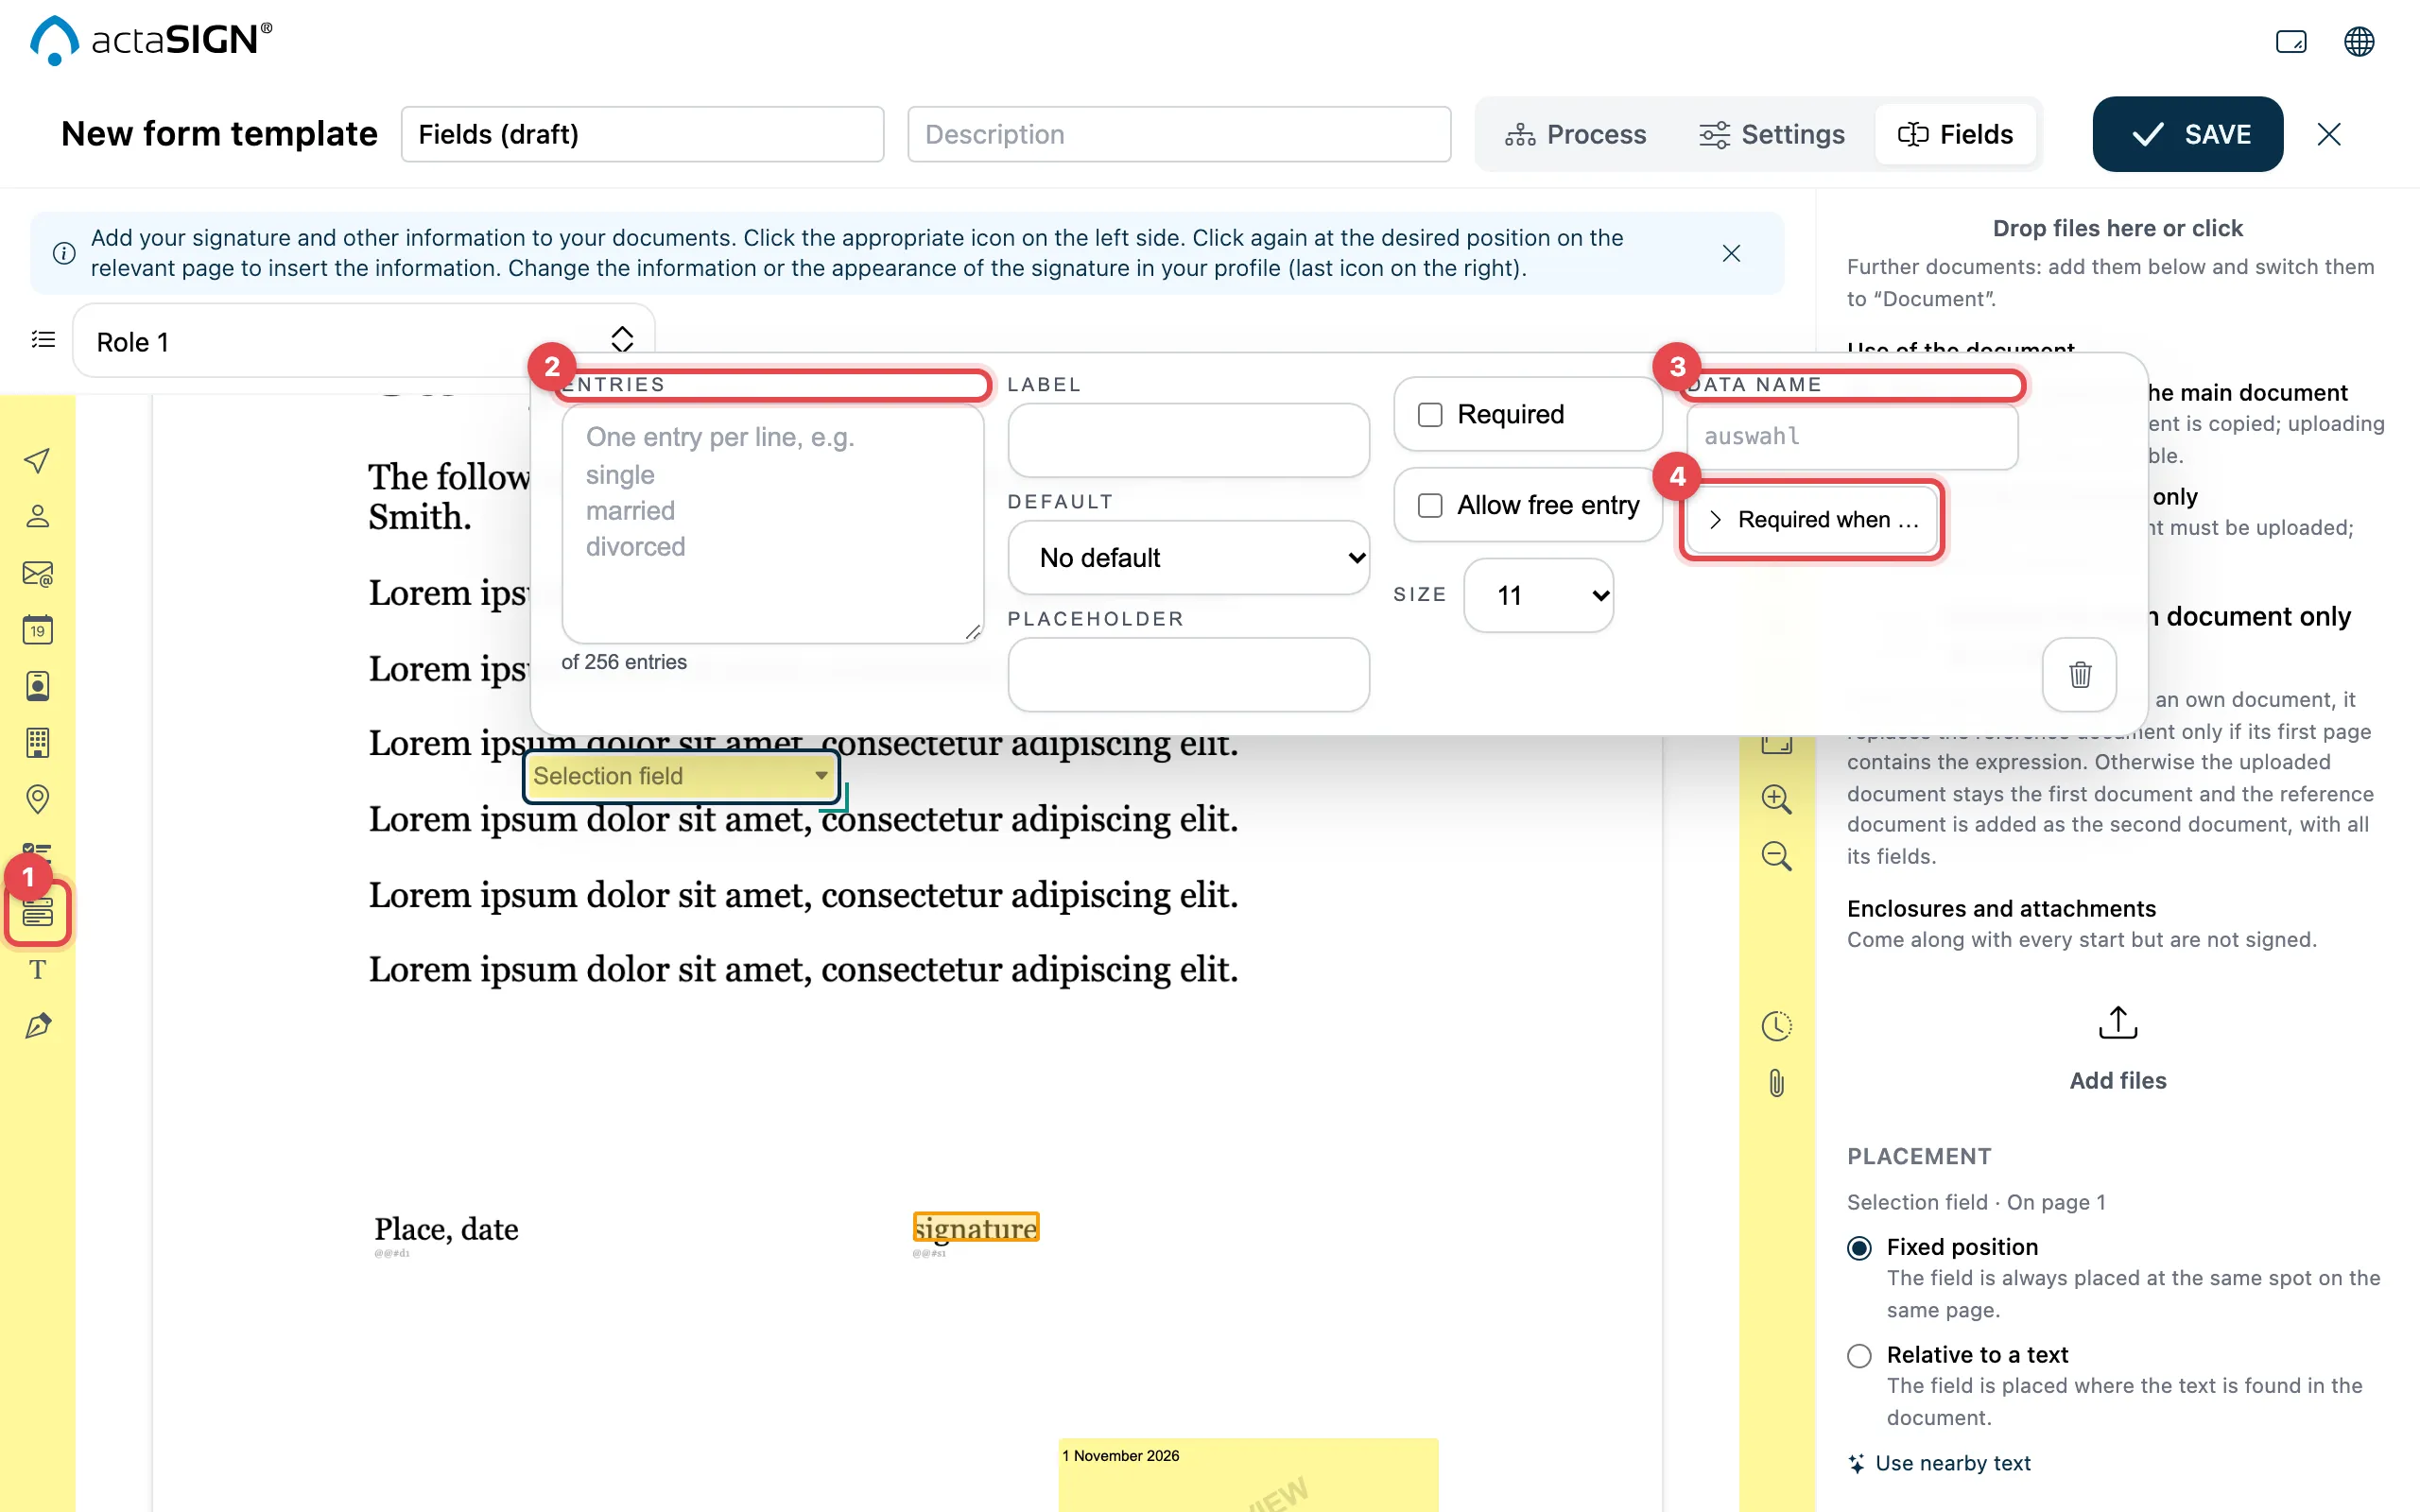
- On the left, choose Selection field and click in the document.
- Under Entries, write one entry per line, for example “single”, “married”. With Default you preselect an entry; with Allow free entry the recipient may enter something else.
- Data name: a short name such as “civil_status”. It appears as a column in the data export and is used for conditions.
- Required when …: the field only becomes required under a condition, for example when “civil_status” is “married”. With + Condition you add more and choose Any one condition is enough or All conditions must apply.
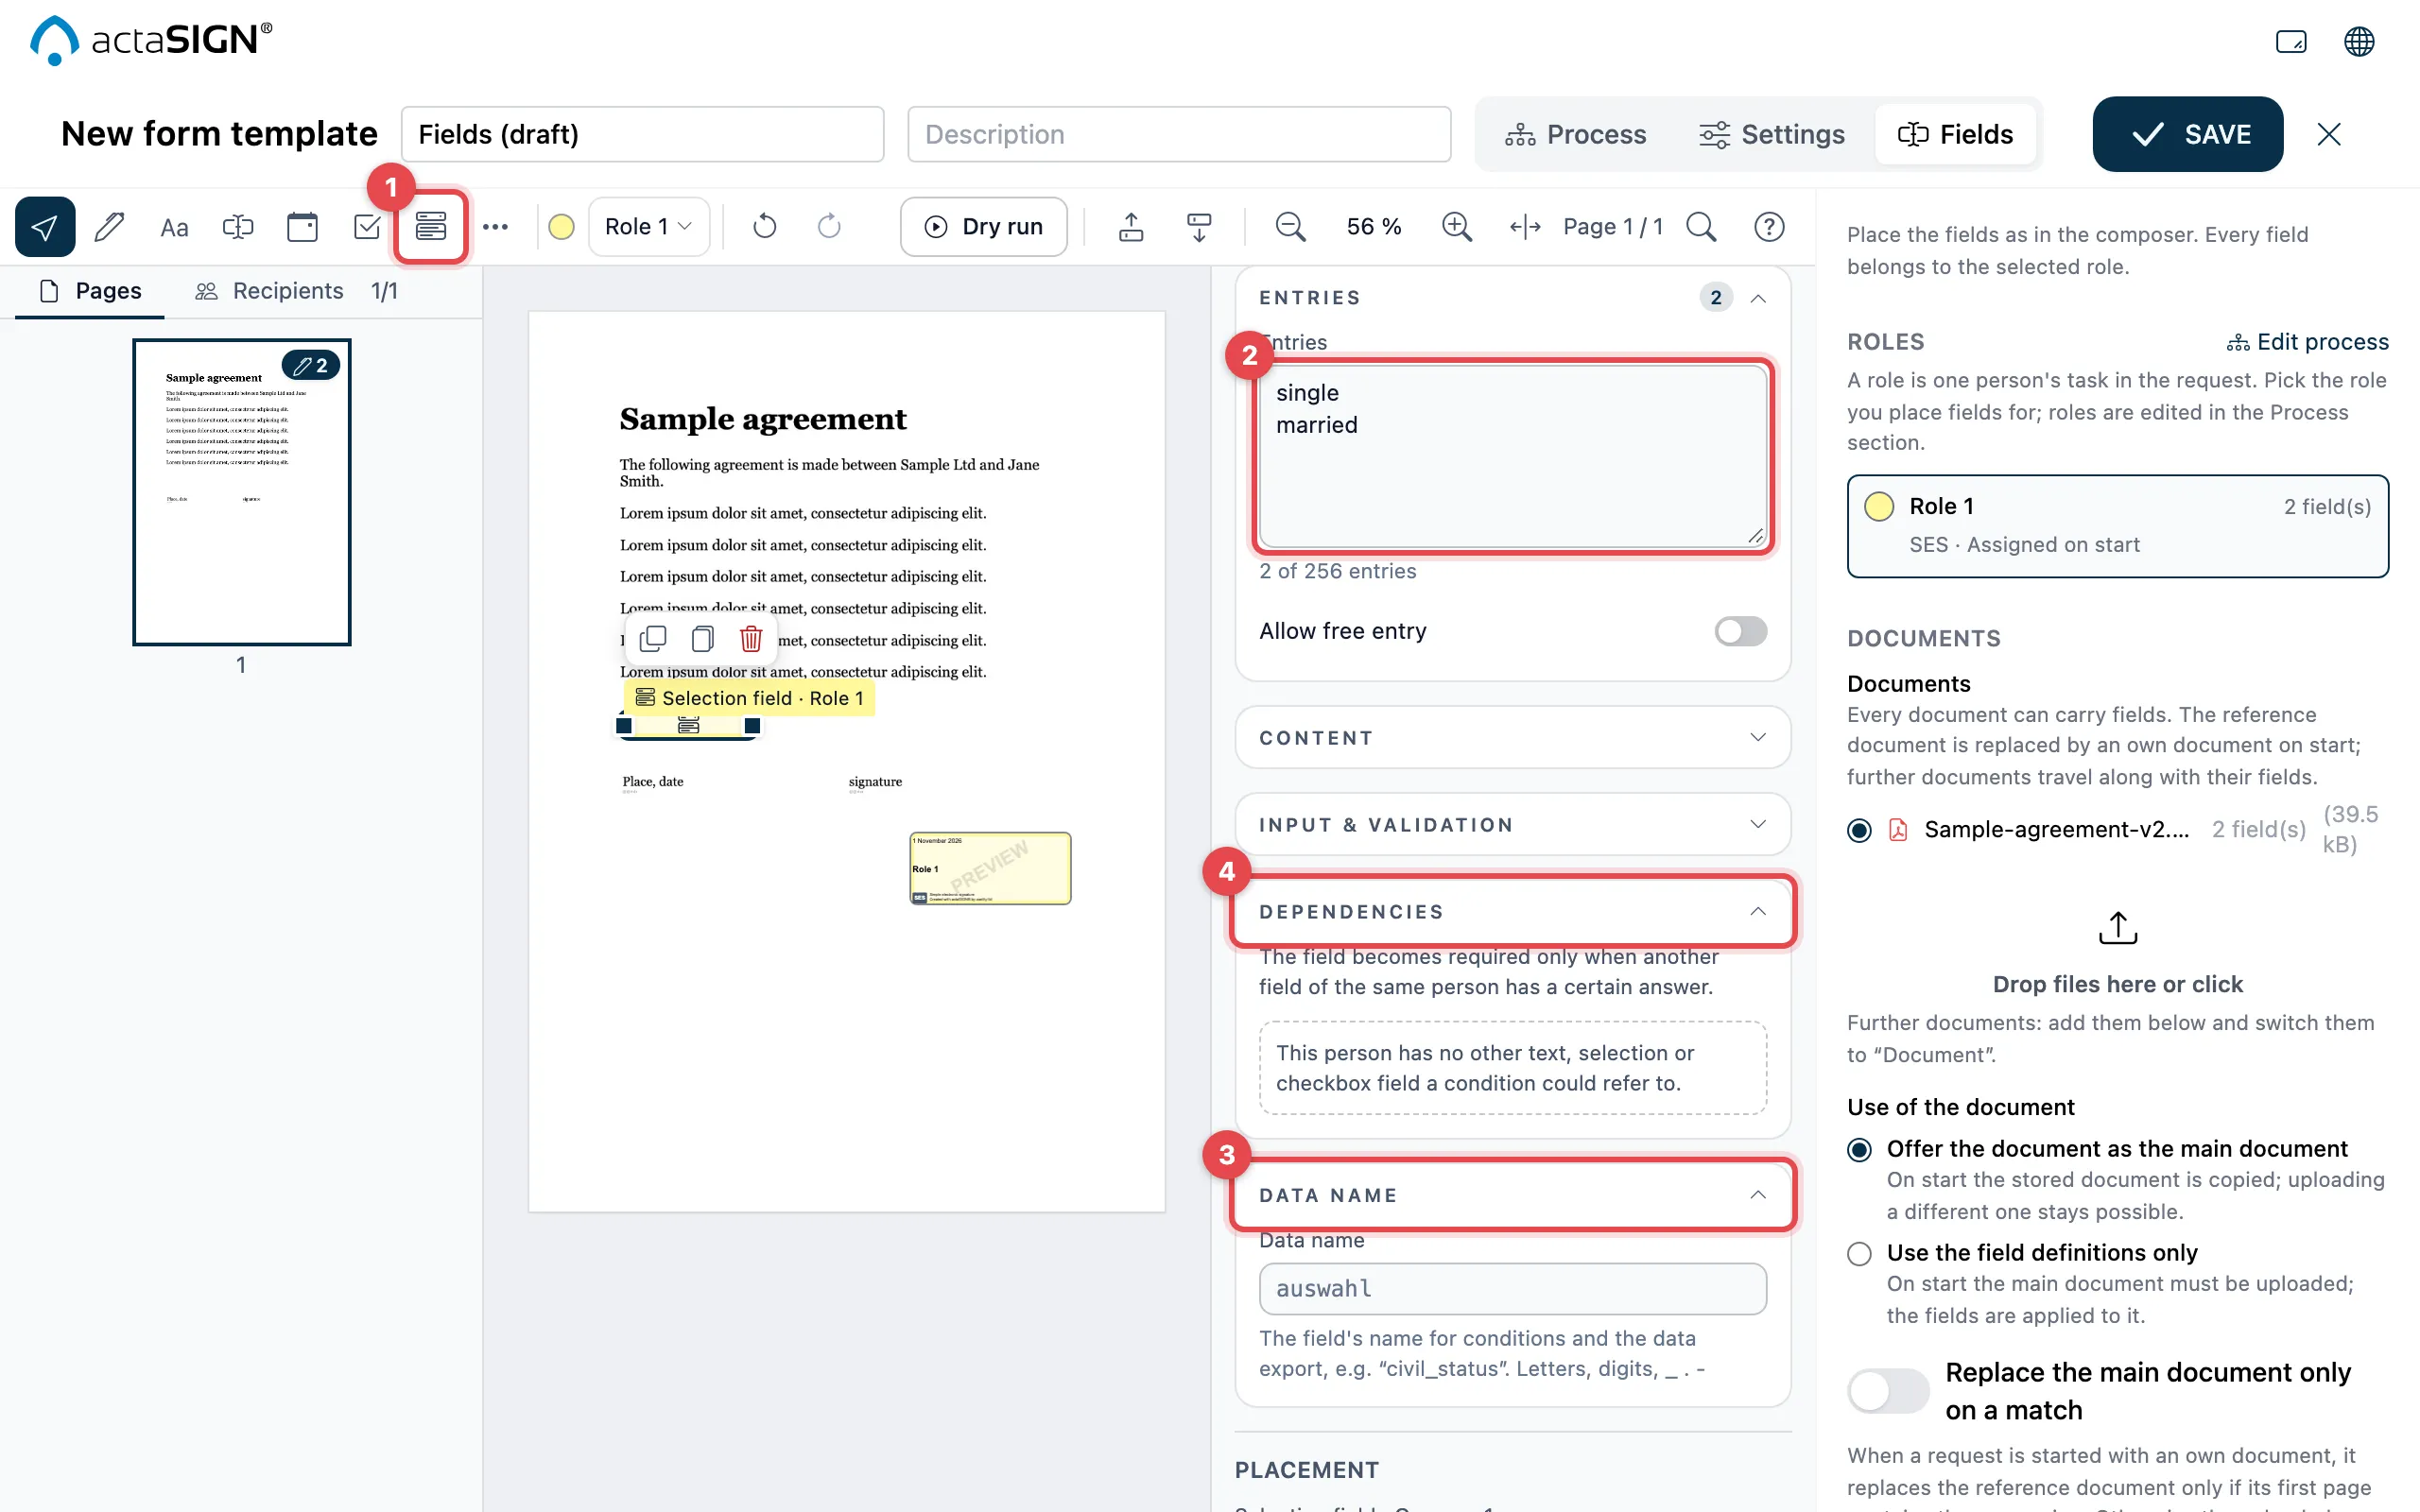
- In the toolbar at the top, choose Selection field and click in the document.
- Under Entries, write one entry per line, for example “single”, “married”. With Allow free entry the recipient may enter something else. You find the Default in the Content section.
- Data name: a short name such as “civil_status”. It appears as a column in the data export and is used for conditions.
- Dependencies: the field only becomes required under a condition, for example when “civil_status” is “married”. With Add condition you add more and choose Any one or All required.
You open and close the sections with a click on their title. Check whether the conditions work with the Dry run.
Checkbox groups
Section titled “Checkbox groups”Several boxes (Checkbox) can be linked into a group, for example “tick at least one, at most two”:
- For one box, under the group, choose + New group.
- Enter Name, Min and Max.
- Assign the other boxes to the same group.
Under Mark you choose Check (✓) or Cross (✗); under Default whether the box is already ticked.
In Studio, these settings are in the checkbox’s Properties, in the Checkbox section (where the default is called Checked by default) and the Group section.
Good to know
Section titled “Good to know”- Only text and selection fields can be conditionally required. The condition must refer to a field of the same role.
- A selection field has at most 256 entries of at most 200 characters each.
- Two fields may not have the same data name.
- With the new document screen (Studio), Placement is in the field’s properties instead of in the sidebar.