

Use a form template
From a form template you start a request where the document and the fields are already prepared. You only decide who takes on which role.
Start from the list
Section titled “Start from the list”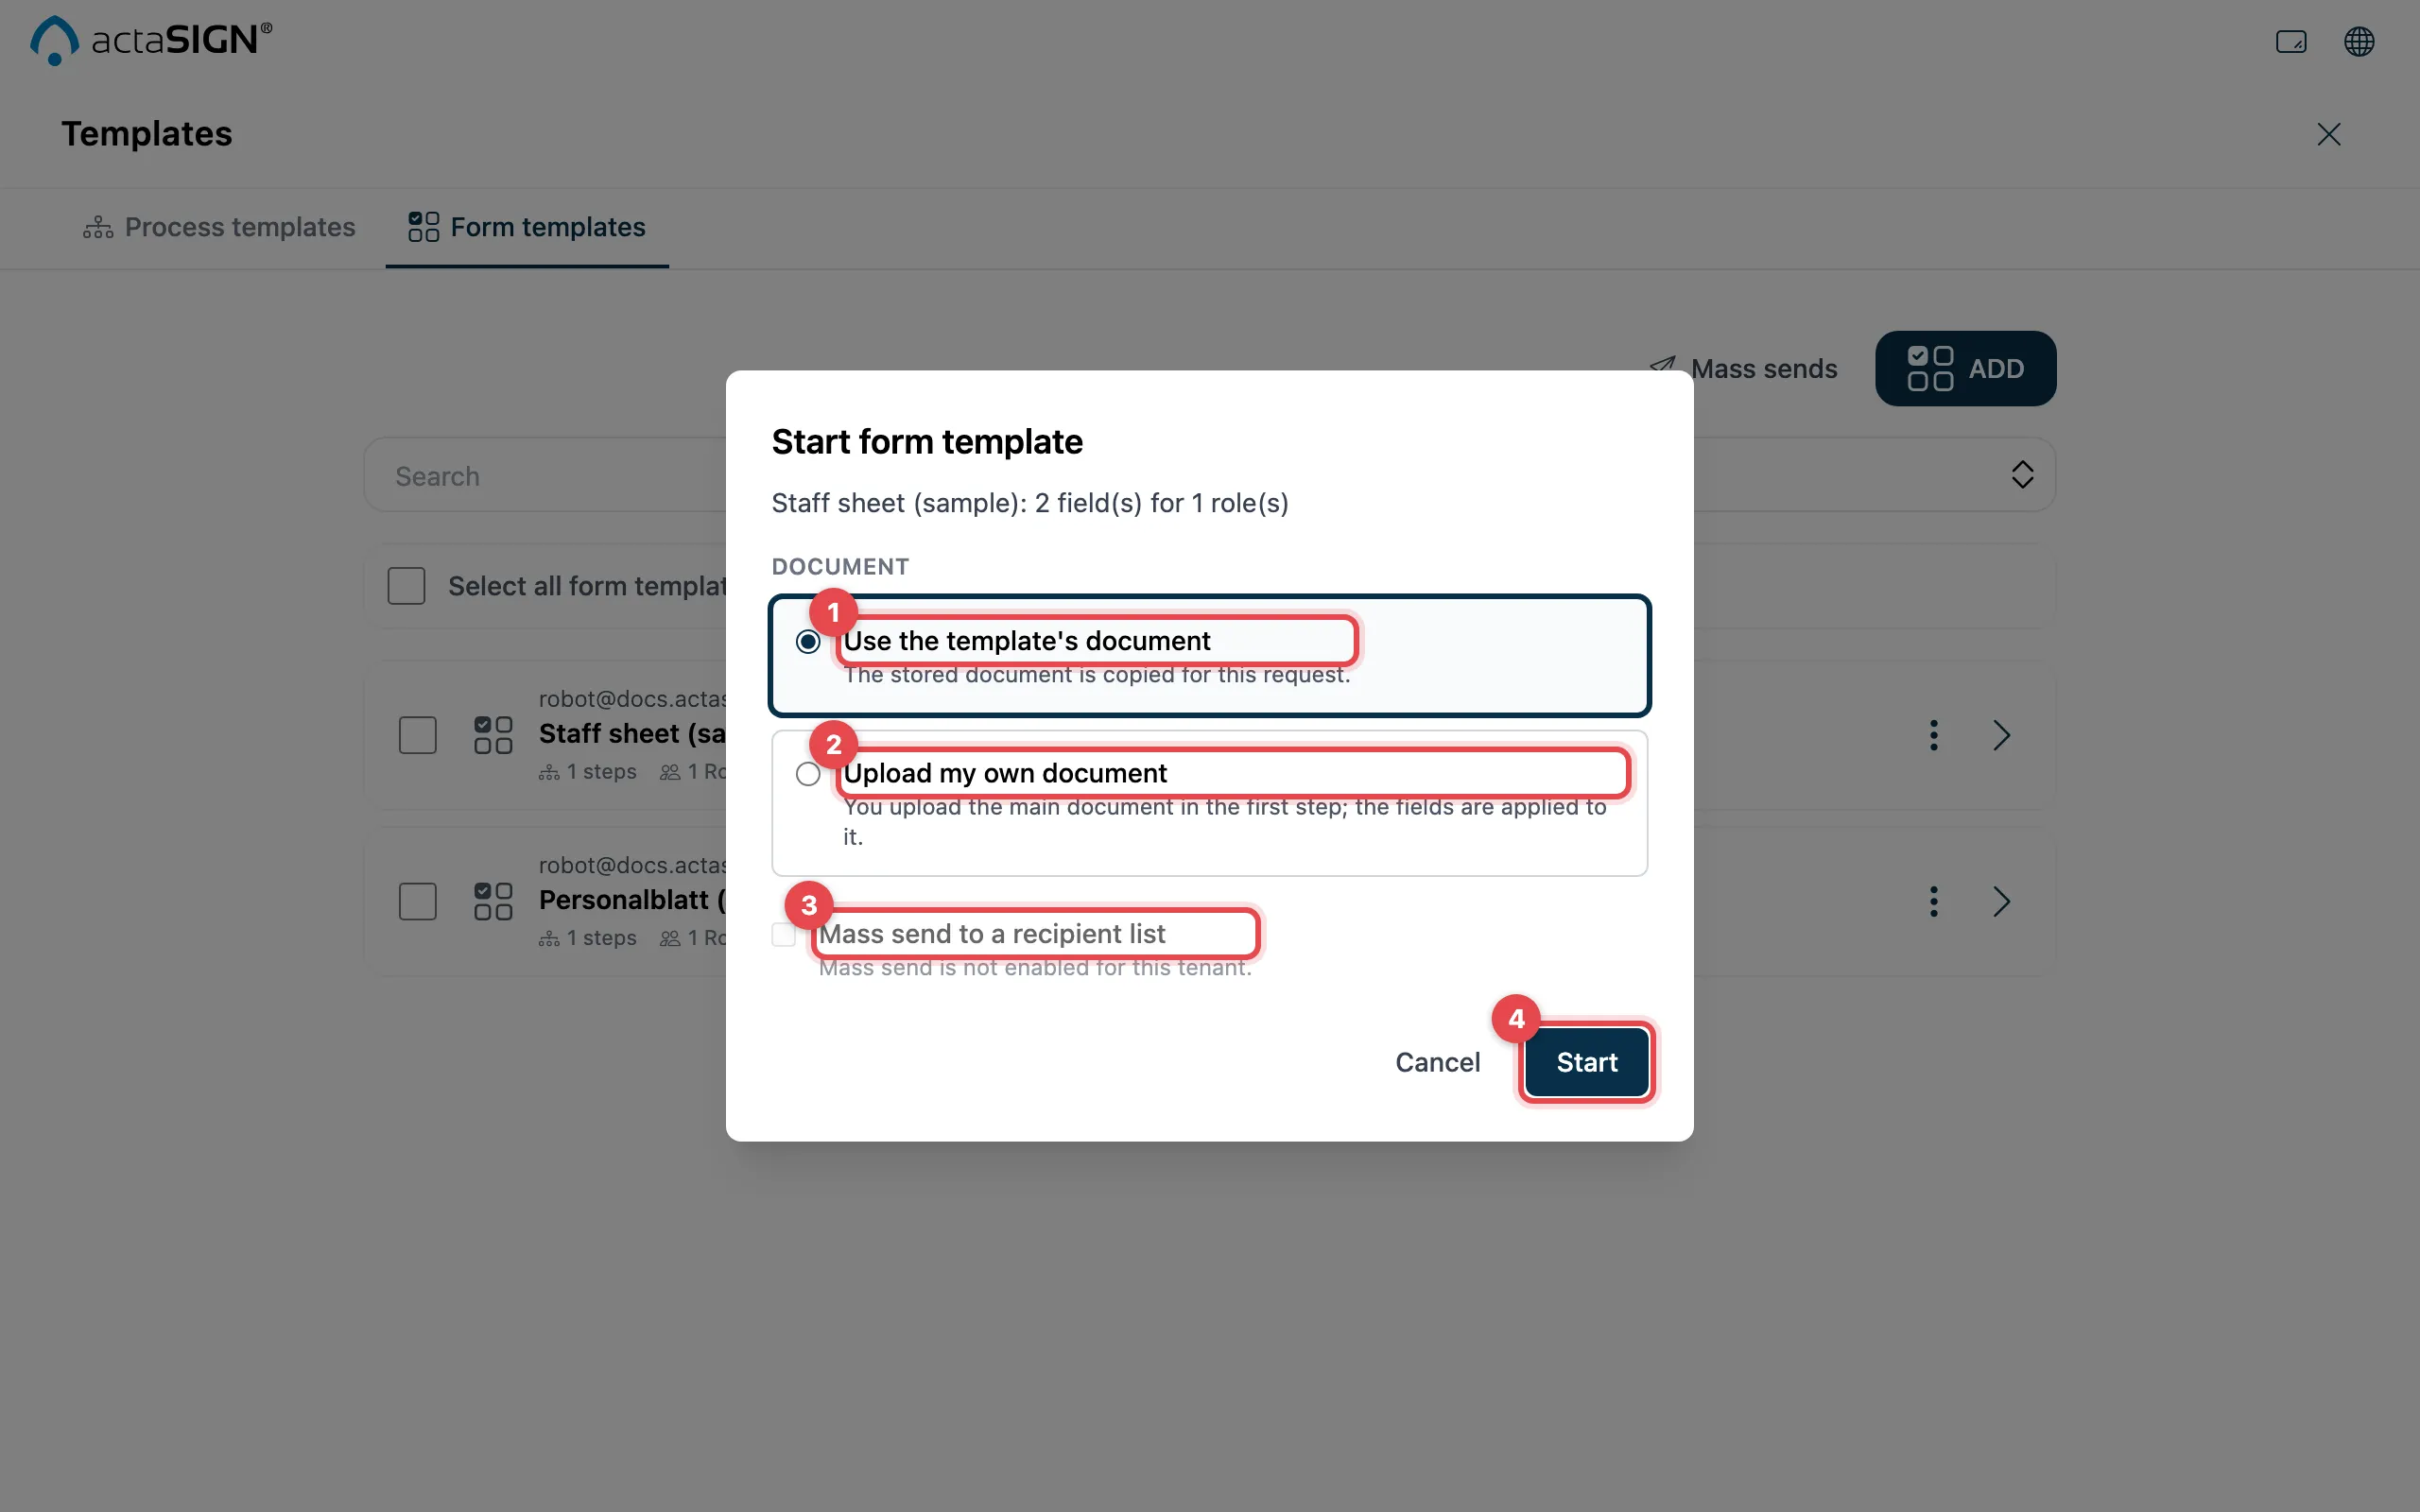
- Use the template’s document: the stored document is copied for this request.
- Upload my own document: you upload the document in the first step; the fields are applied to it.
- Mass send to a recipient list: see Mass send. Unless your administrators have enabled it, the box is greyed out.
- Click Start.
If the template contains only fields and no document, there is no choice: you upload the document in the first step.
When creating a request
Section titled “When creating a request”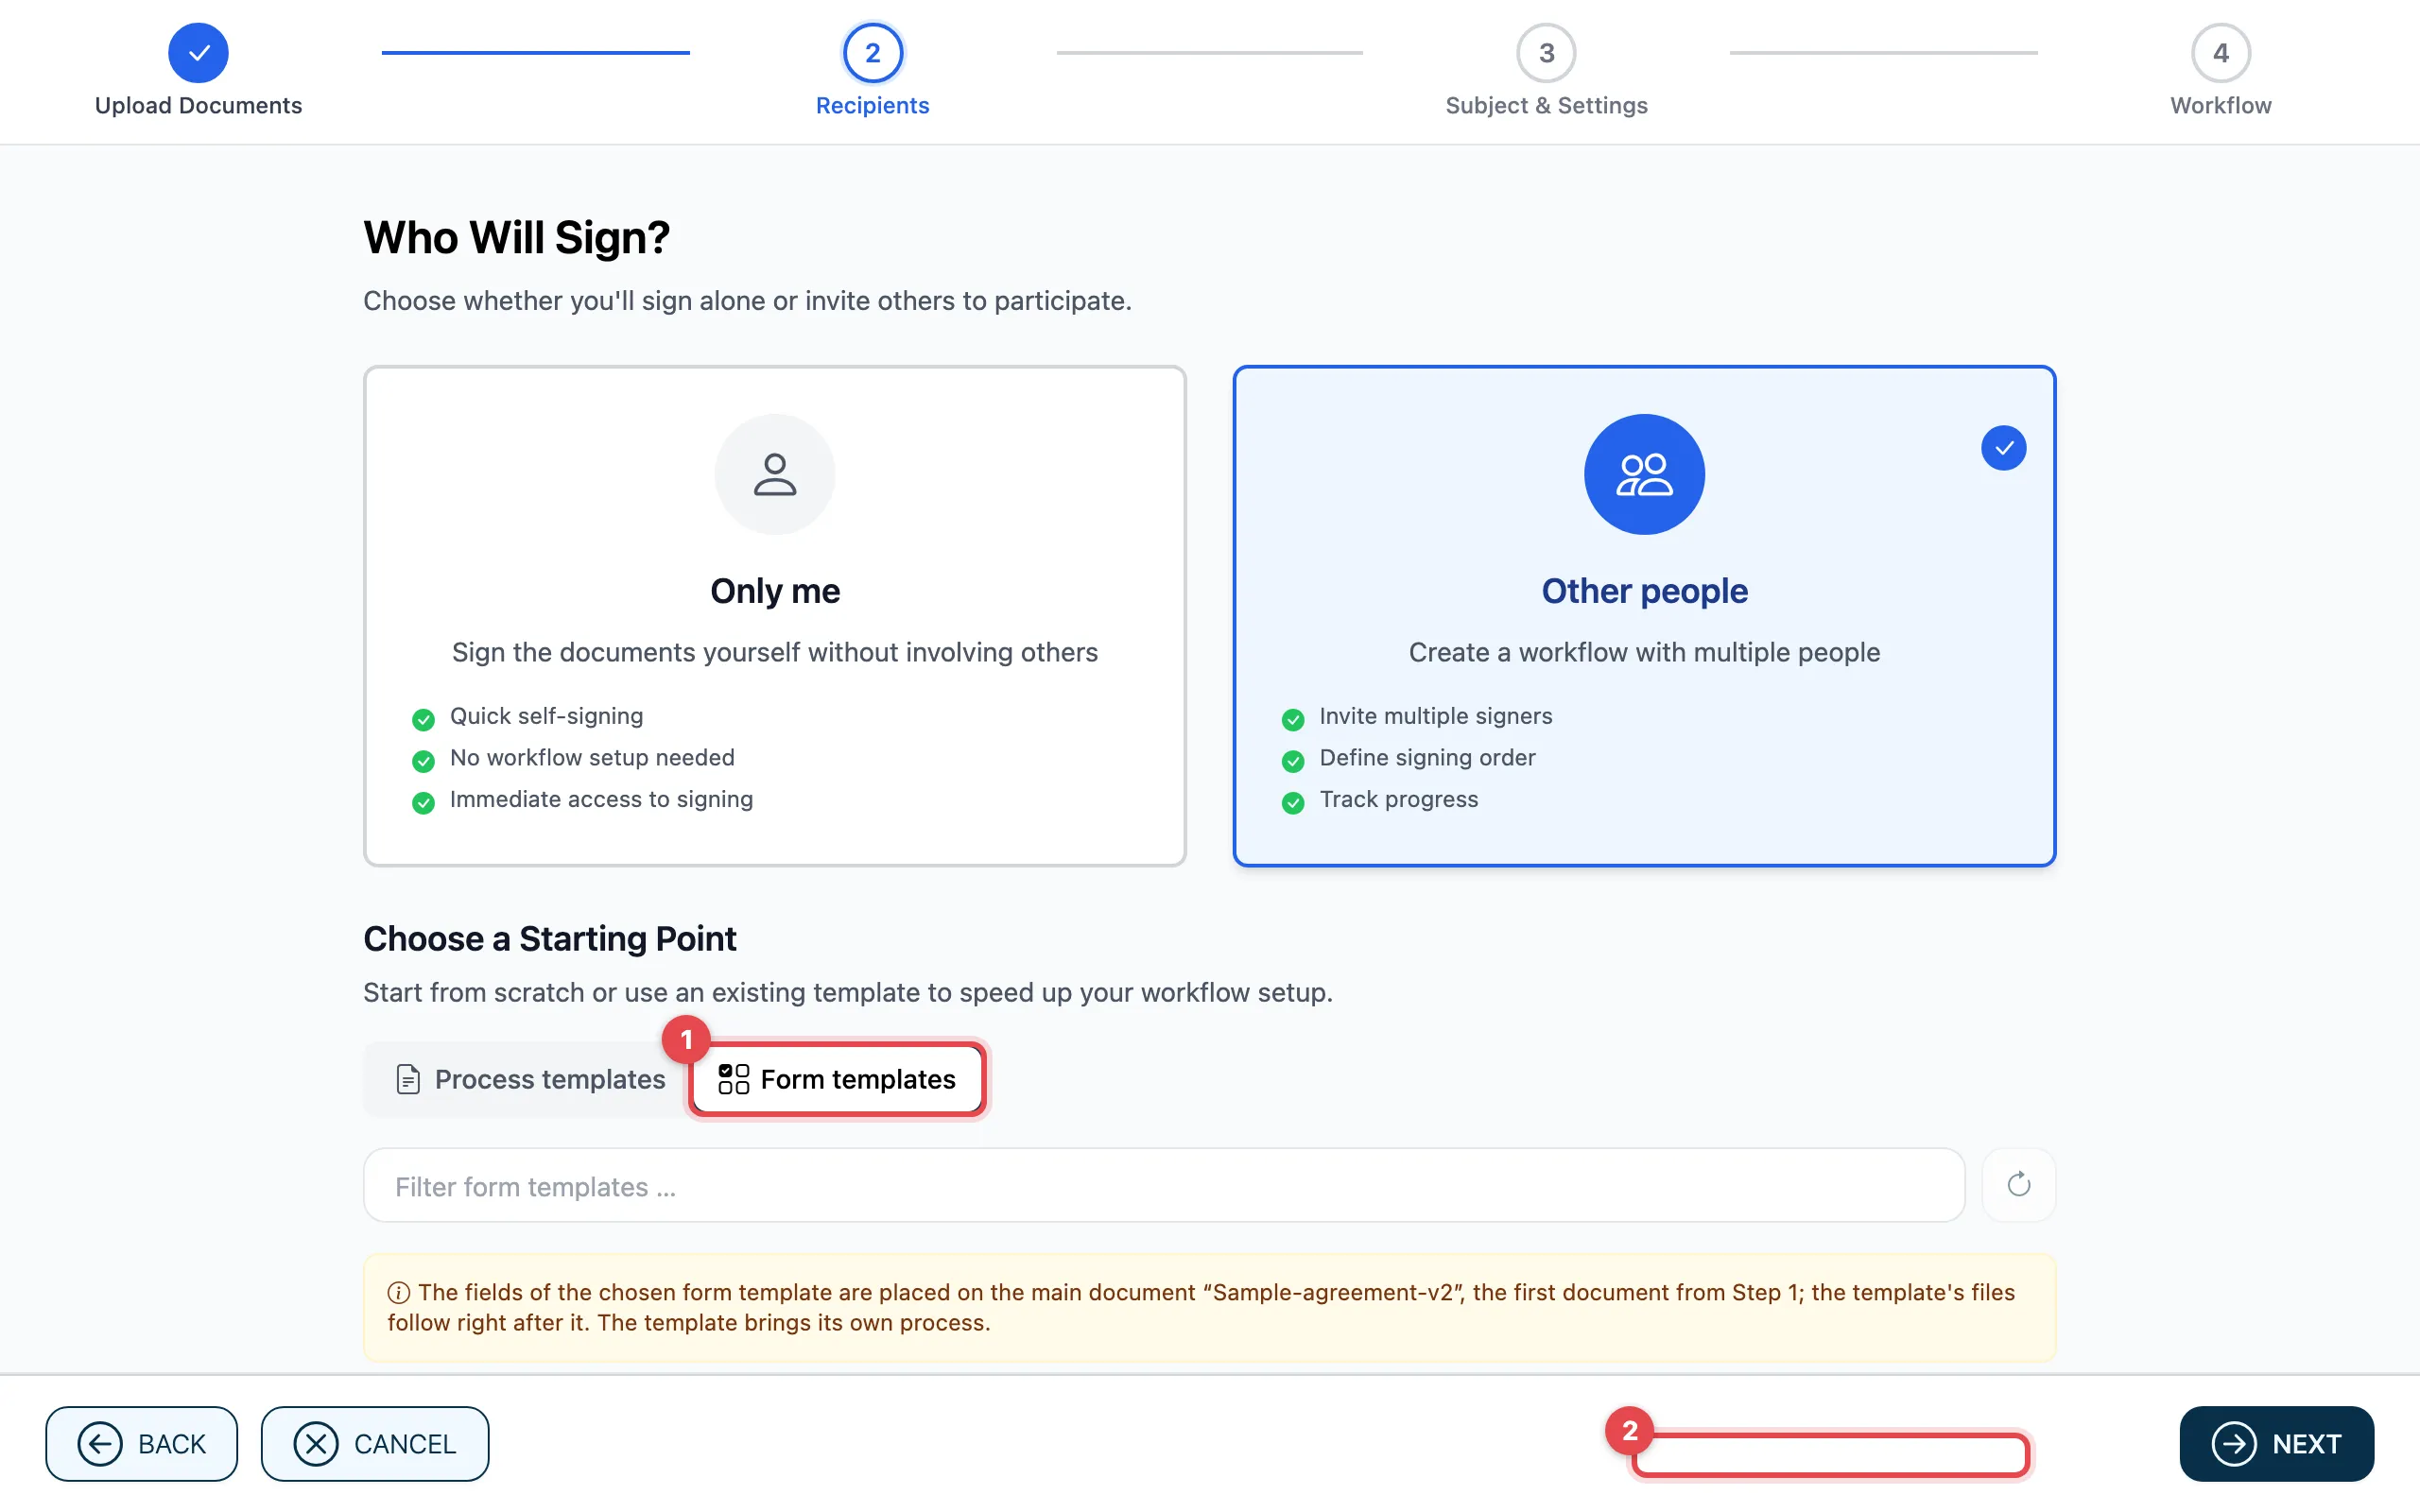
- First upload the document. In the Recipients step, choose Other people and then the Form templates tab.
- Click the template. The fields are placed on the first document from step 1.
Assign the roles
Section titled “Assign the roles”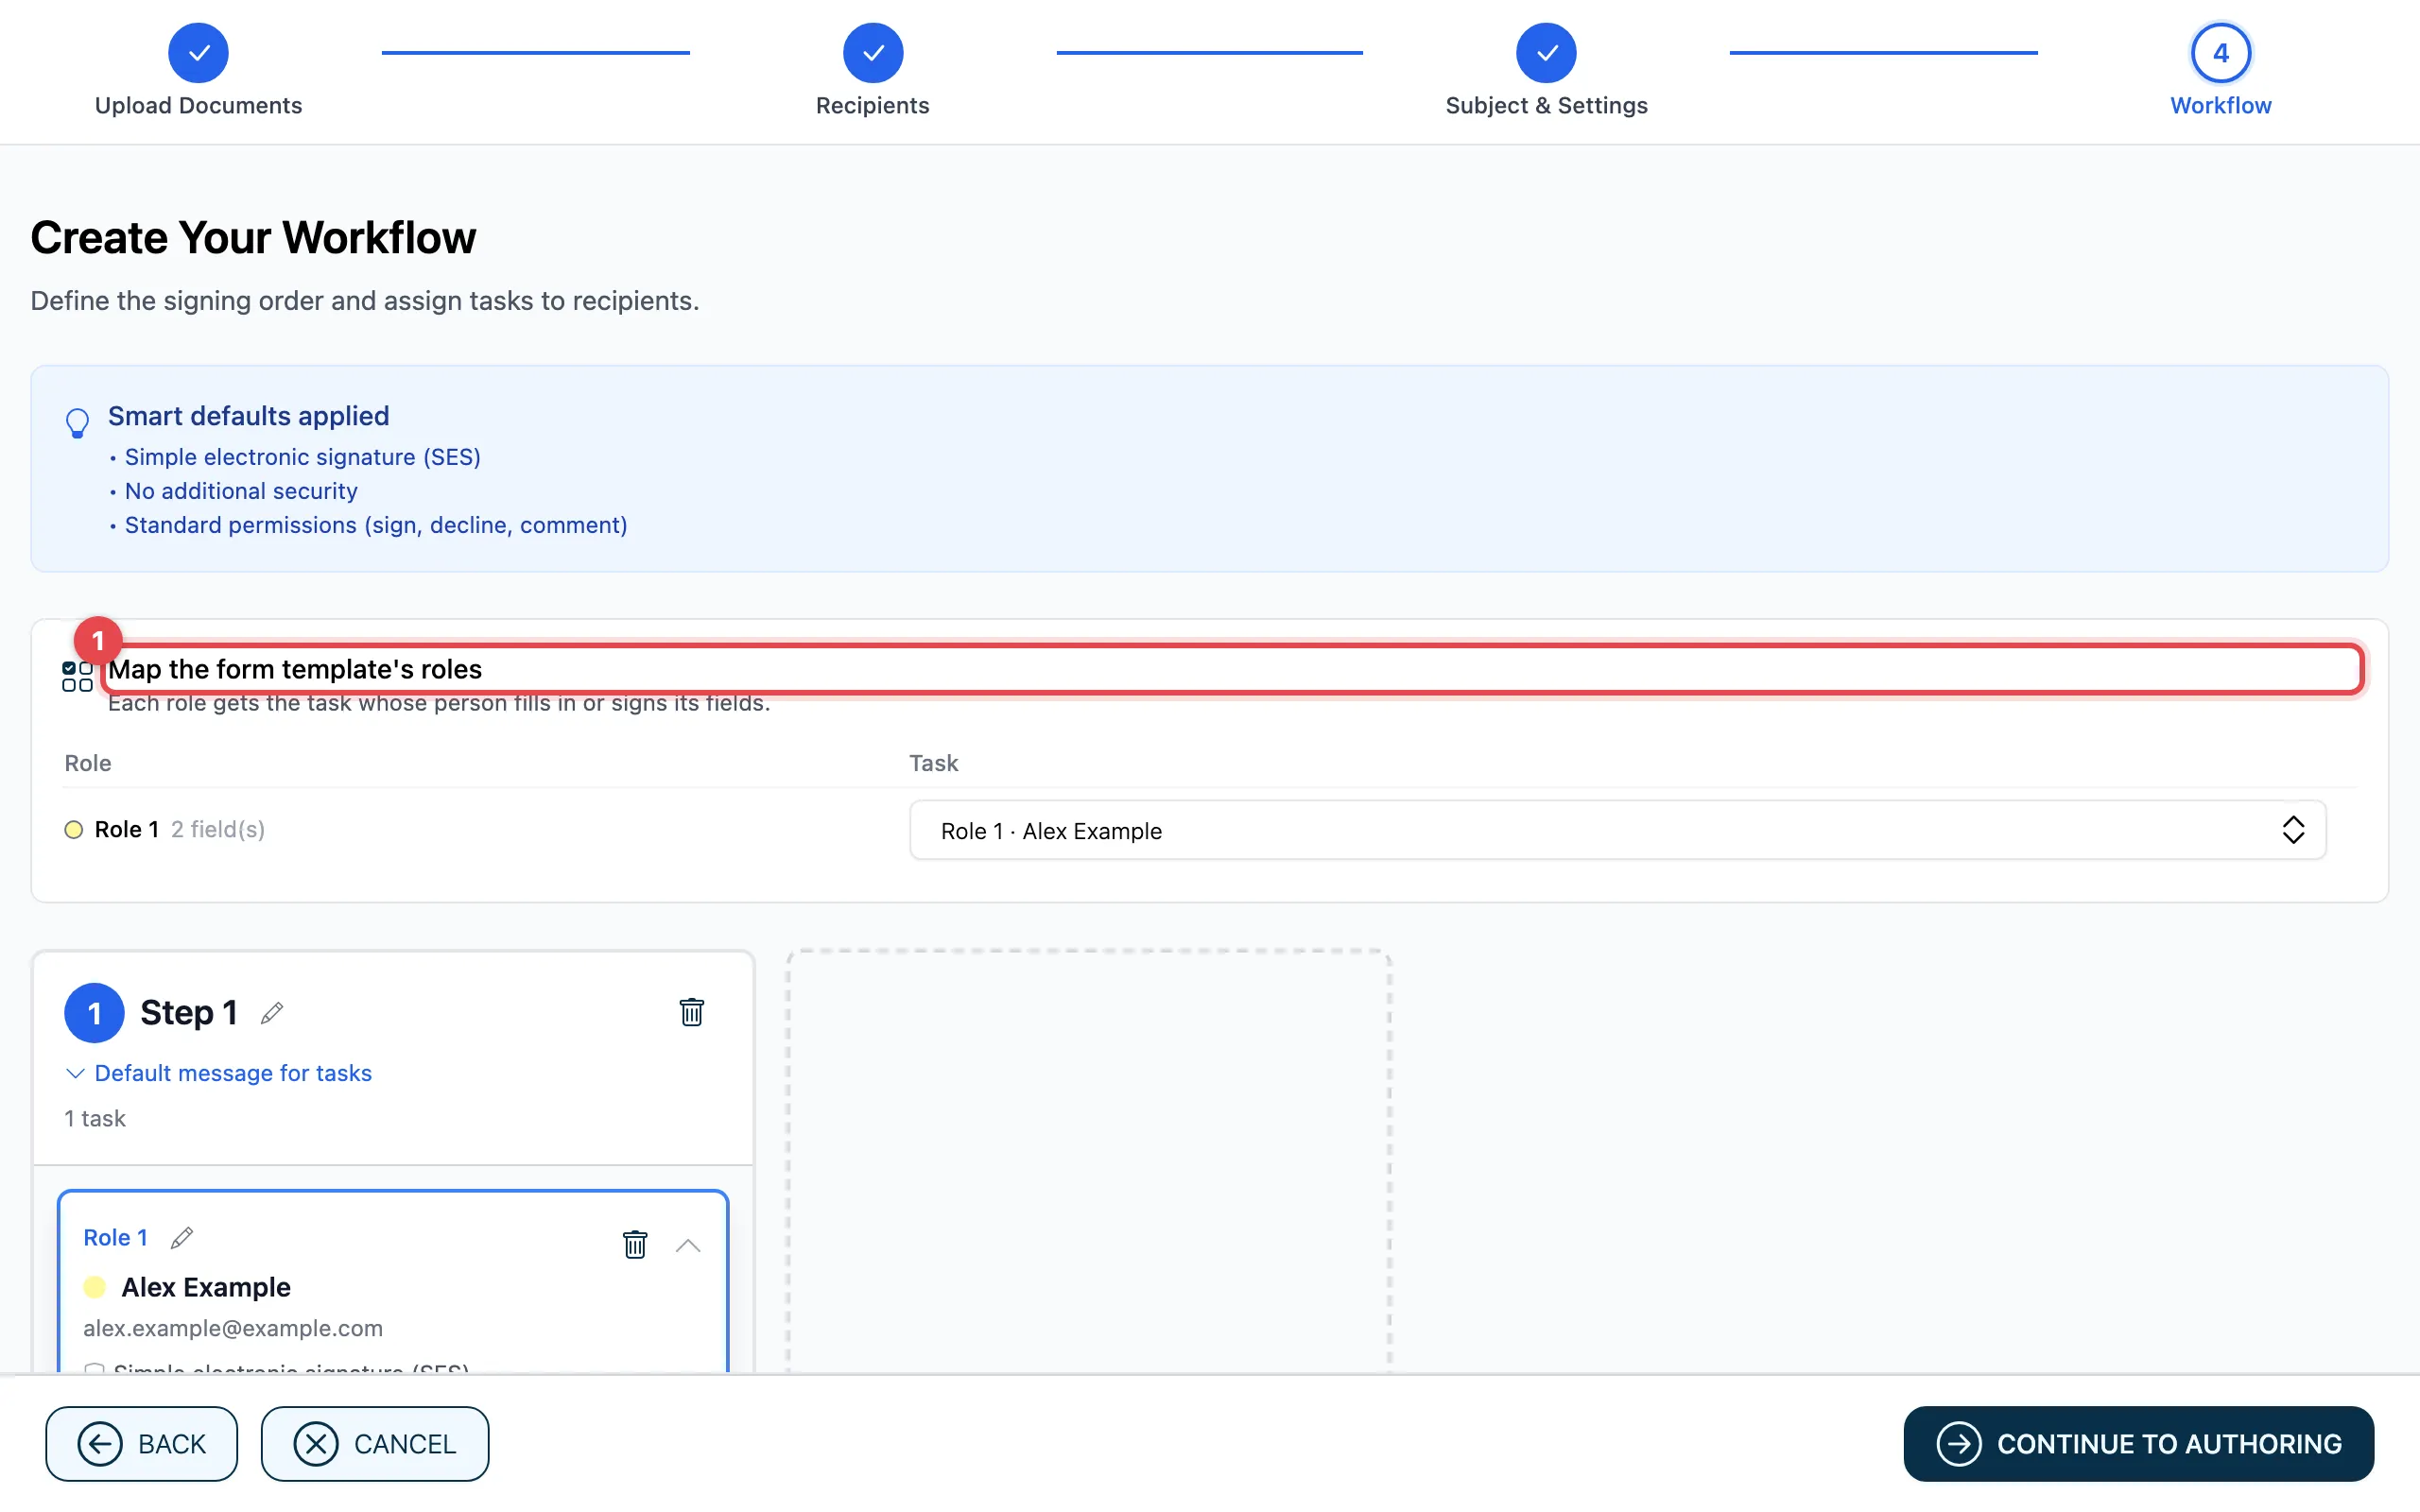
In the Workflow step you see Map the form template’s roles (1).
- For each task, enter the person (email address and name).
- Check in the table which Role belongs to which Task. With Not mapped you leave a role without fields.
- If the role’s person and the task’s person differ, use Use the role’s person to take over the person from the template.
- Click Continue to Authoring. There you see the fields, change them if needed and send the request.
Good to know
Section titled “Good to know”- Each role with fields needs a task, and two roles may not have the same task. Otherwise you cannot continue.
- With your own document, actaSIGN shows how many fields it could align with the text. If it could not place some fields, move them to their place by hand while authoring.
- If the template has further documents or enclosures, they come along.