

Manage members
Under Members you see all people in your organization. You can edit their actaSIGN profiles, give them rights and release Studio for them ahead of everyone else.
Find members
Section titled “Find members”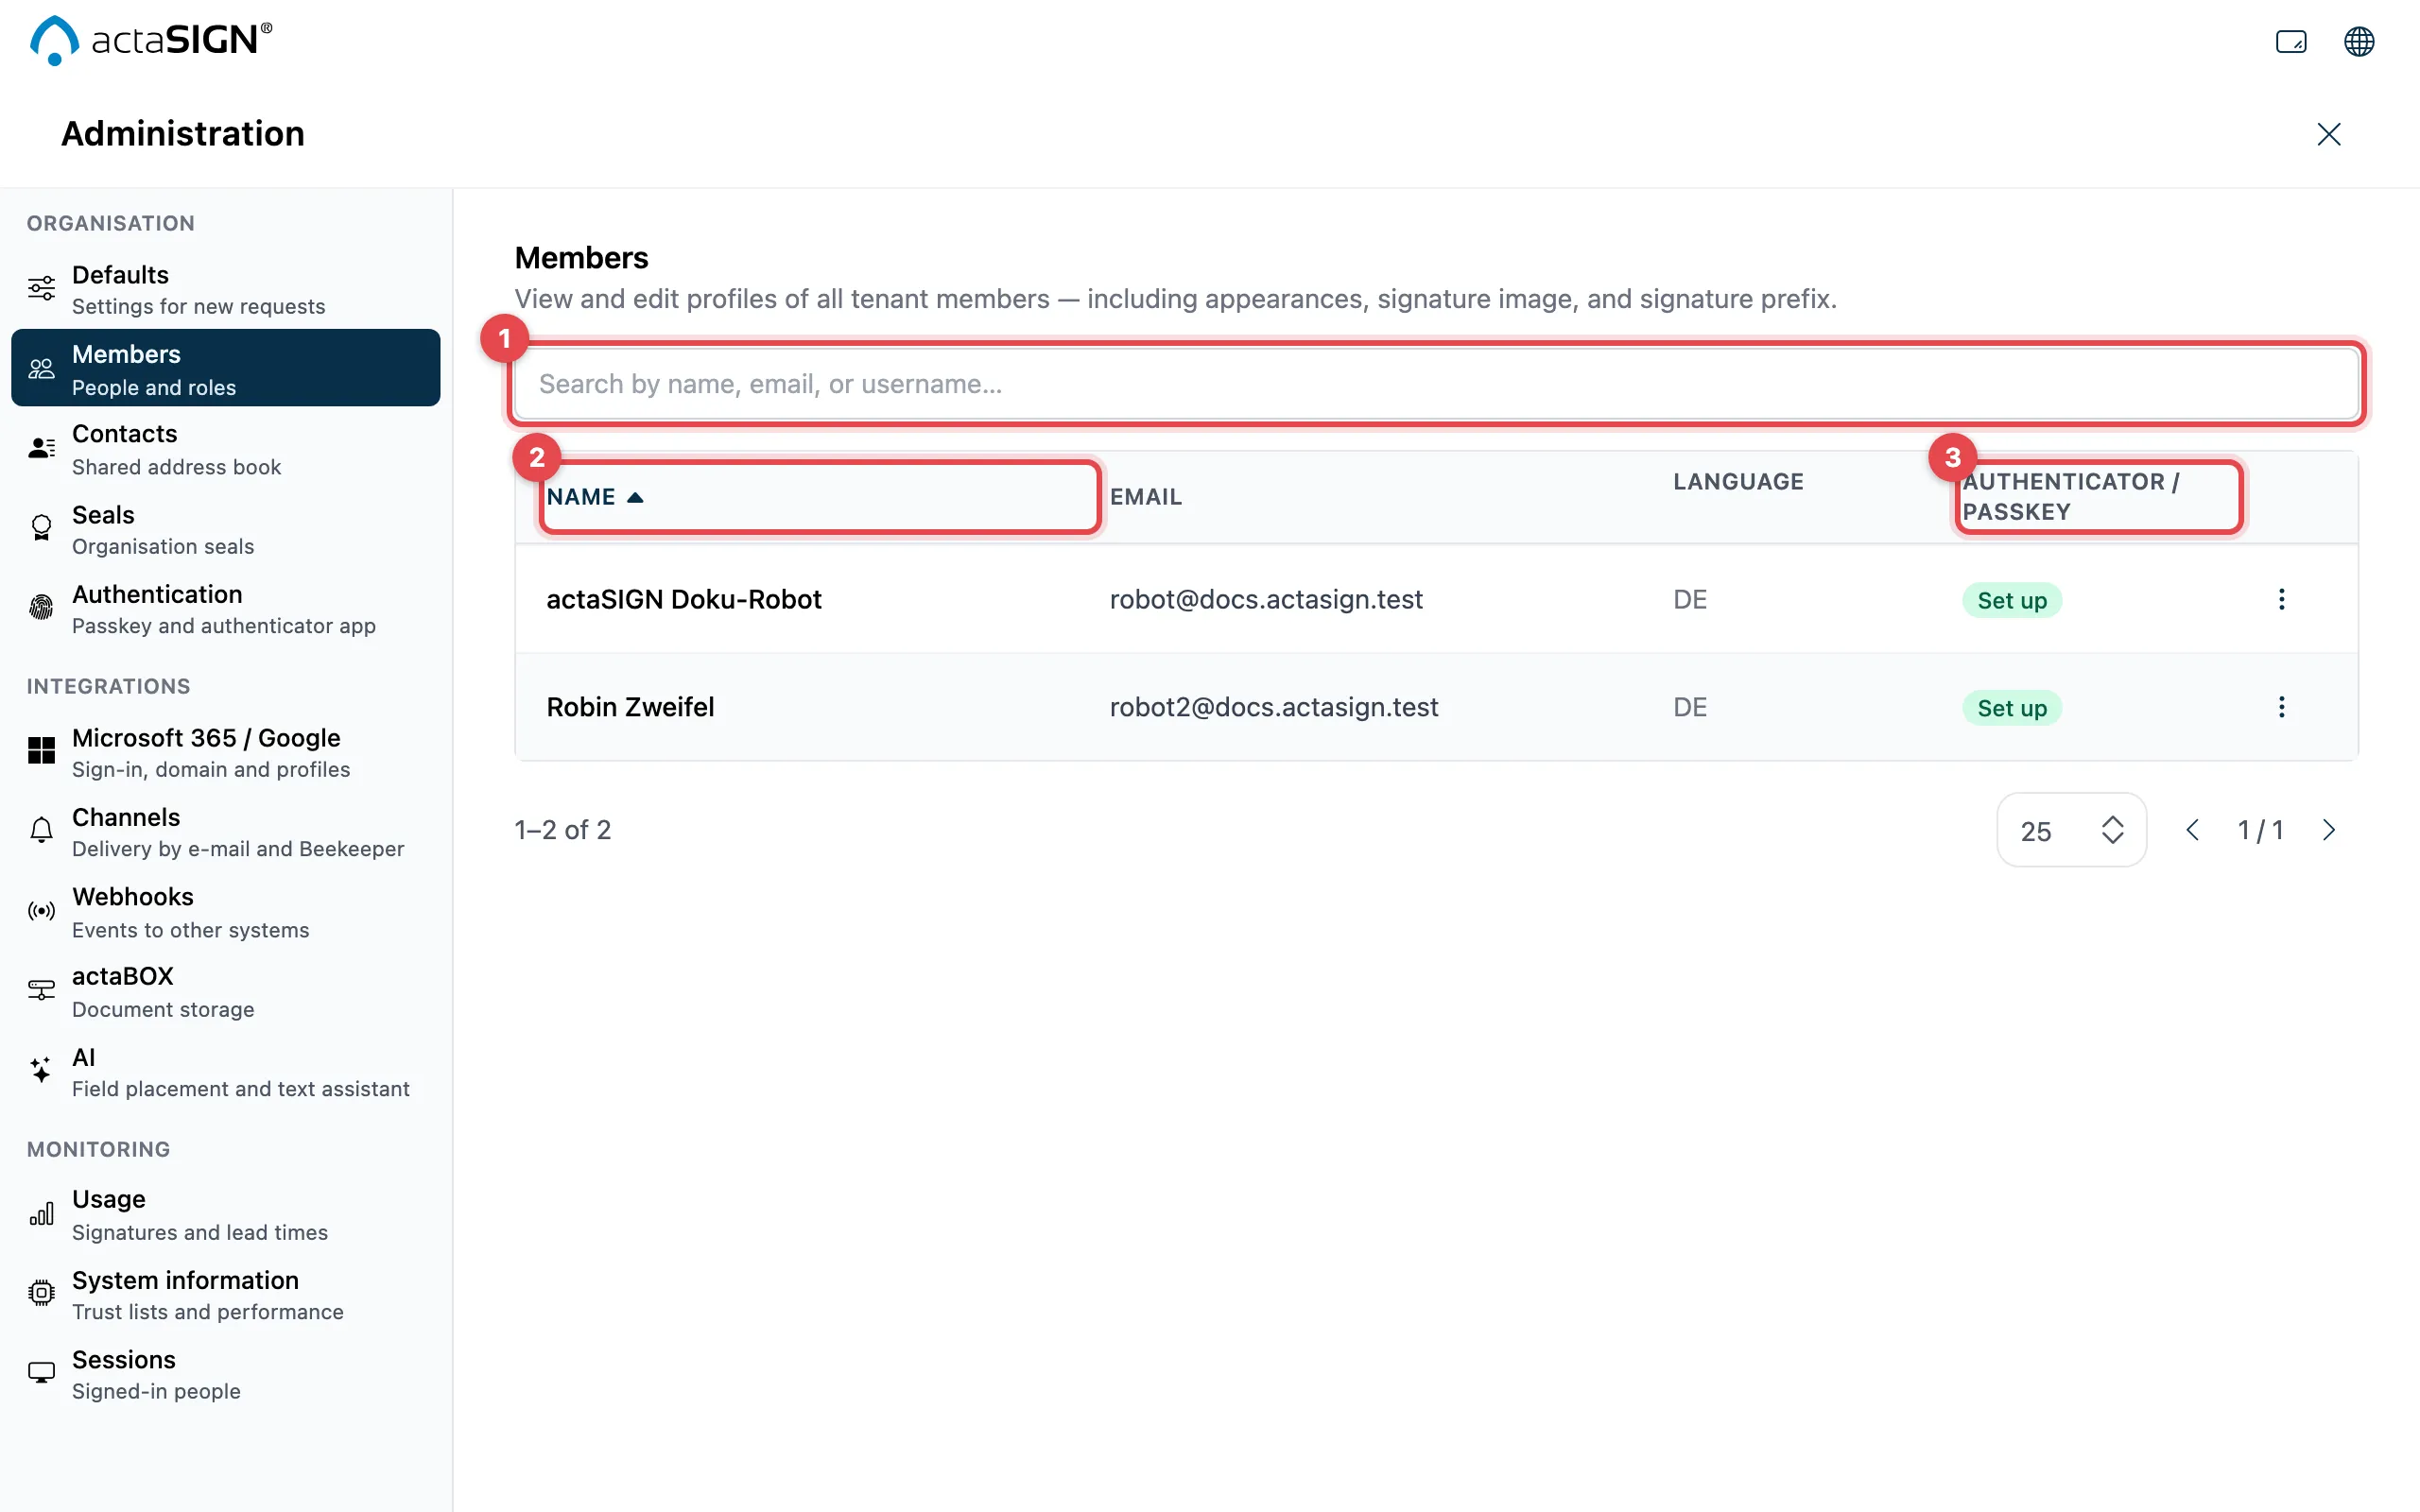
- Search in the Search by name, email, or username… field.
- Click the Name or Email column header to sort by it. A second click reverses the order.
- The Authenticator / Passkey column shows Set up or Not set up.
Small icons after the name show whether the person May send strong-authentication invitations and whether Studio released applies.
Actions for a member
Section titled “Actions for a member”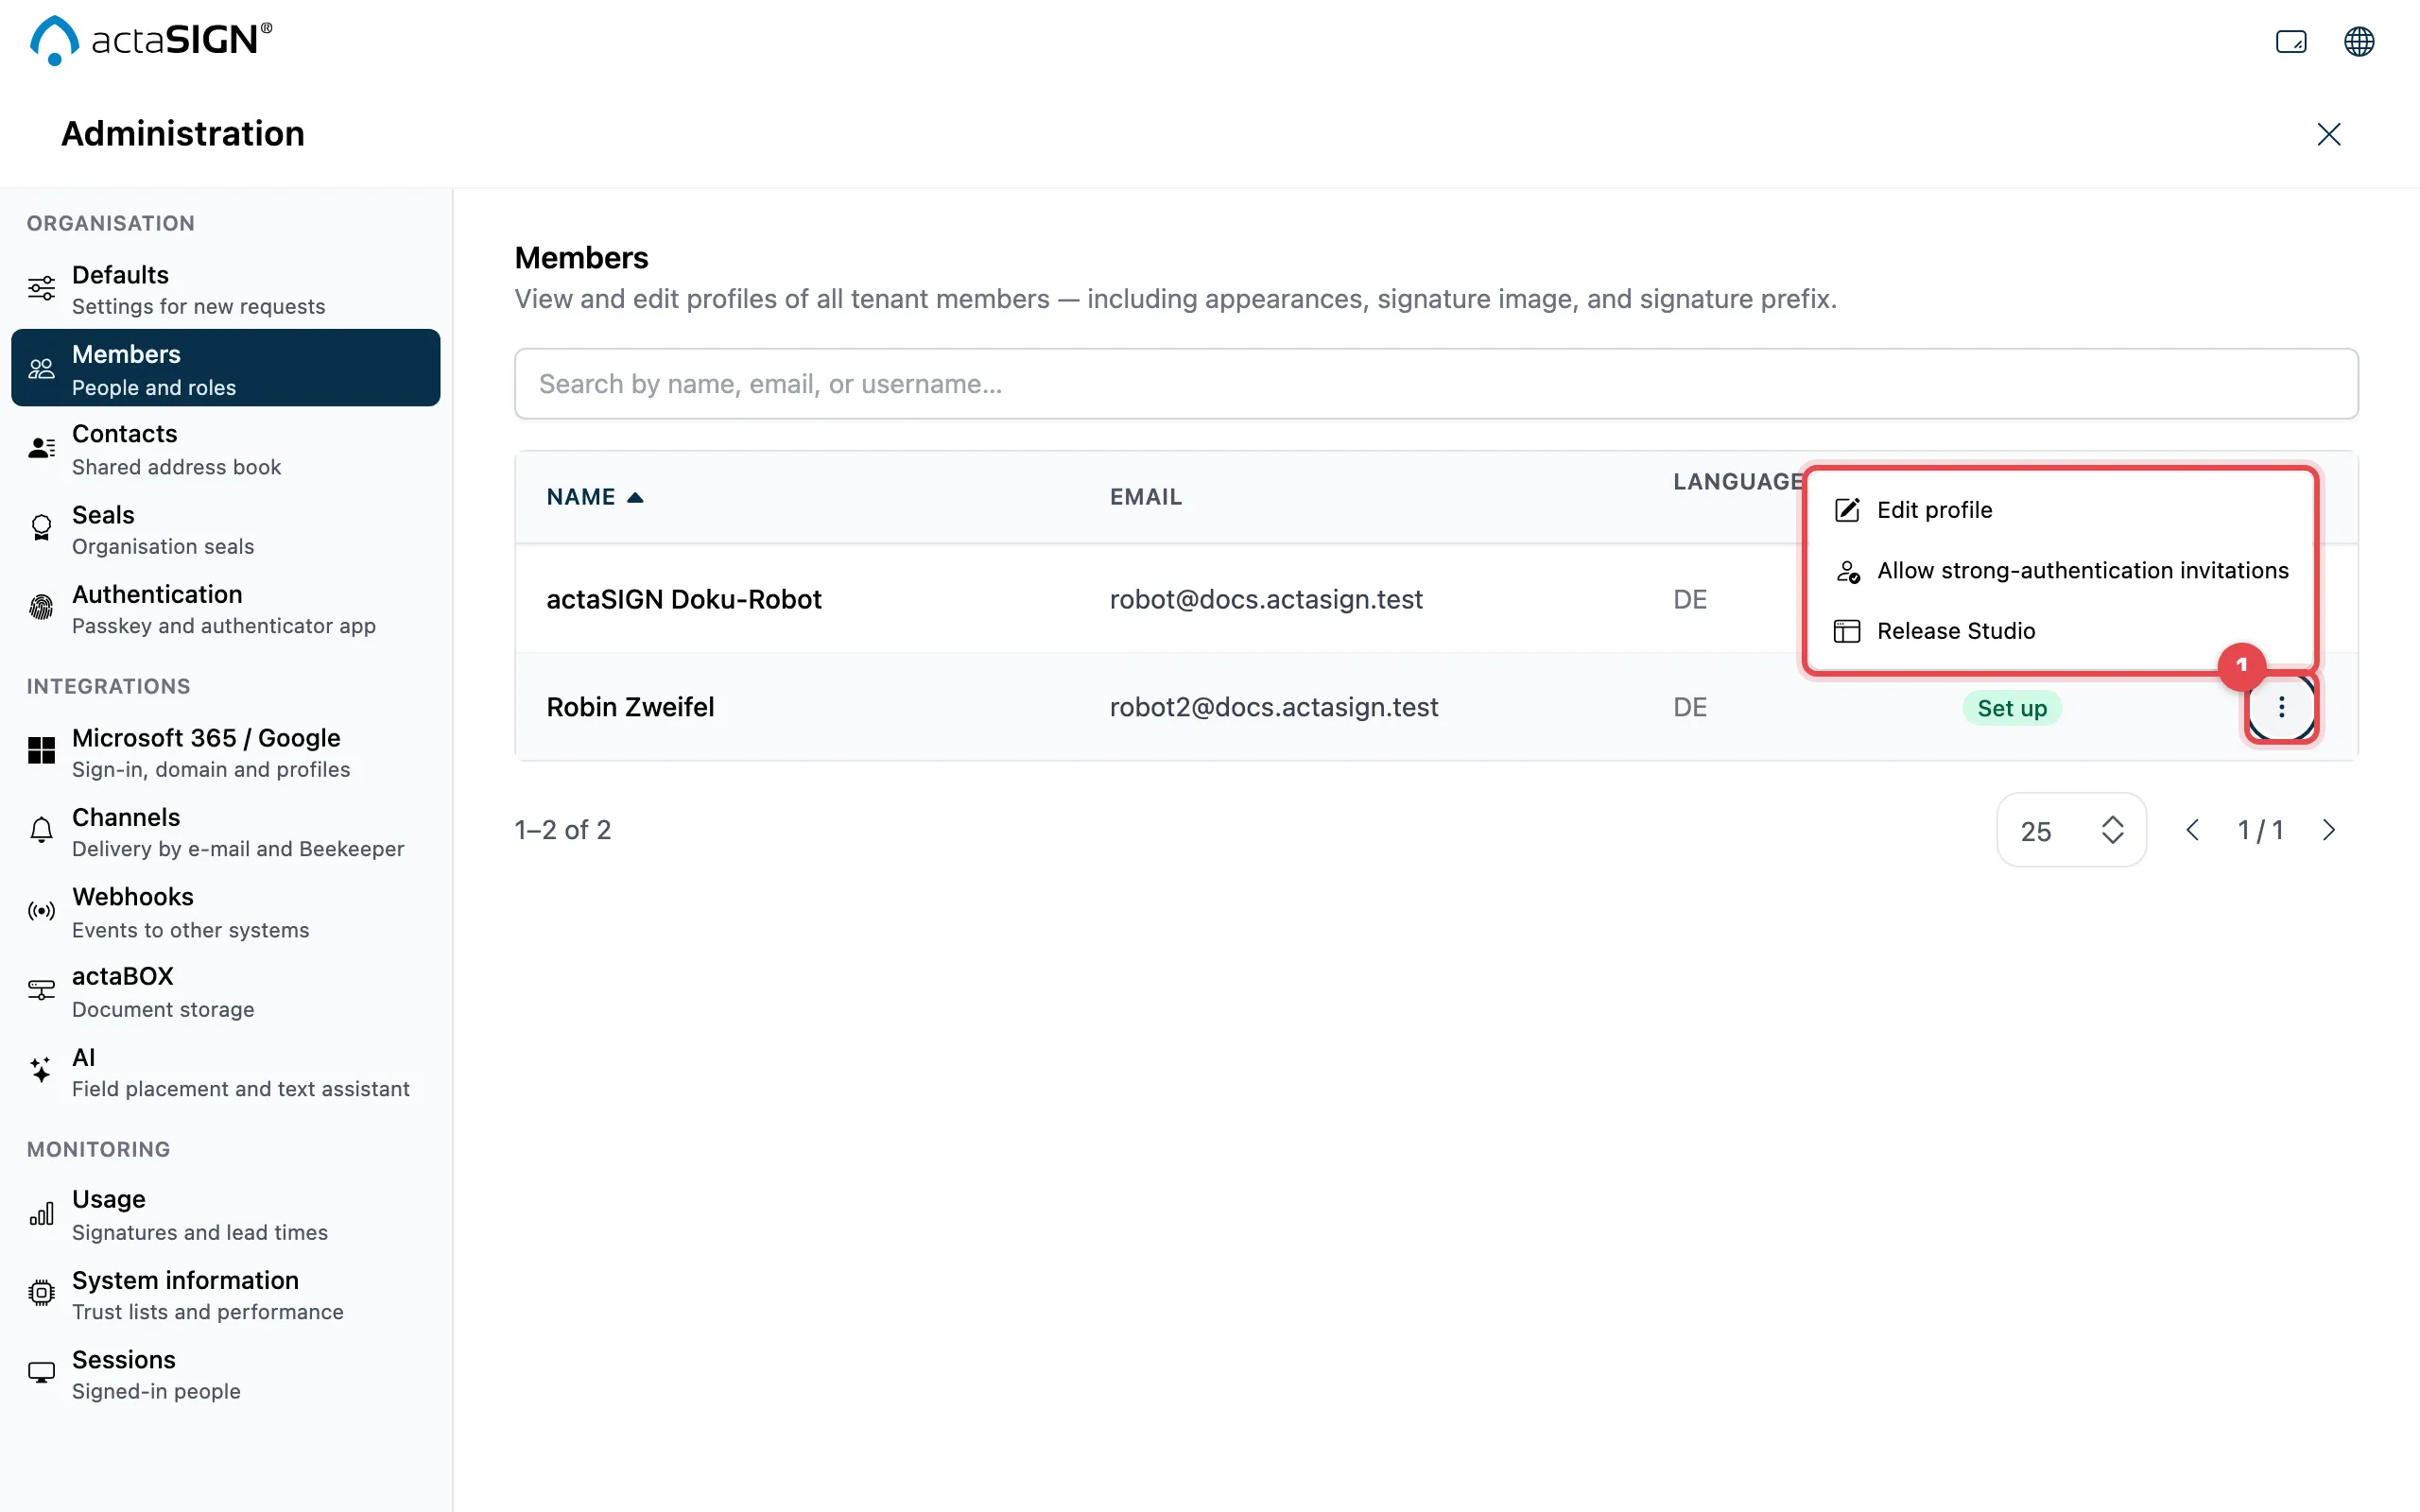
Click ⋮ at the end of the row (1):
| Action | What it does |
|---|---|
| Edit profile | Opens the person’s actaSIGN profile: name, appearances, signature image and signature addition. Admin edit is shown at the top. |
| Send setup invitation | Sends the person an e-mail to set up an authenticator app or a passkey. Only visible as long as they have not done so. |
| Allow strong-authentication invitations | The person may send such invitations themselves. With Withdraw strong-authentication invitations you take this back. |
| Release Studio | The person works with Studio from now on. With Withdraw Studio release you take this back. |
The actions take effect right away; a message above the list confirms them.
Studio for individual people
Section titled “Studio for individual people”With Release Studio, individual people can test the new document screen before you switch it on for everyone. If Studio is switched on for everyone under Defaults, this action is missing and each row shows Studio is on for the whole tenant.
Good to know
Section titled “Good to know”- If a person has no actaSIGN profile yet, you see No profile yet — opening will initialise one. With Edit profile you create it.
- People with the right to send invitations see only the Authentication area in the administration, with their own invitations.