

Send from a shared address
With Send as … a member can send requests not only from their own address, but also from a shared address, for example the HR department’s. Recipients then see the name of this address, and replies go to it.
Give a member a sender
Section titled “Give a member a sender”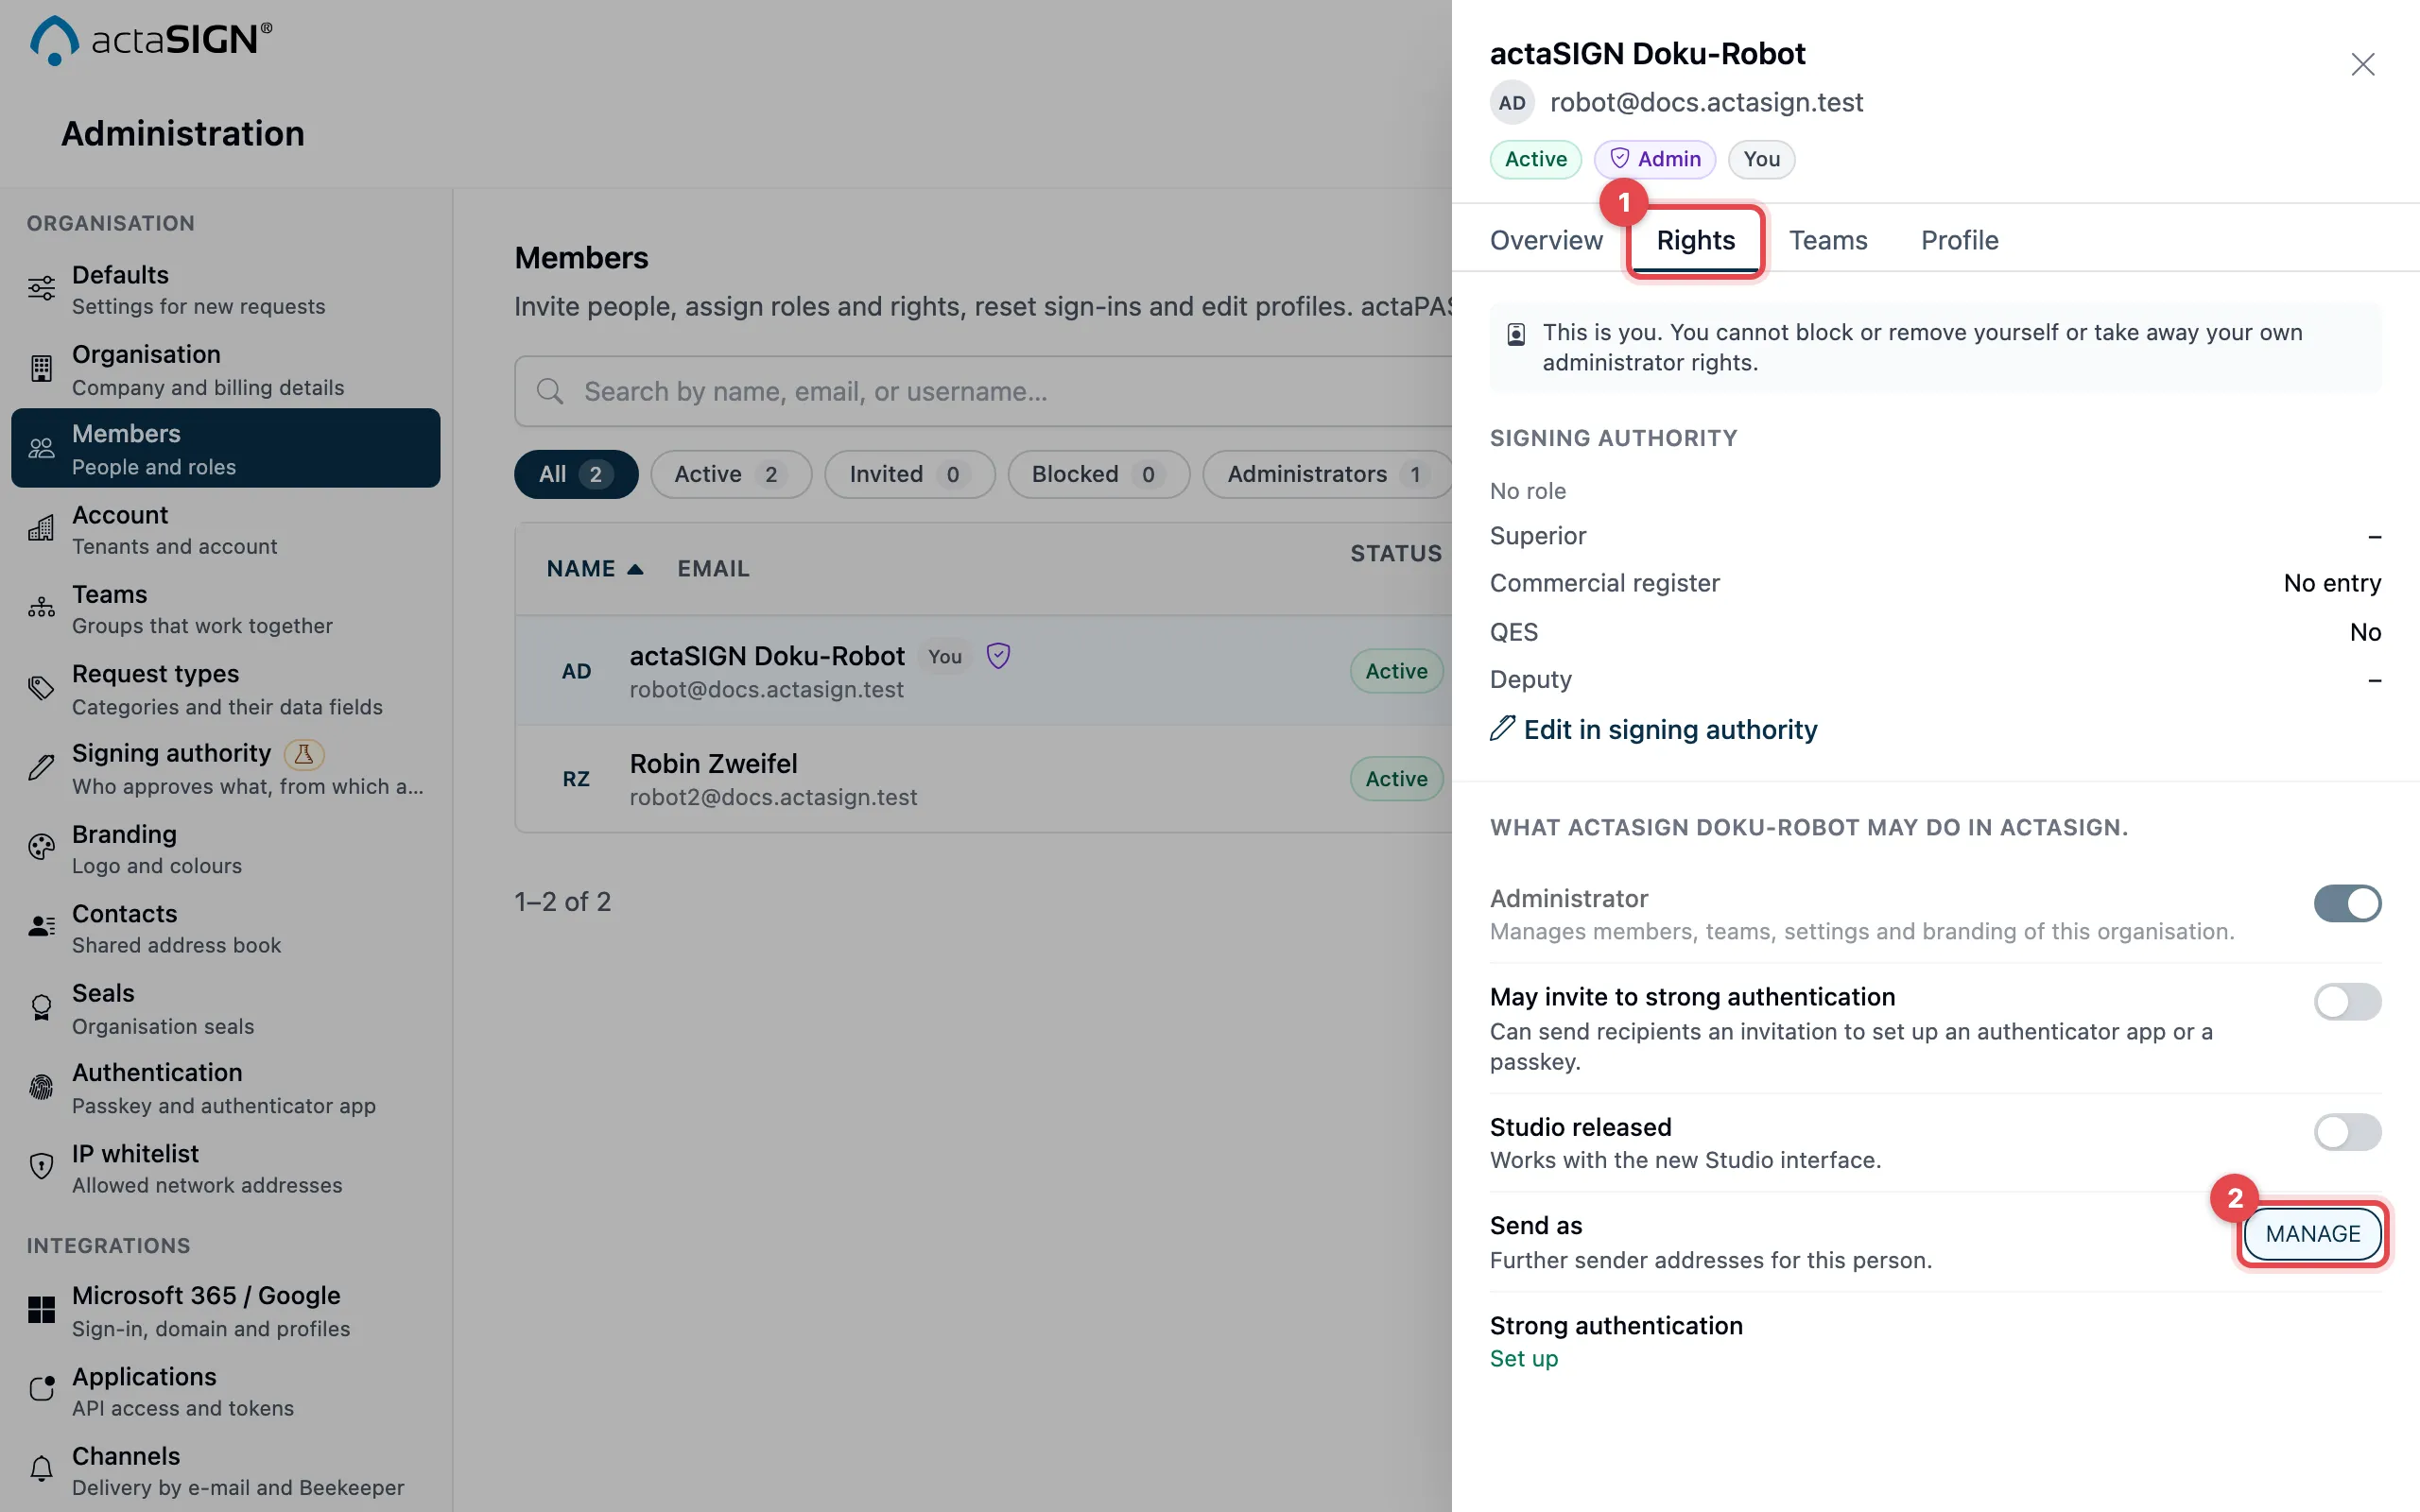
Click the member’s name. In the side panel, open the Rights tab (1) and click Manage next to Send as (2).
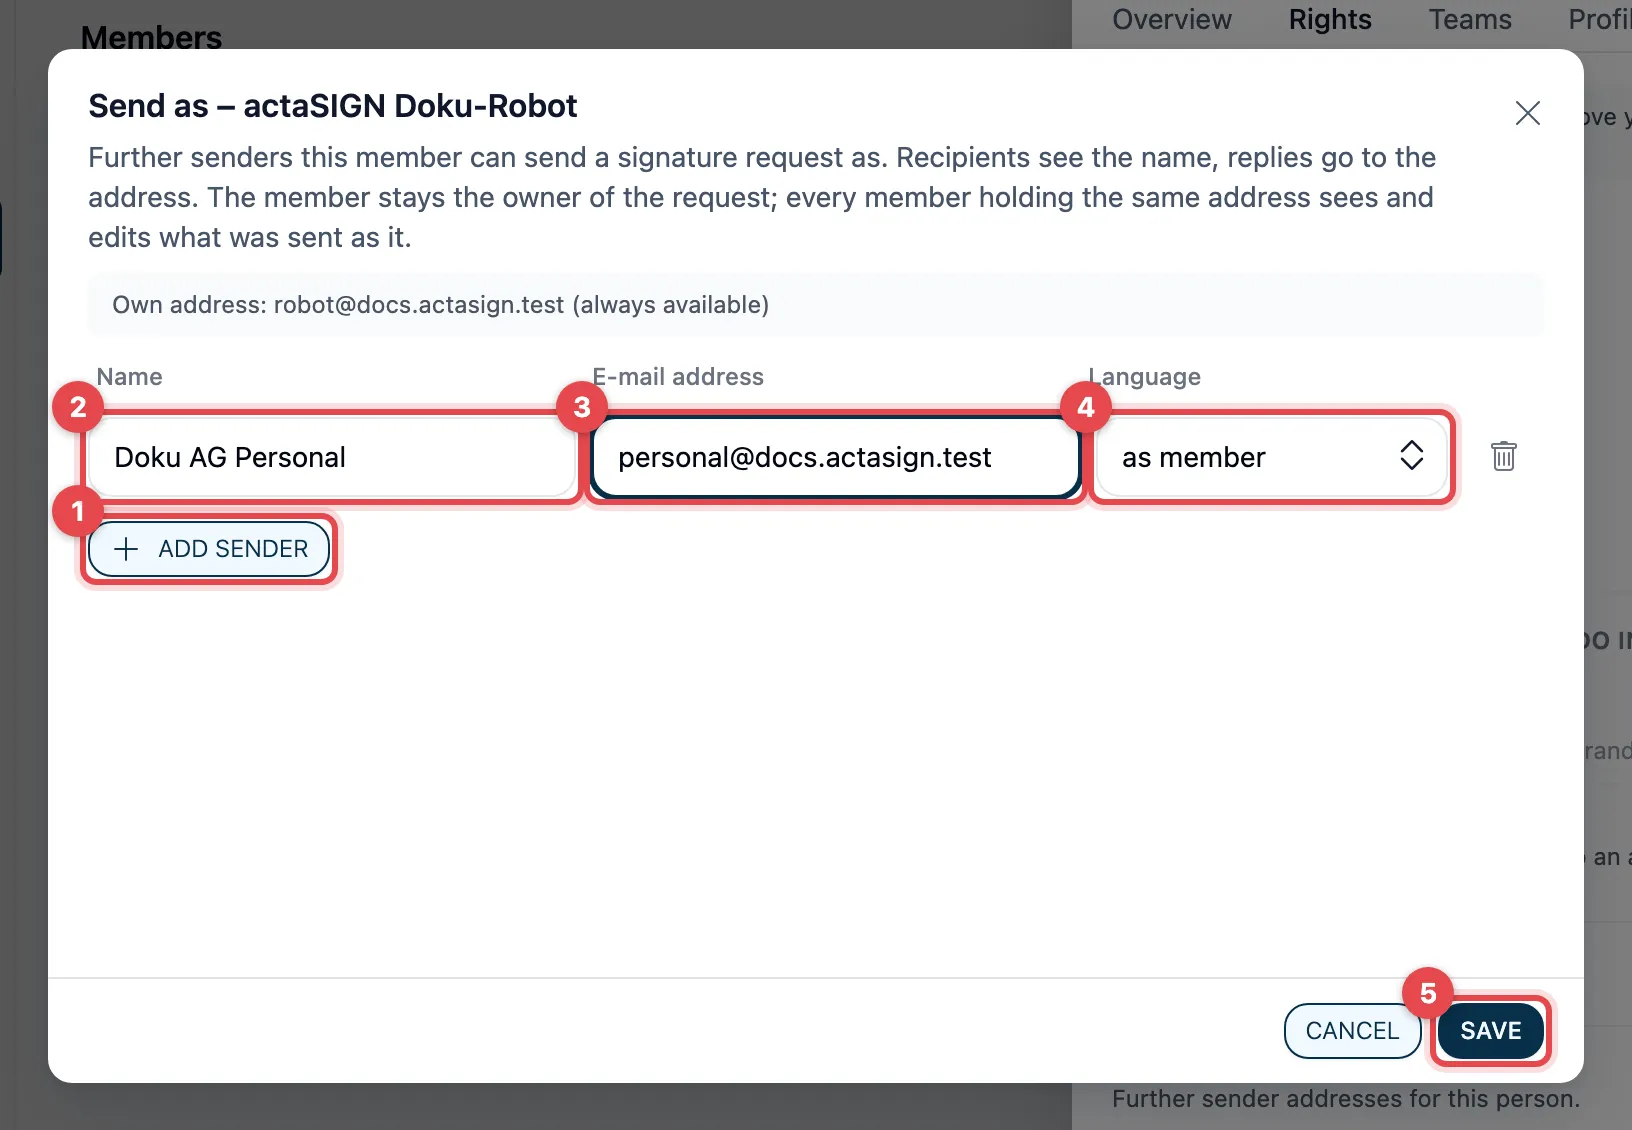
- Click Add sender. The member’s own address is shown at the top of the dialog; it is always available.
- Name: the name recipients see as the sender, for example “Rigora HR”.
- E-mail address: the shared address, for example
hr@rigora.ch. Replies from recipients and the notifications to the sender go to this address. - Language: the language of the notifications to this address. With as member, the member’s language applies.
- Click Save.
With the trash can icon (Remove) you take a sender away again. A member can have up to 20 further senders.
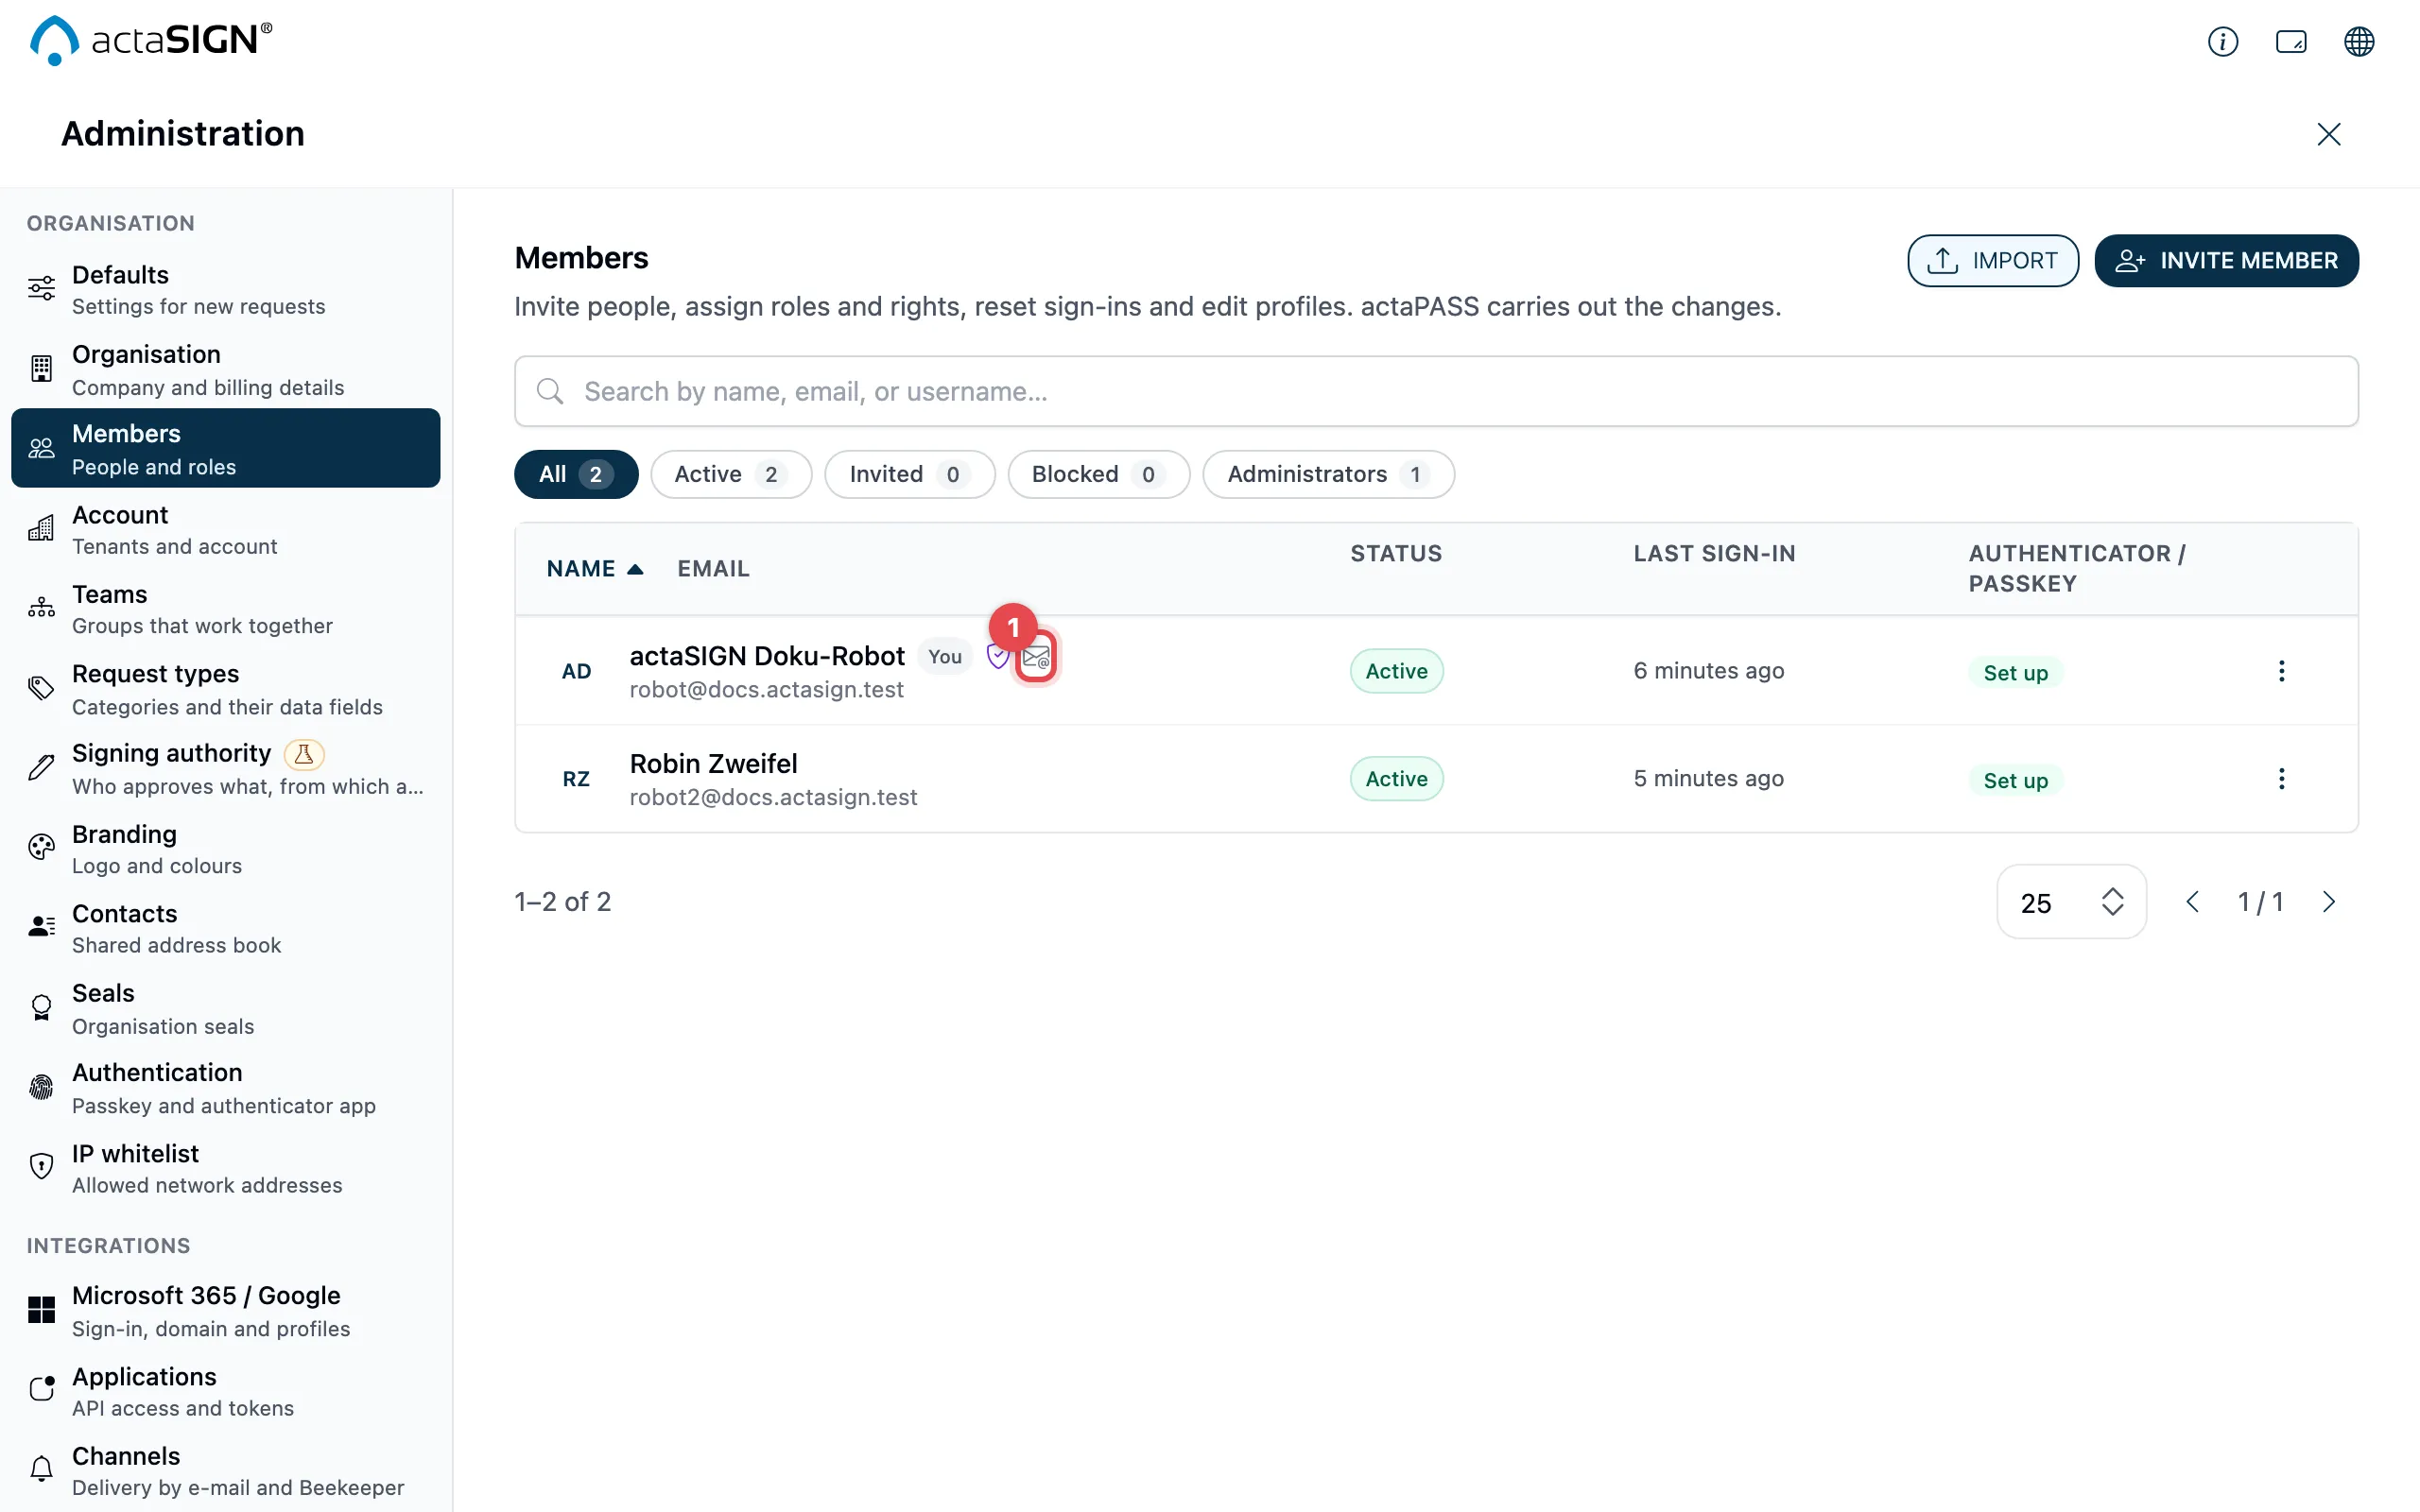
In the list of members, the name is followed by an envelope icon (1) if the person has further senders. Point at it with the mouse to see how many there are, for example “Send as: 1”. In the Rights tab, the number is shown in brackets after Send as.
What the member sees
Section titled “What the member sees”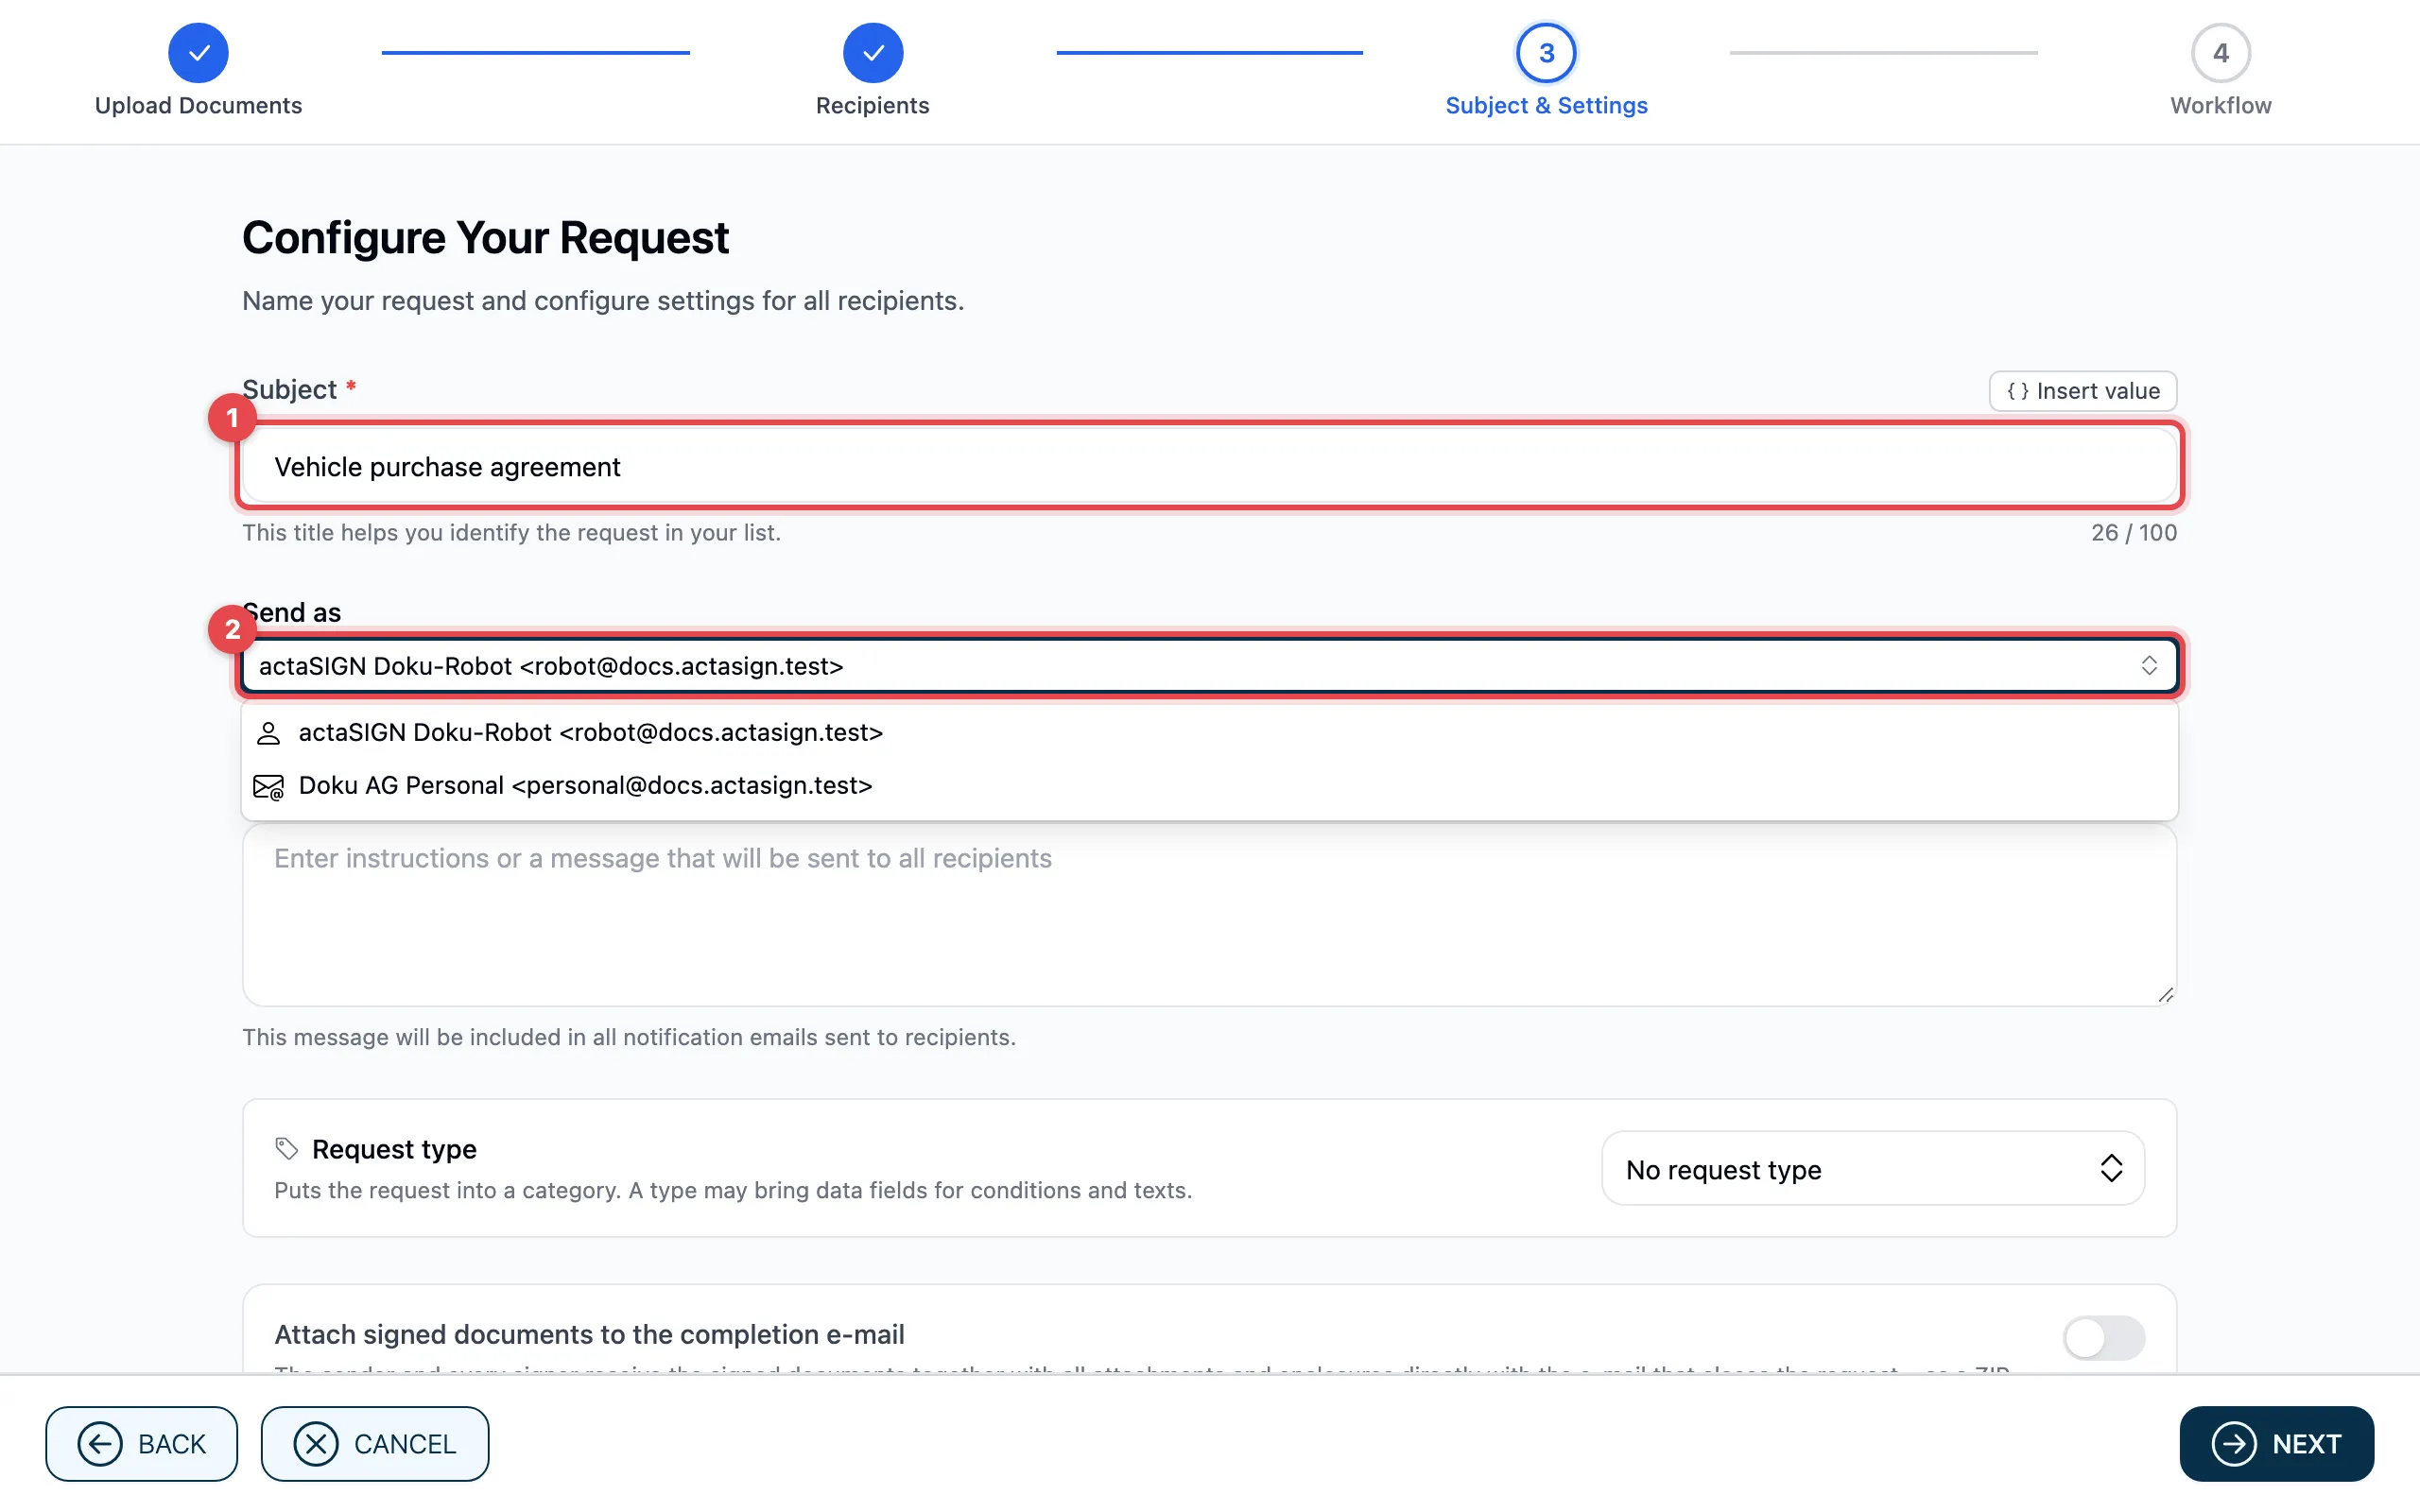
When creating a request, step 3 shows the Send as selection (2) below the subject (1). There the member chooses their own address or one of the senders. The selection only appears if the member has at least one further sender, and not if they are only signing themselves.
When a request is sent under a sender:
- Recipients see the sender’s name. Replies and the notifications to the sender go to the sender’s address.
- The member who sent the request remains its owner and sees it like any of their own requests.
- All members who have the same sender also see and edit the request, including its portfolio. This way a team works as if with a shared mailbox.
- The protocol names, next to the sender, who actually sent the request (“sent by …”).
A mailbox that is also a login
Section titled “A mailbox that is also a login”Sometimes someone signs in with the shared address themselves, for example
the HR specialist with hr@firma.ch, because they have no other address.
Such an address is a member’s login. actaSIGN only accepts it as a sender if
your organization allows this.
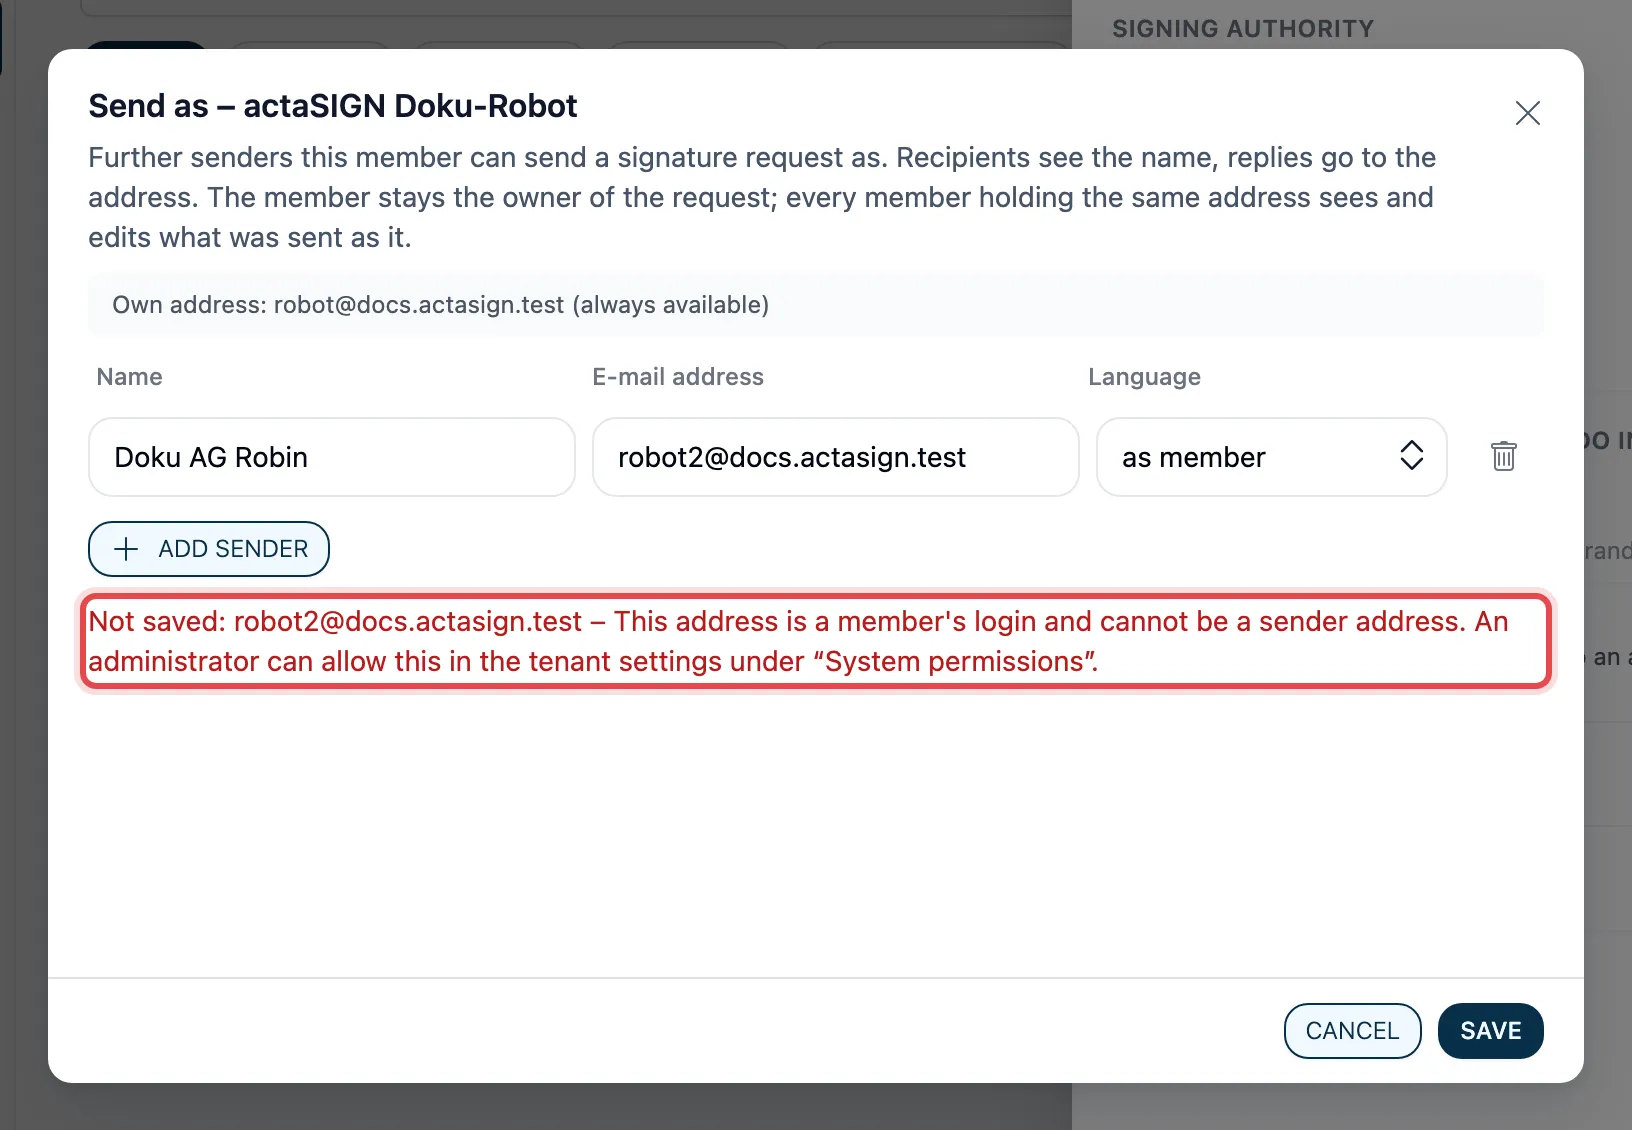
Without permission, actaSIGN does not save the sender and reports, for
example, Not saved: hr@firma.ch – This address is a member’s login
and cannot be a sender address. with a note on where to allow it.
Allow it
Section titled “Allow it”- Open my.actasign.ch → Administration → Defaults → System permissions card.
- Switch on Allow member logins as senders and click Save at the bottom.
- Give the member the sender as described above.
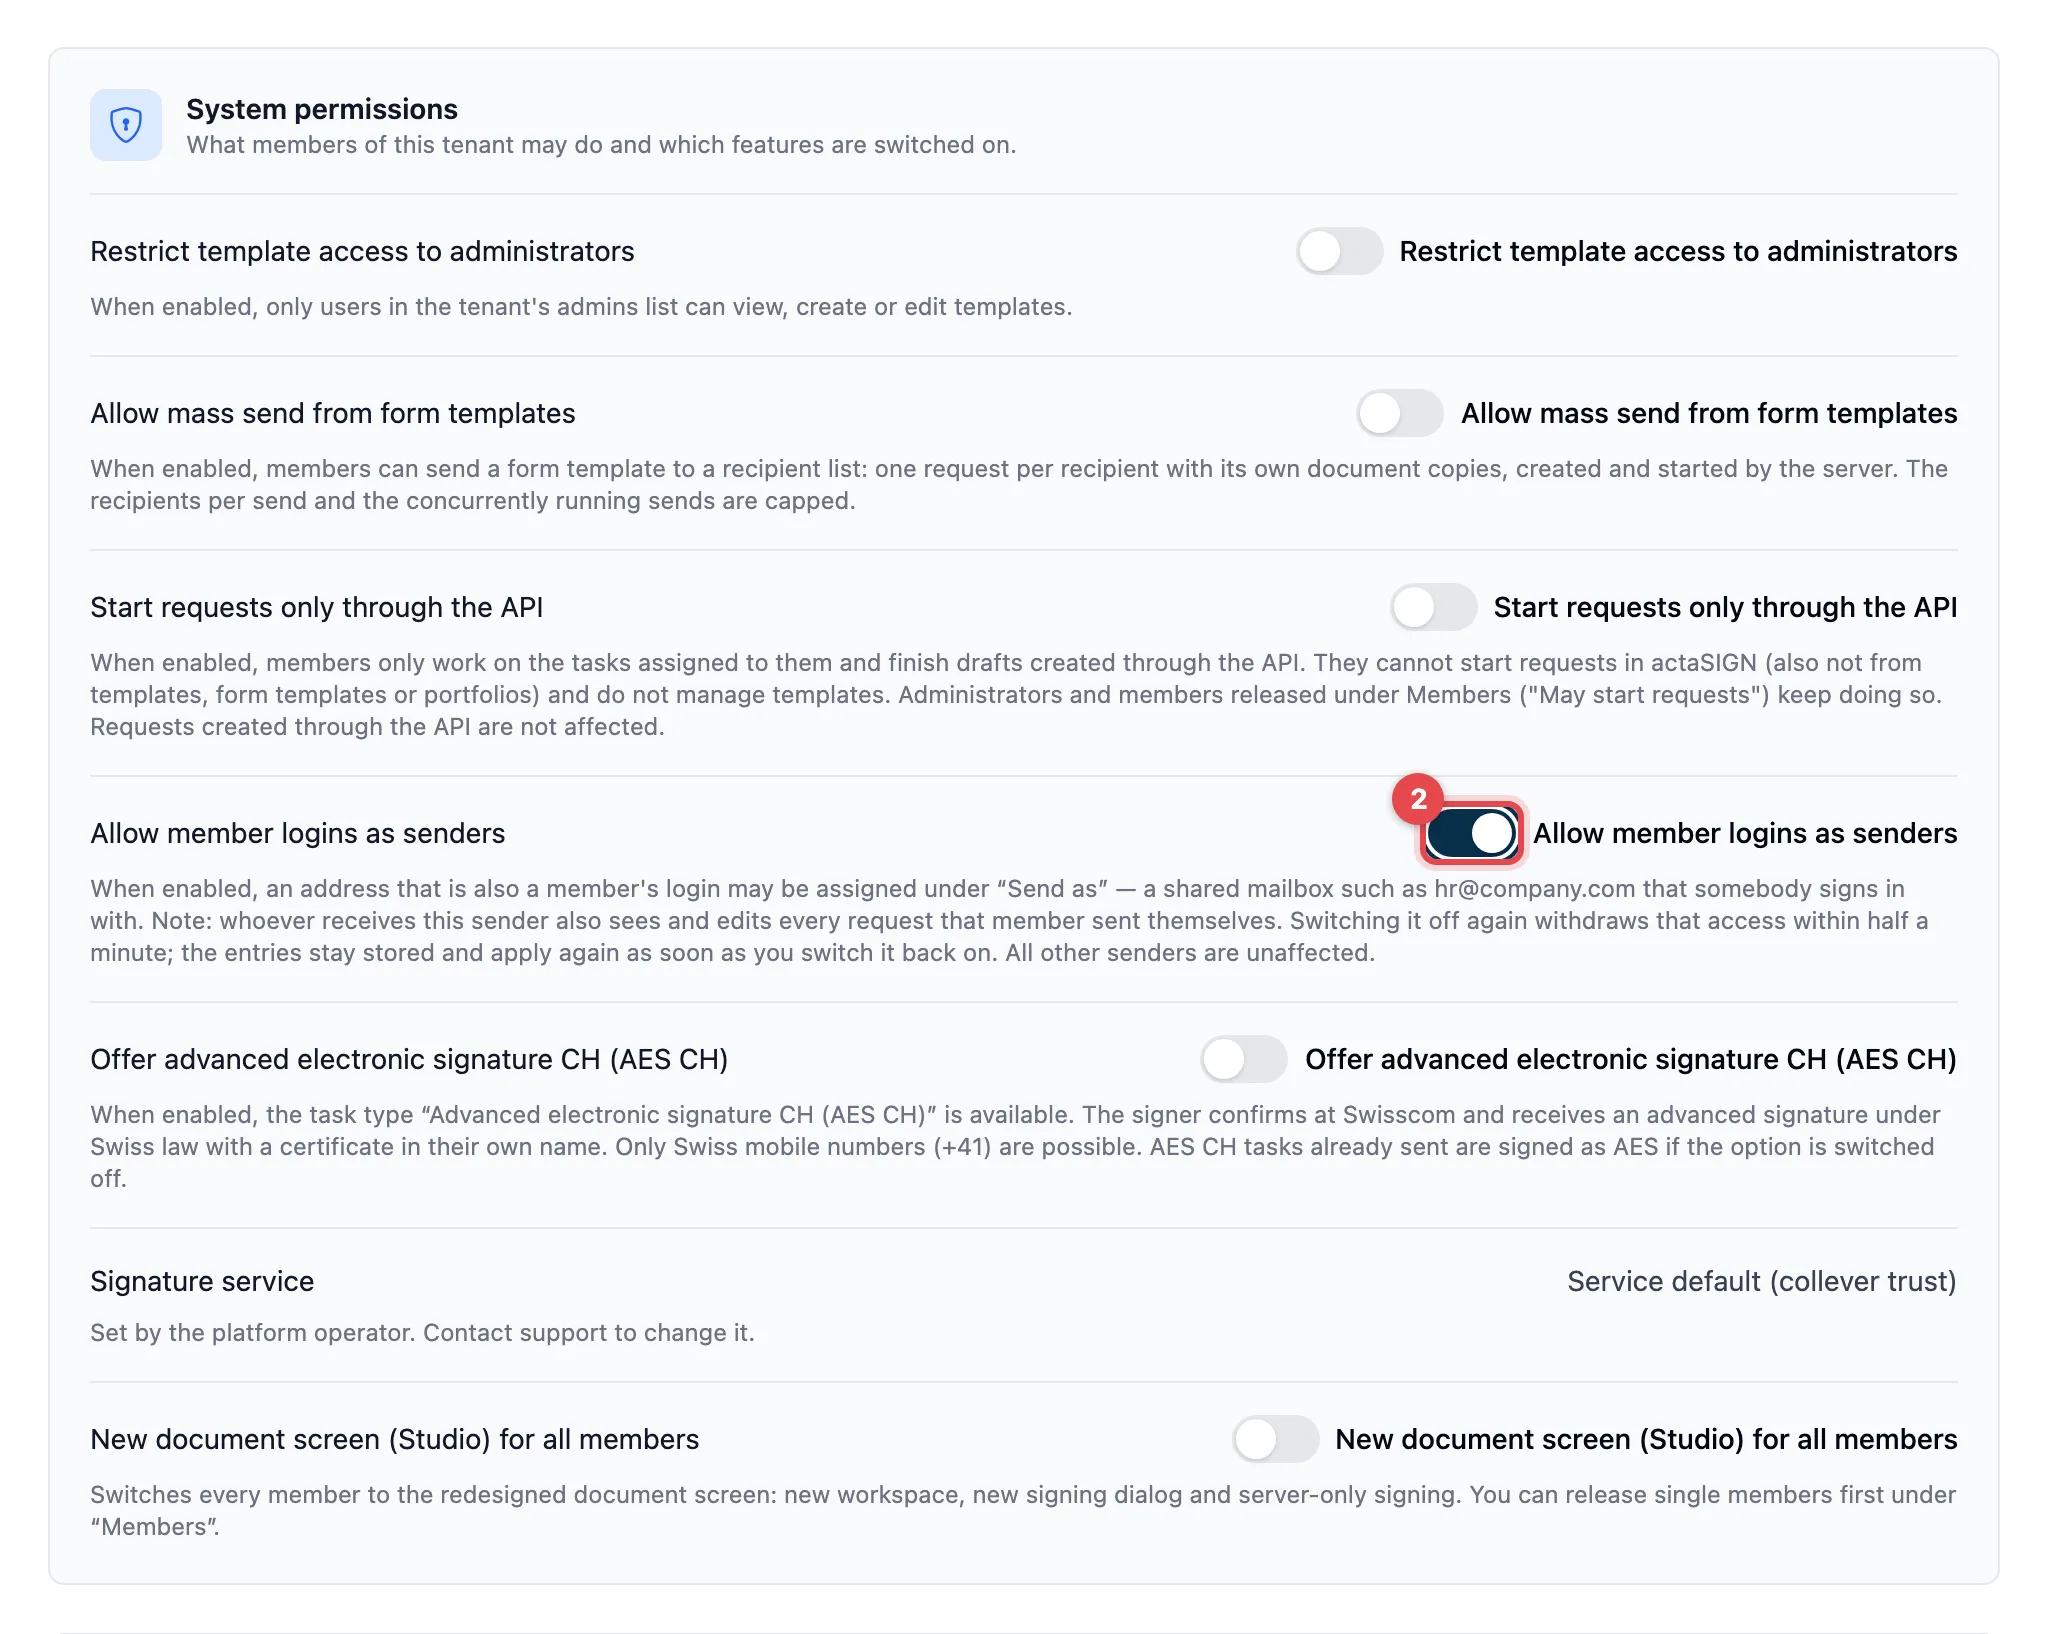
The switch is off at first. All other senders work regardless of it.
How to recognise such senders
Section titled “How to recognise such senders”If you open Send as again later, every sender that is a member’s login has a warning below it (1): This address is a member’s login. Whoever holds this sender also sees and edits every request that member sent themselves.
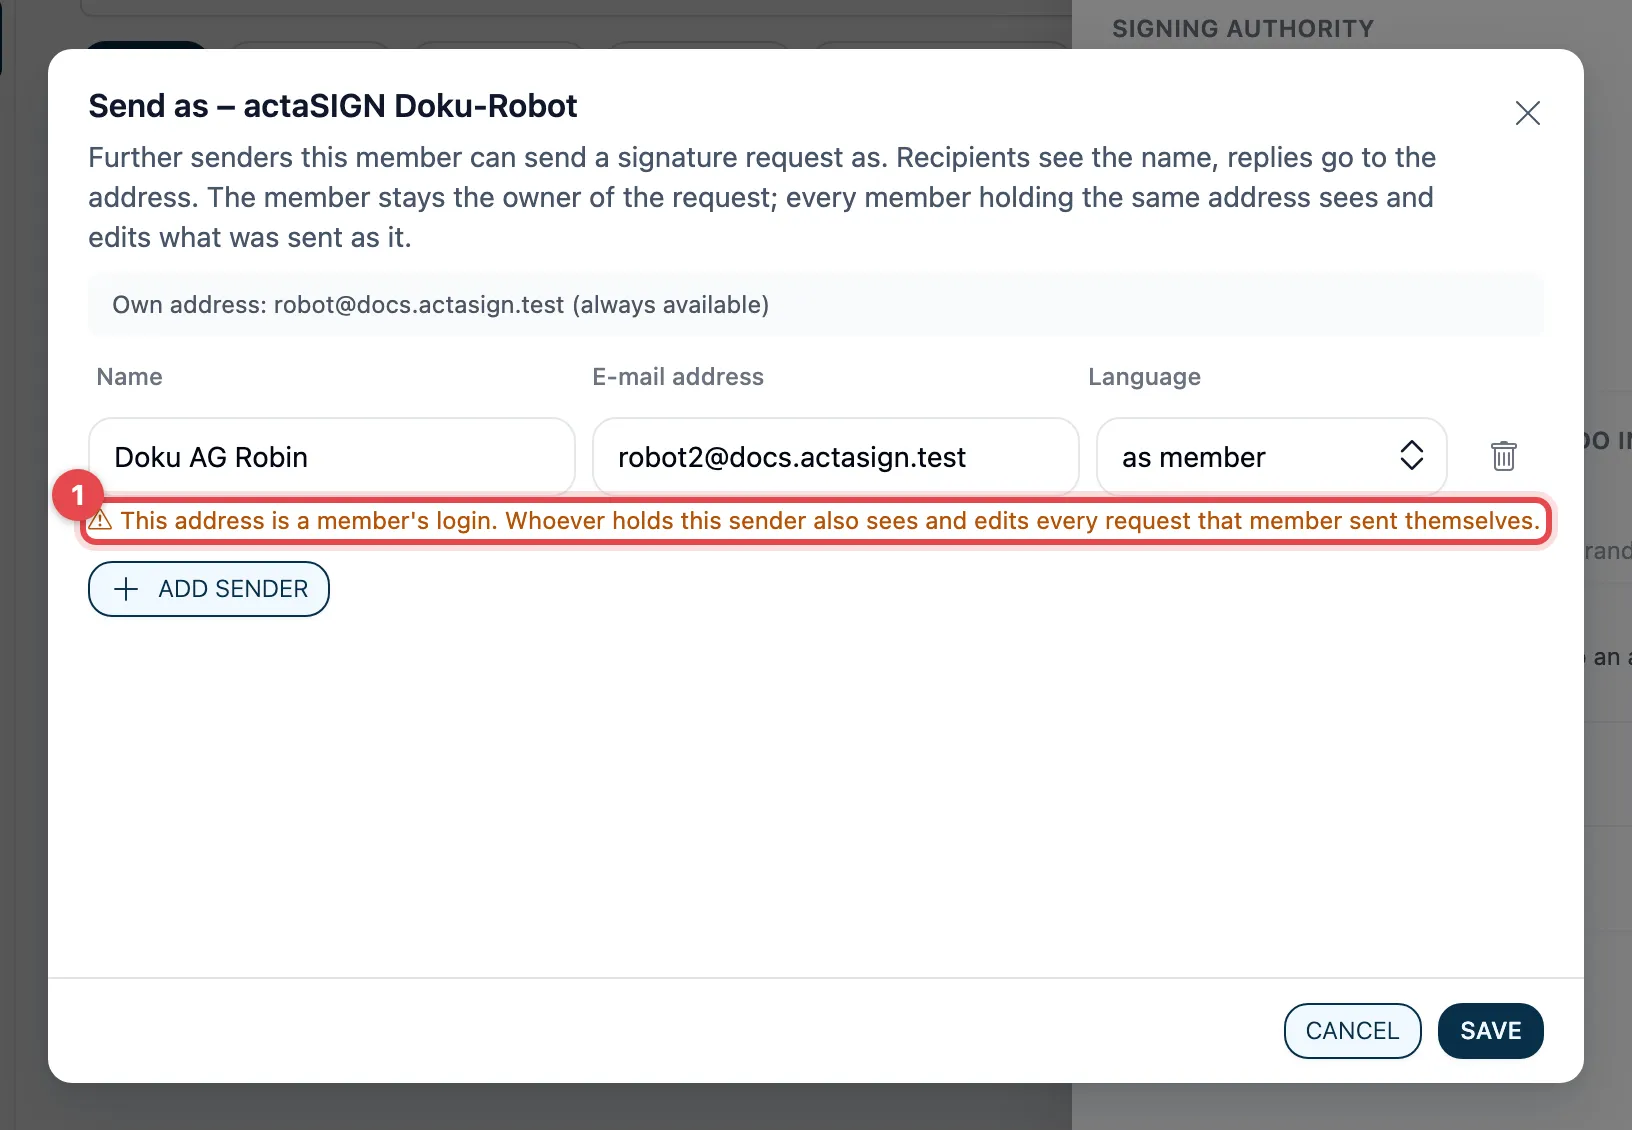
The warning only appears once the sender is saved. When you first enter it, the dialog does not show it yet.
Switch it off again
Section titled “Switch it off again”If you switch Allow member logins as senders off again, the members lose access through such senders within about half a minute. The entries stay saved. The Send as dialog then shows in grey (1): This address is a member’s login. It is not active at the moment, because member logins as senders are switched off in the tenant settings.
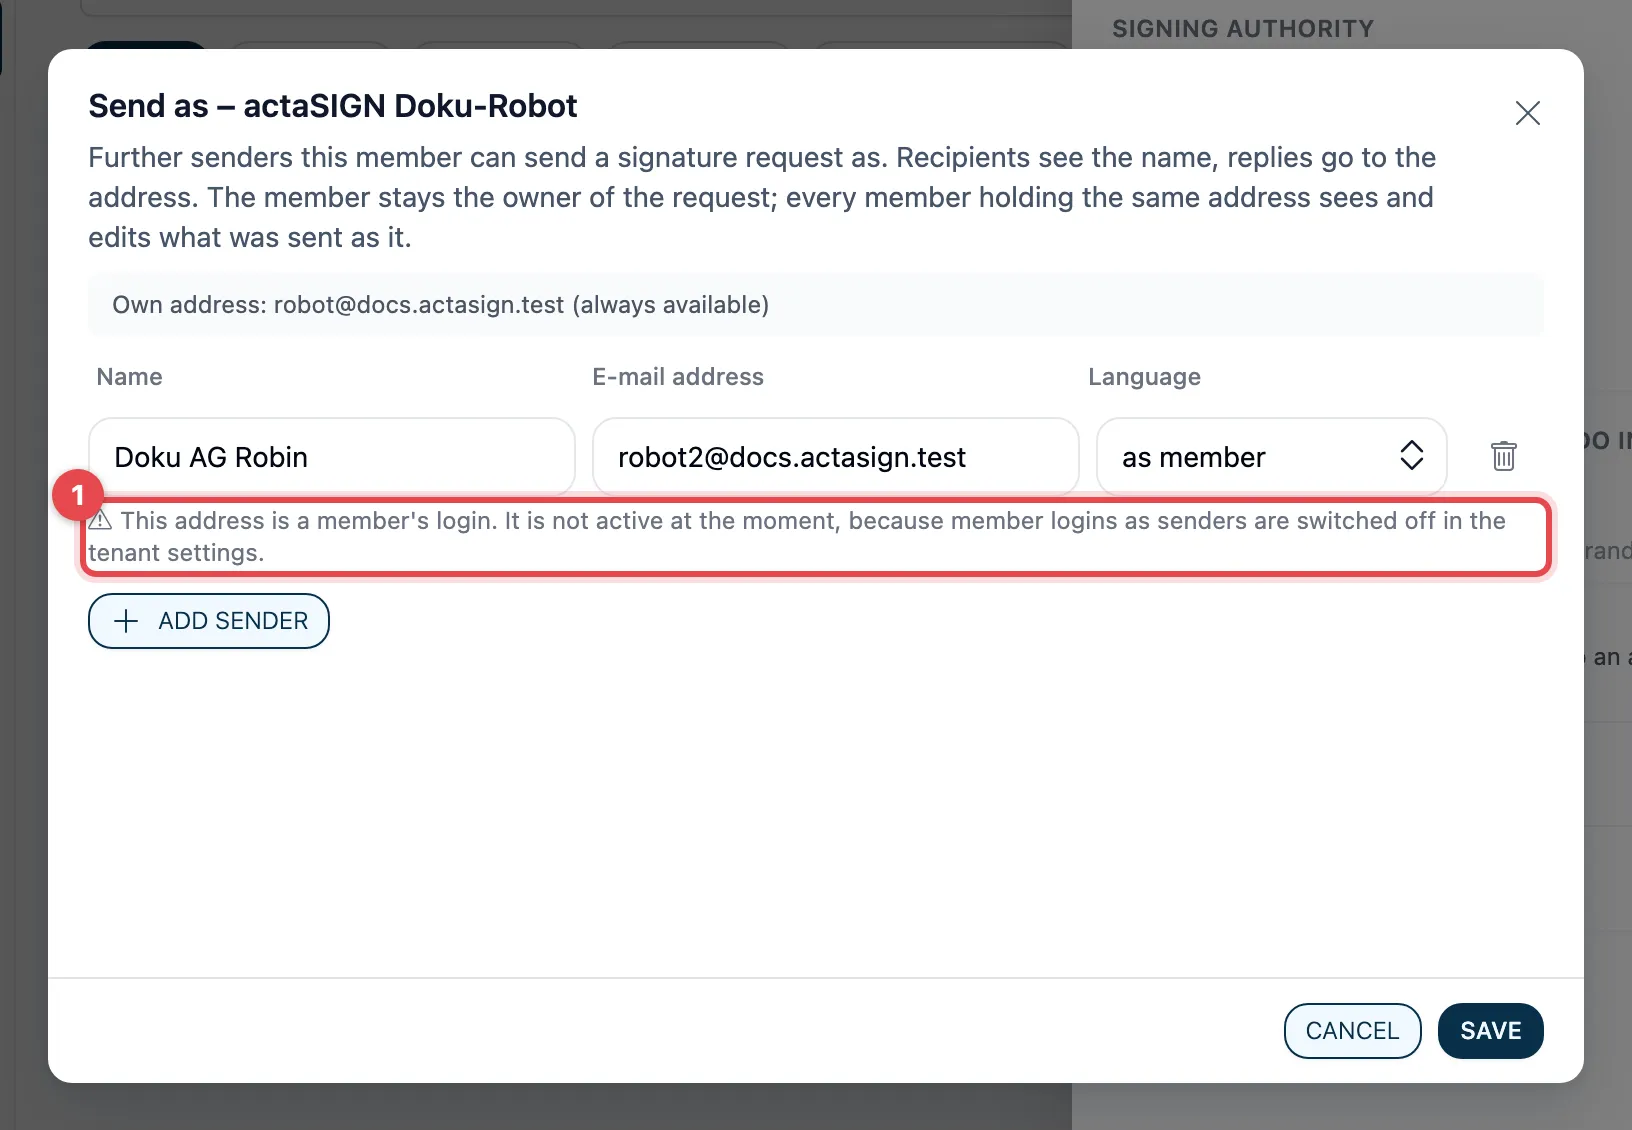
If you switch it on again, exactly these entries apply again. With the trash can icon you remove such a sender completely.
As long as the switch is off, actaSIGN only saves this member’s senders if no such inactive entry is left in the list. If you want to change something else for this member, remove the inactive entry as well, or switch the switch on again first.
actaSIGN also checks this when the members change: if you invite a person under Members with an address that is already a sender (individually or by import), the sender counts as a login from then on and only works while the switch is on. If you remove the person, it becomes an ordinary sender again.
Good to know
Section titled “Good to know”- The login address of a member of your organization can only be a sender if you explicitly allow it, see above.
- You do not need to enter the member’s own address; actaSIGN rejects it as a sender.
- If you remove a sender, the member loses access to the requests sent under this sender, unless they sent them themselves. This takes effect after about 30 seconds at the latest.
- Every change to the senders is recorded in the audit log.
- Connections via webhooks receive, besides the sender
address, who created the request (
requestCreatedBy).